Science Fun


Polar Bear Blubber
- 2 gallon sized zipper lock bags
- 4 tablespoons of shortening
- ice (crushed/cubed)
- 1 gallon bucket
Instructions:
- Fill bucket halfway with the cold water.
- Add enough ice to make water chilly.
- Add 4 tablespoons of shortening in one of the ziploc bags.
- Put empty ziploc bag inside of the ziploc bag with shortening in it. Put your hand in the empty ziploc bag, this way your hand stays clean during the experiment.
- With other hand spread shortening all over the outside of the inner bag.
- Now fold the top of the inner ziploc bag over the top of the outer ziploc bag. Now the shortening is stuck between the two bags. To make sure the shortening stays secure duct tape this fold.
- Finally, stick your hand in to the into your new blubber glove and dip it into the bucket of ice cold water.
VIDEO COMING SOON BUT YOU CAN STILL ENJOY THESE AWESOME EXPERIMENTS!
How it Works:
Shortening is a fat just like blubber is, and fat acts like an insulator. An insulator stops energy from flowing the way that it usually does, from things that are hot to things that are not. So the body heat that polar bears create is trying to flow from the body to the outside chilly temperatures, but because of the flubber, it stops it from escaping.
Extra Experiments:
- Try to use other types of insulators such as butter, cotton balls, or sand. Which one works as the best insulator?
- Try using one hand in the glove and the other had in the water. Make observations using touch describe how it feels.
- Try using room temperature water or water that is 100 degrees Fahrenheit (Be careful with hot water when you are testing it). Does the glove work in these situations?
EXPLORE TONS OF FUN AND EASY SCIENCE EXPERIMENTS!

SUBSCRIBE AND NEVER MISS A NEW SCIENCE FUN VIDEO!
previous experiment
Next experiment.
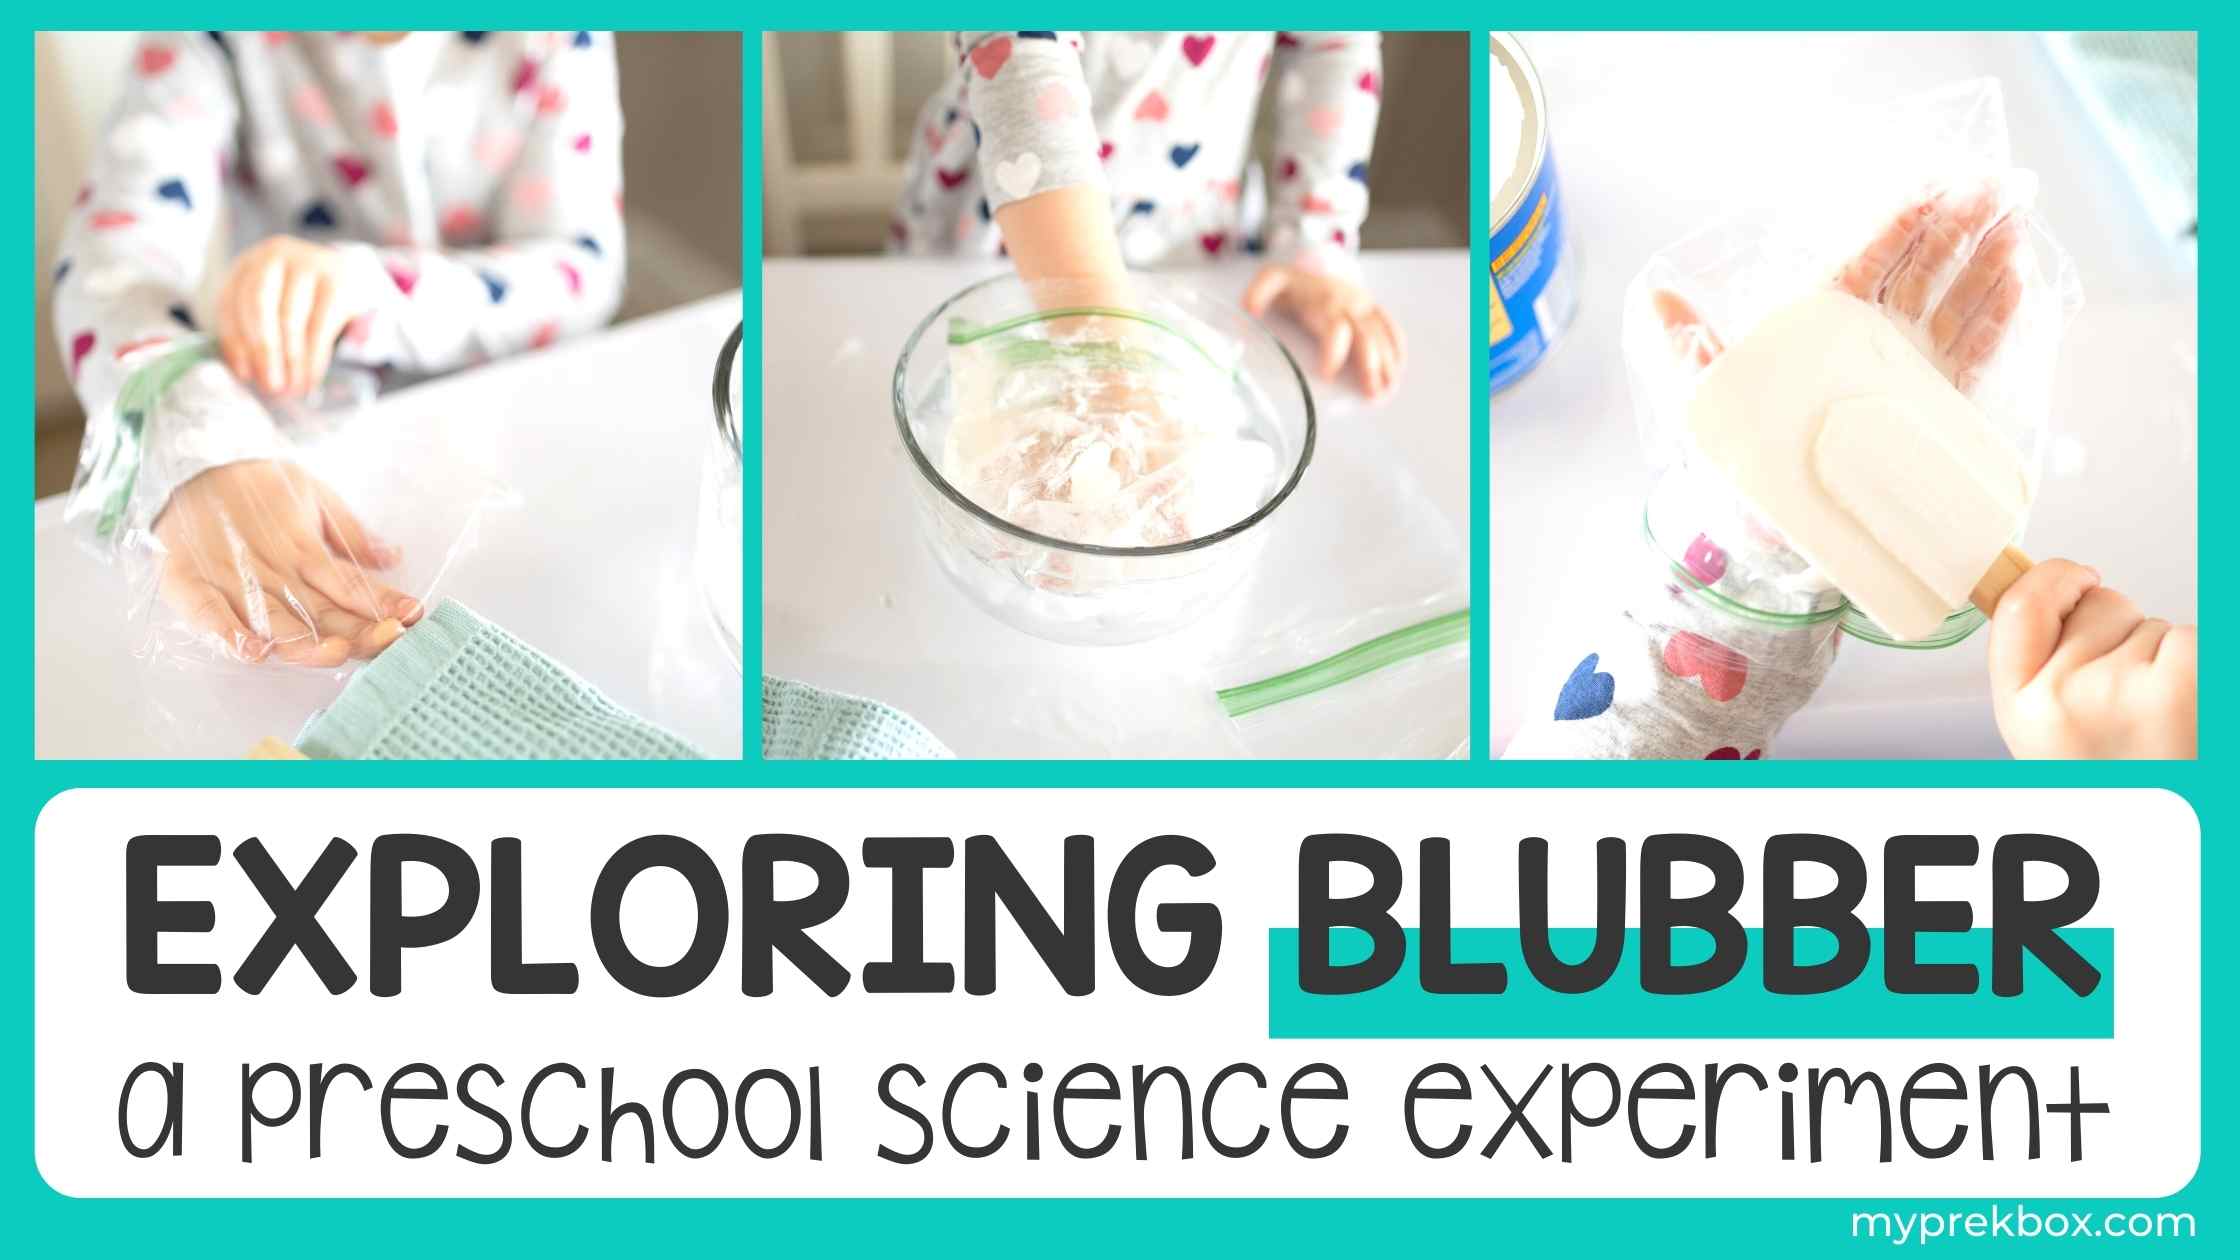
Blubber Experiment
Brrr! Your preschooler will love diving into this fun science experiment with you to learn how animals in cold places stay warm without a jacket! This experiment is done with common household items.
It’s crazy to think that mammals such as whales, seals, and others live in such cold conditions such as the Arctic and Antarctica and don’t freeze! But how? BLUBBER! This is such a fun conversation starter with your preschooler. This is an experiment so take some time to discuss how they think these animals stay warm and what exactly blubber is before you dive in.
Pre-experiment Questions
- How do animals survive in cold weather areas?
- What do you do when it’s cold outside? What do you wear?
- What happens if you go outside when it is cold without a coat?
- Where do you think blubber is located on an animal?
- What is blubber made out of?
You can also watch this quick video before you do the experiment to further explain and understand how blubber works.
My Pre-K Box: The best monthly subscription box for kids ages 3-5
My Pre-K Box is an educational subscription box for preschoolers filled to the brim with learning activities for math and literacy skills! Each box is based on a different theme and is focused on play-based learning. Your kids will love exploring new activities each month while practicing kindergarten readiness skills!
You May Also Like Our Free Preschool Science Fun Pack!
Download Your FREE Preschool Science Worksheets Now!
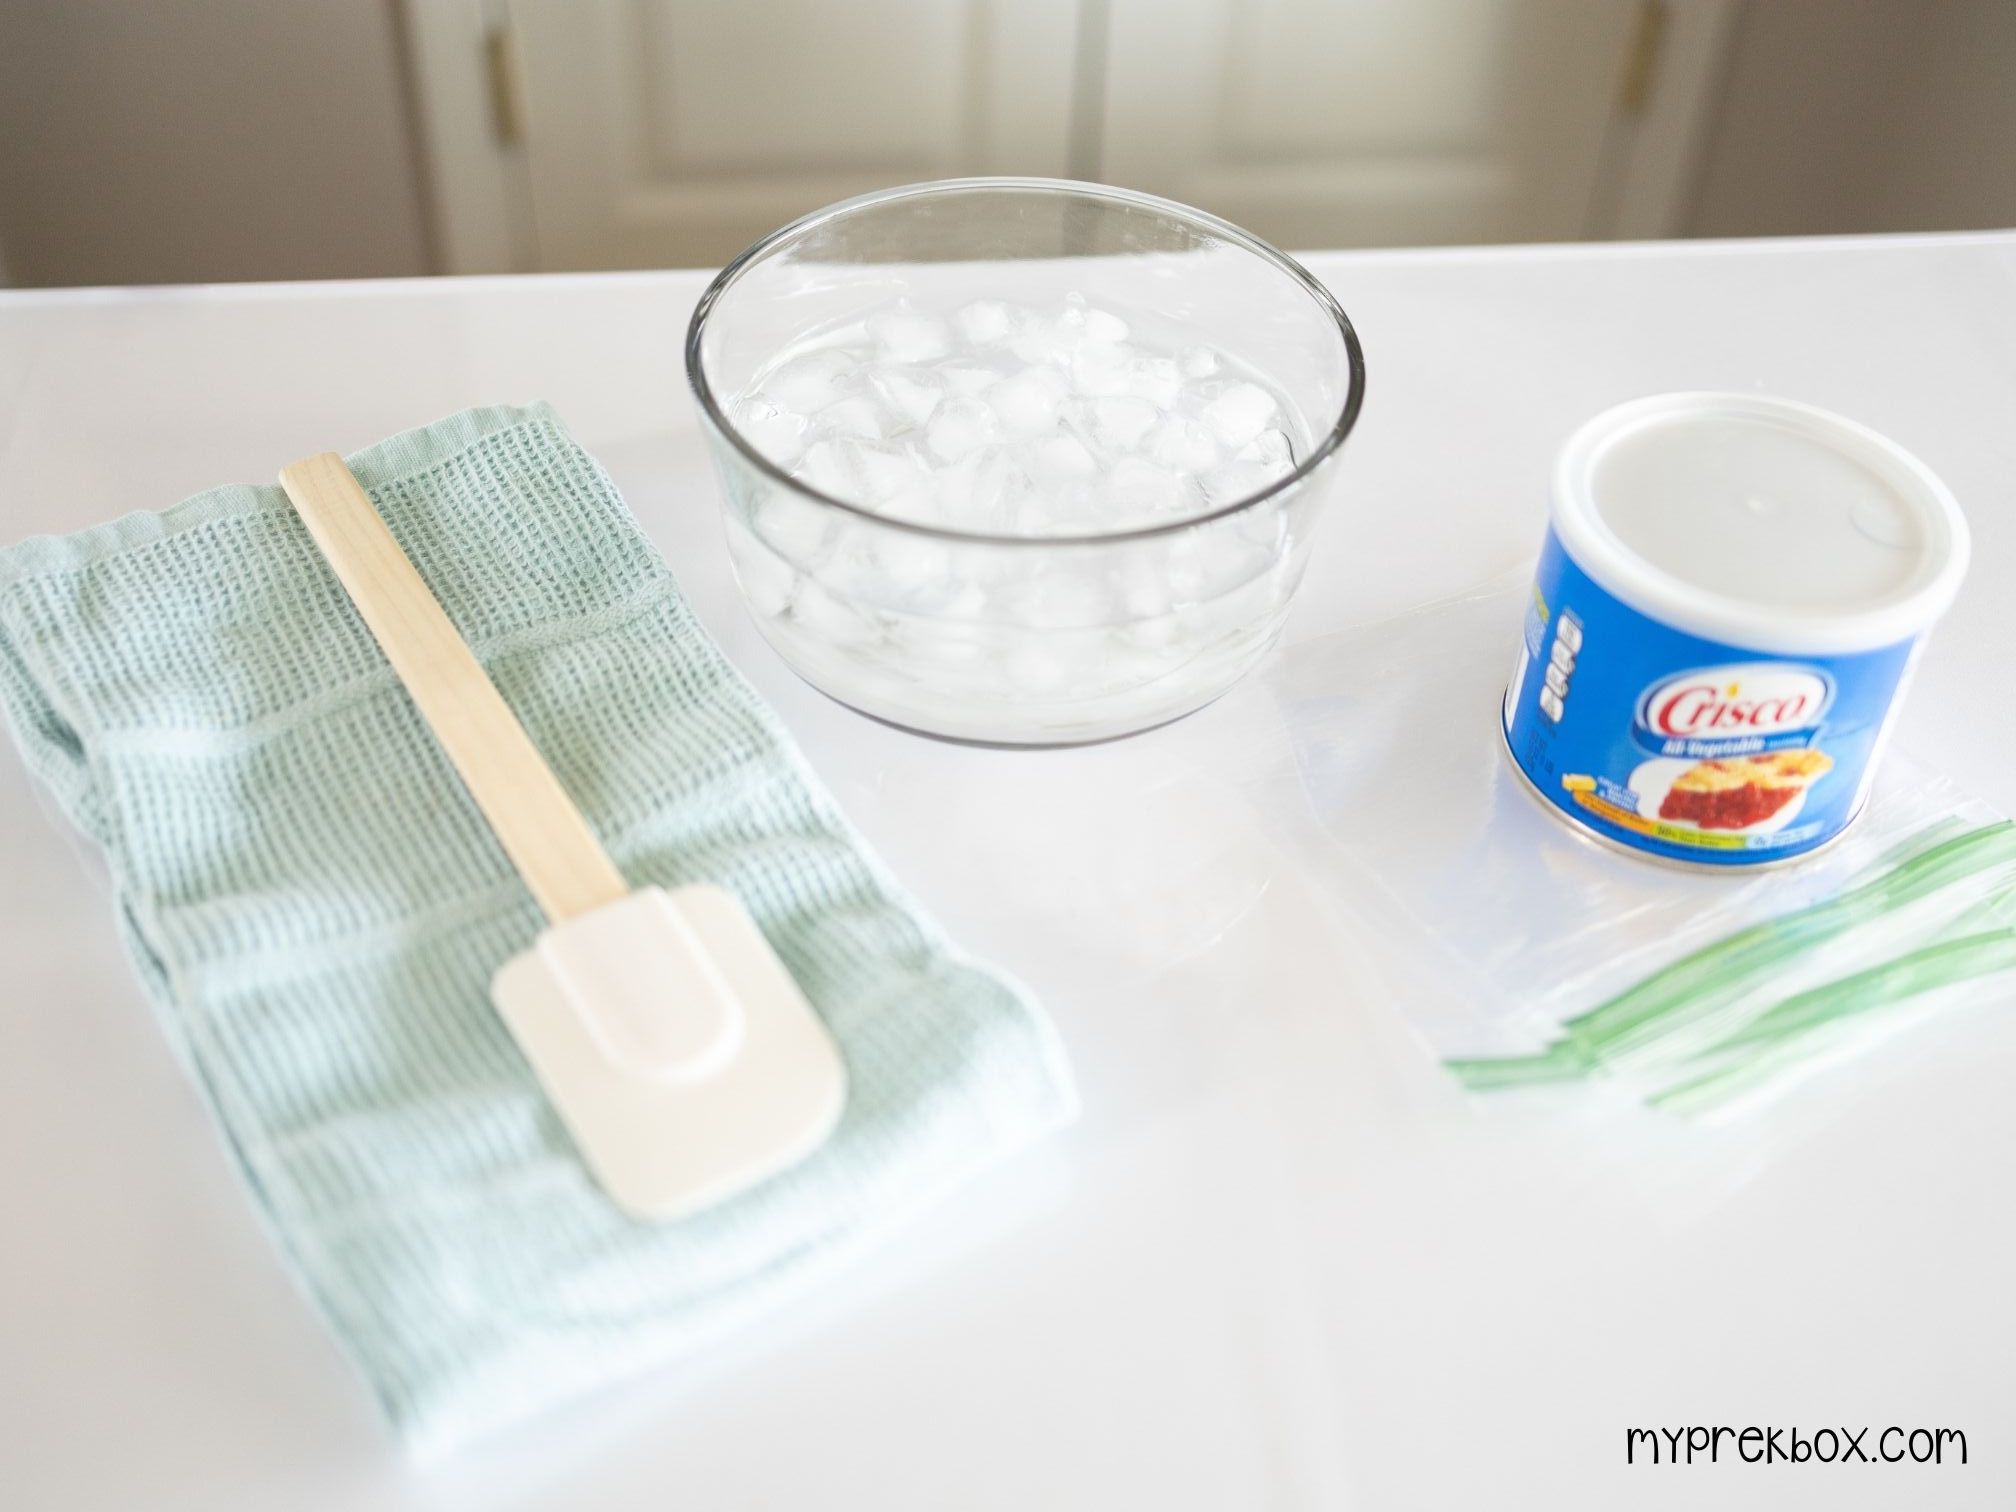
The Blubber Experiment
- bowl of ice water
- 4 quart sized baggies
- crisco
- spatula
Step 1 Place a plastic bag over one of your preschooler’s hands. Ask them to place their hand in the ice water.
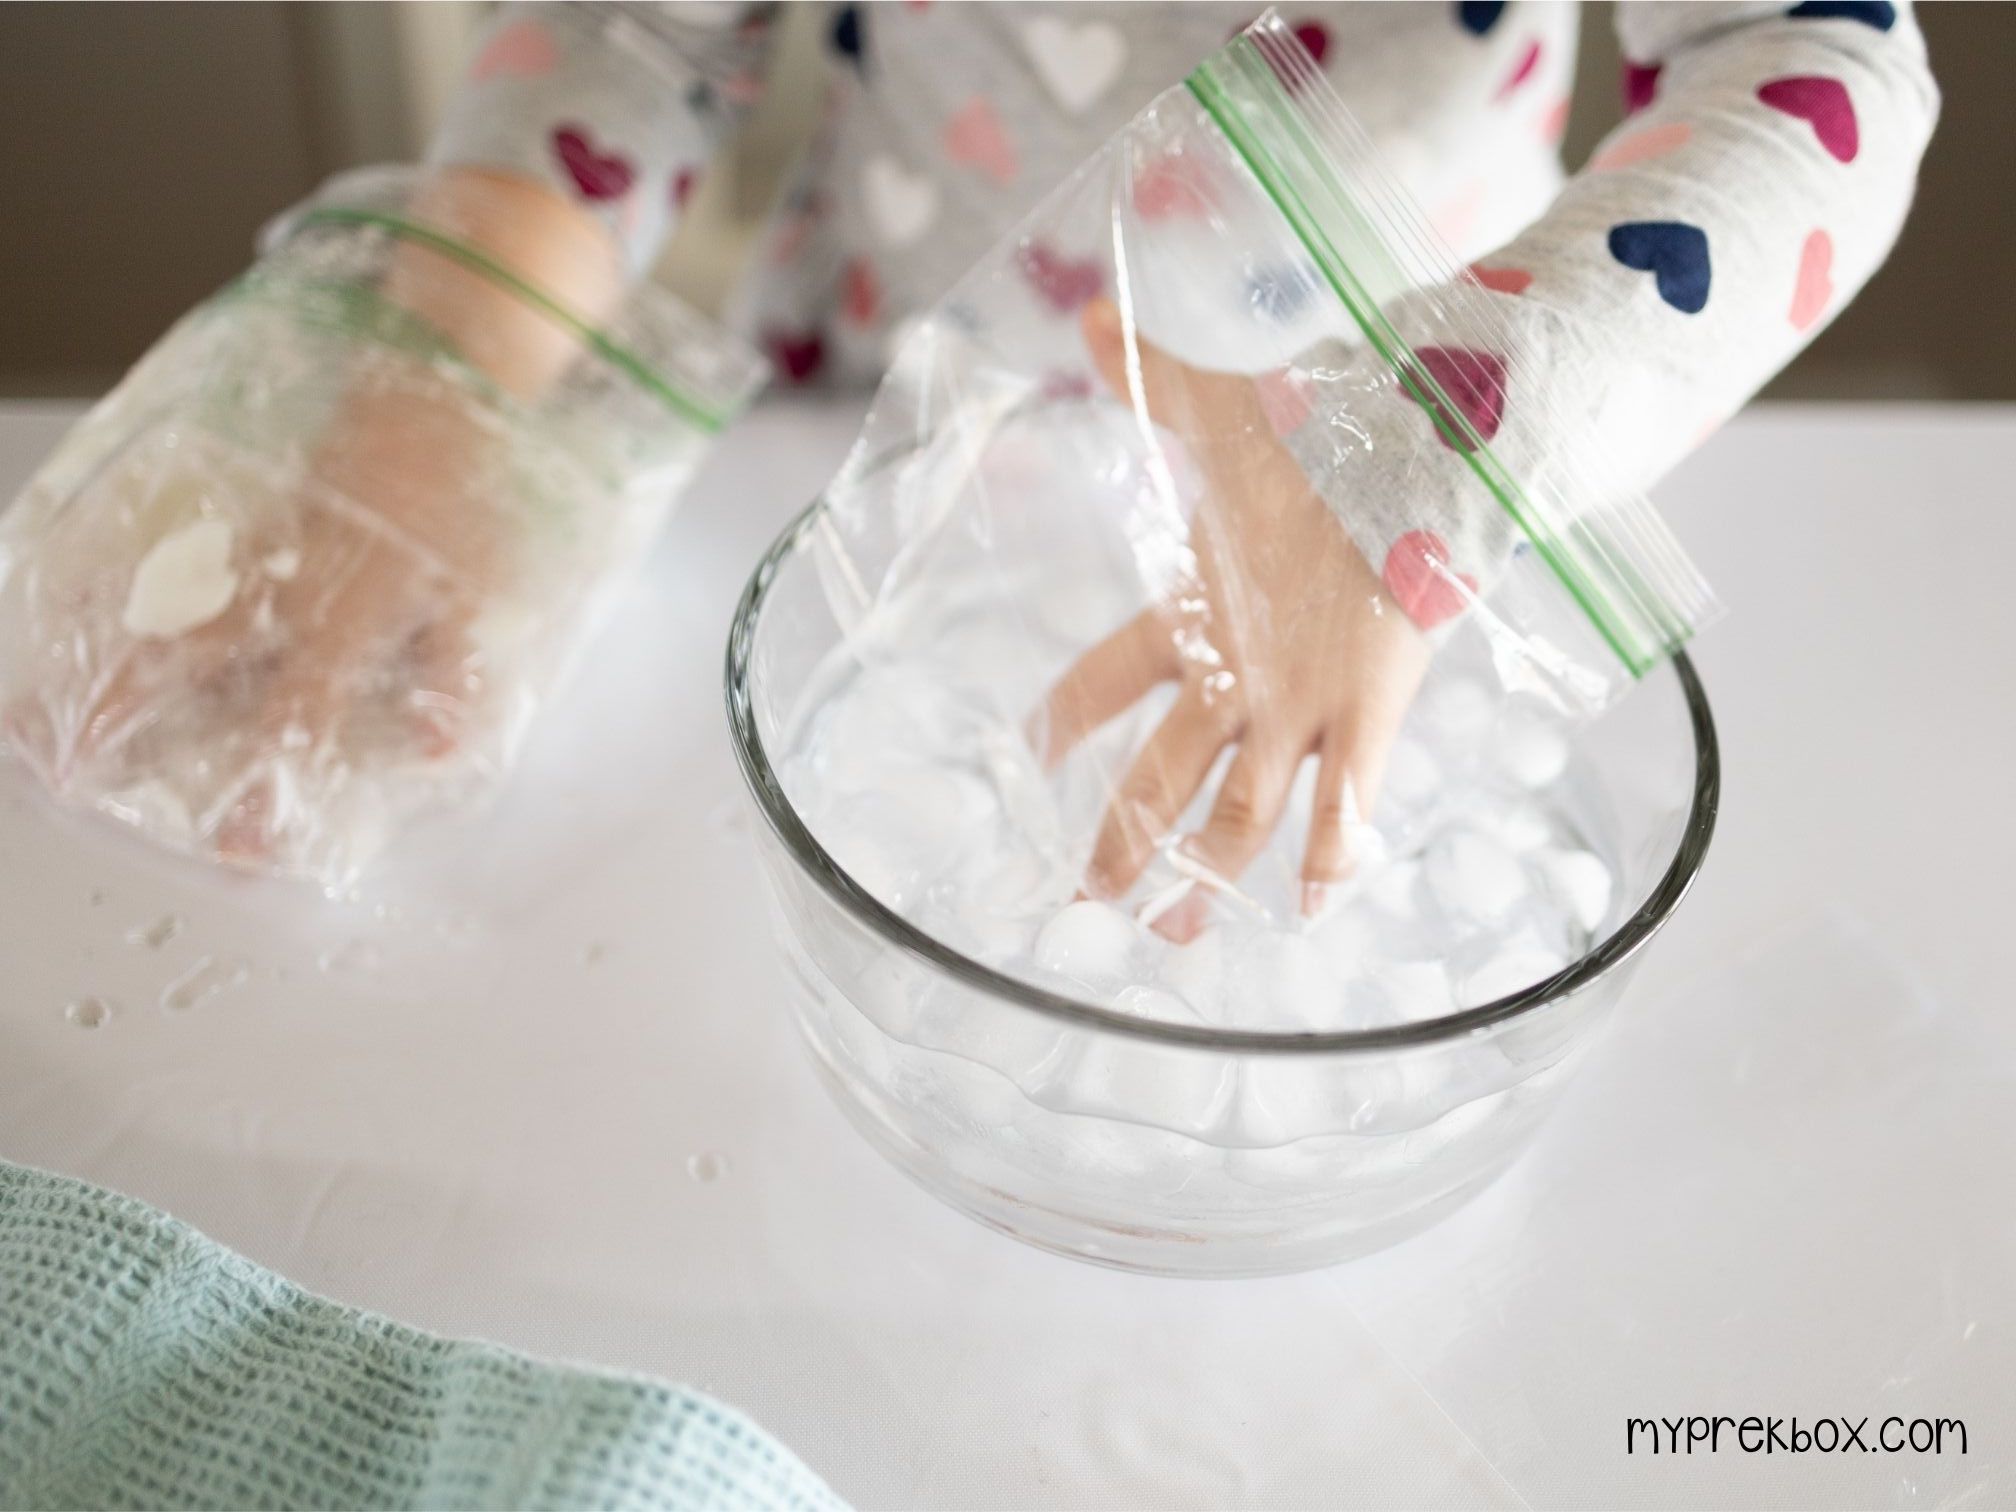
Step 2 Ask your child to describe what they feel.
Step 3 Place some Crisco using the spatula on the outside of the bag.
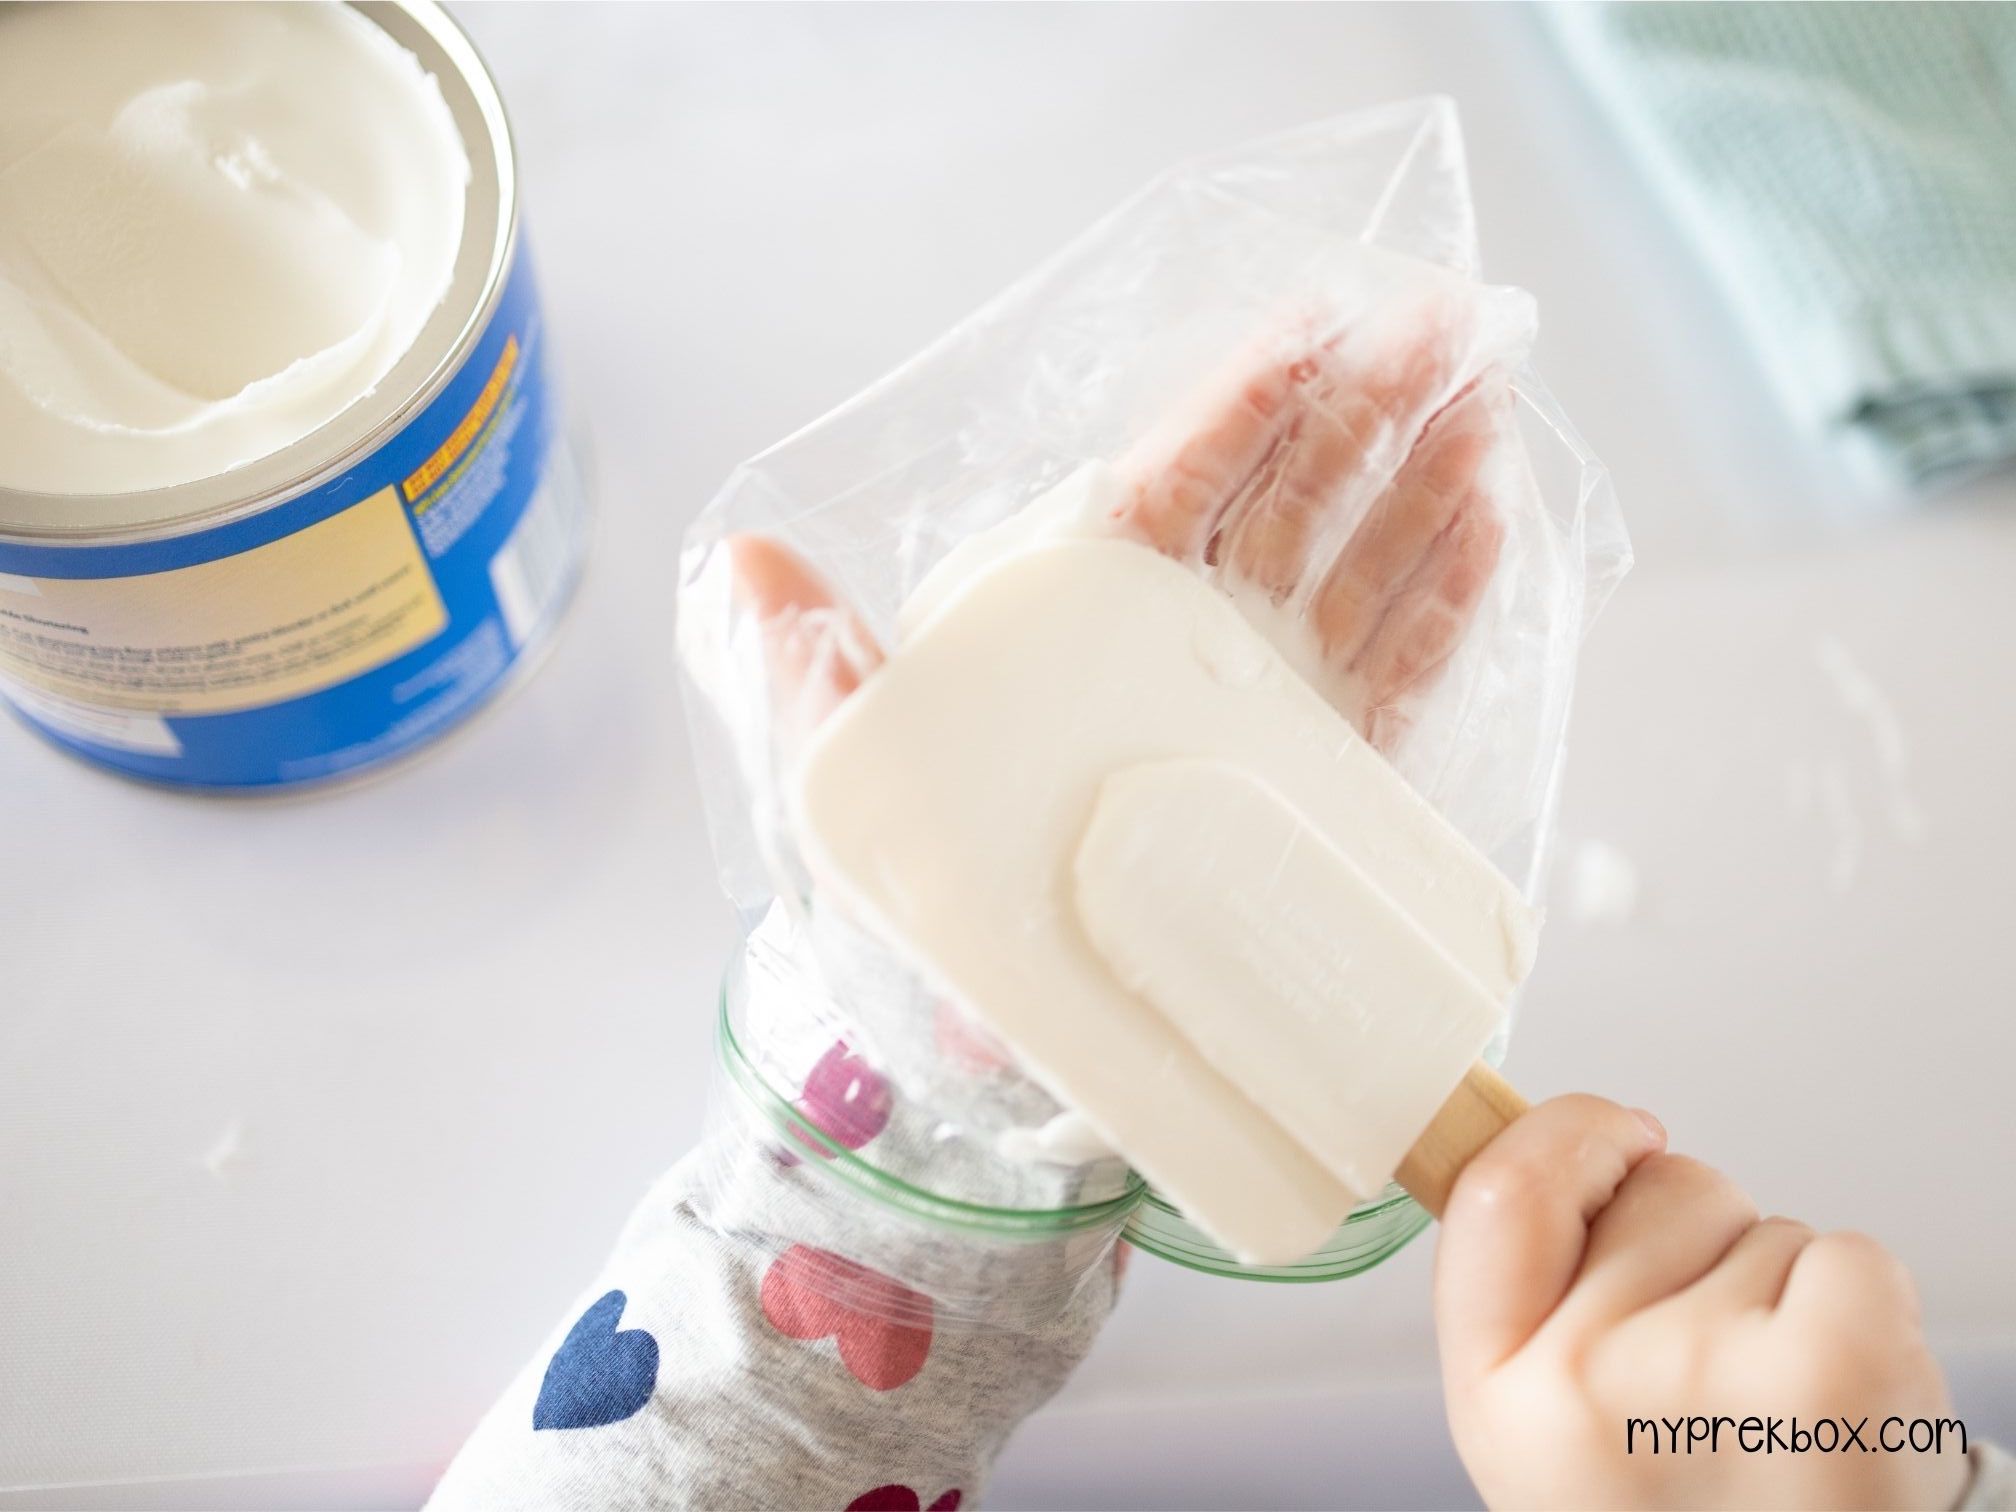
Step 4 Place that bag inside of a clean bag so when you submerge it into the water, the Crisco doesn’t come off.
Step 5 Have your child place their hand in the water again. Ask them what they feel this time and then ask them to let you know when it starts to get cold.
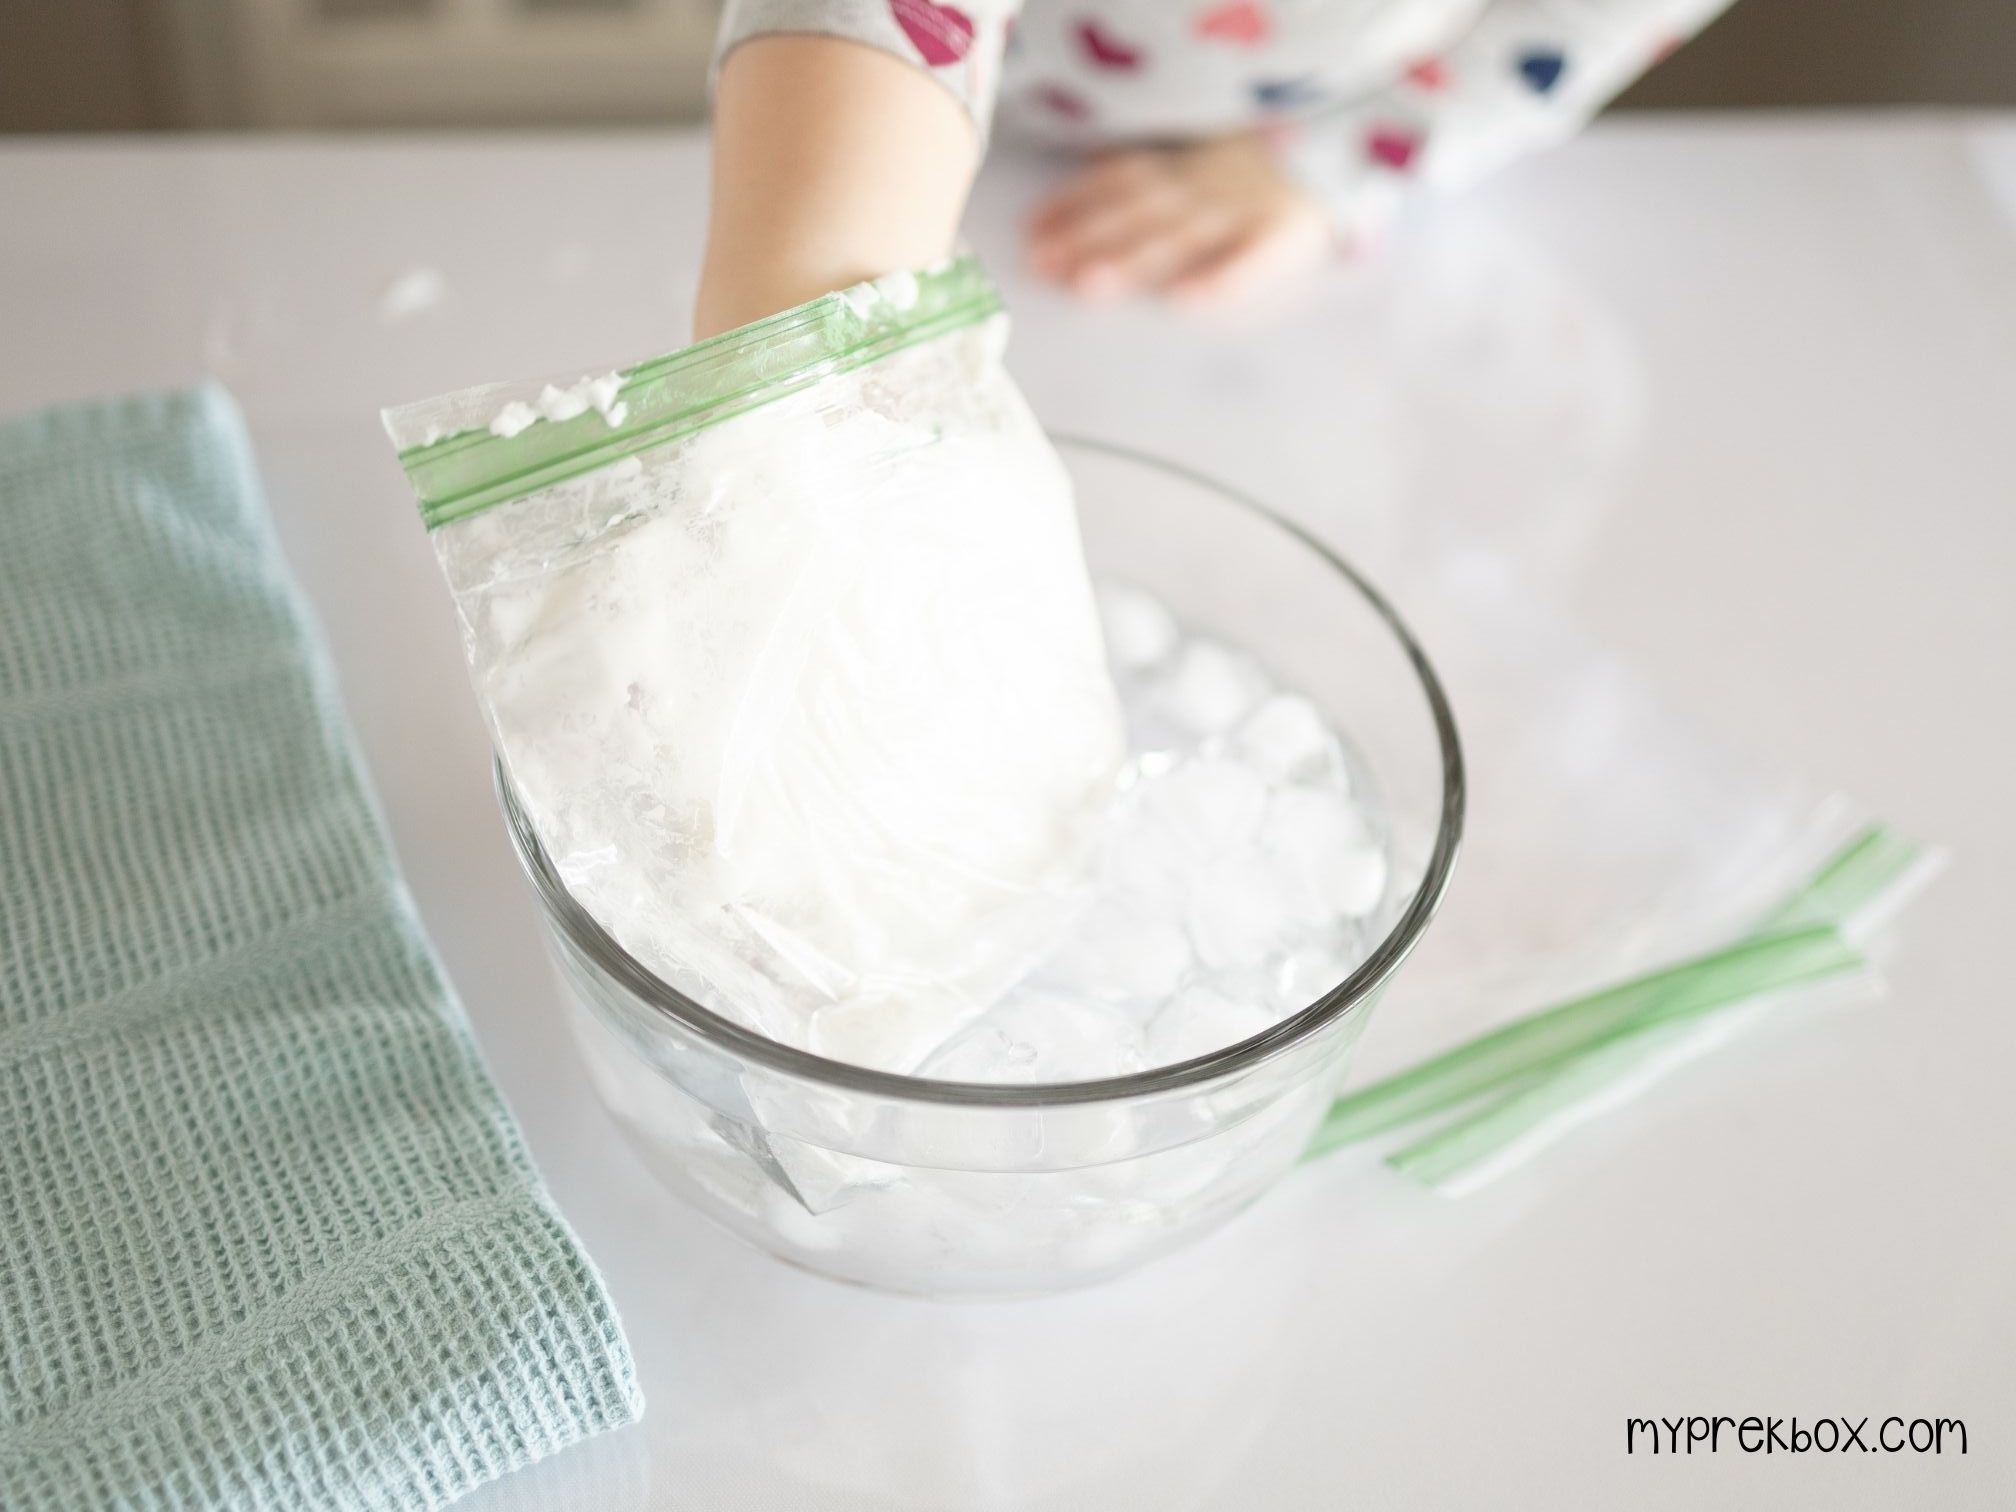
Step 6 Ask your child what might happen if you add more Crisco? Try the experiment again with more Crisco.
You can repeat this experiment as many times as you’d like, taking time to predict what will happen if you add more crisco to the baggie.
Reflection Questions
- Do you think animals with more blubber stay warmer longer than those that don’t?
- Why might a whale need more blubber than a seal?
- How does blubber work?
Let's Connect!
We absolutely LOVE seeing your preschoolers learning through play! Be sure to share your photos and videos of your Blubber Experiment and share them with us on Facebook and Instagram !
Also, if you aren't already, be sure to follow us on Facebook and Instagram for more fun activities to do at home with your little ones!
Haven't yet tried My Pre-K Box?
- Skip to main content
- Skip to primary sidebar
Second Grade teachers! Join me Around the 2nd Grade Kampfire on Facebook! JOIN HERE
- Facebook Group
- Search this website
Around the Kampfire
Elementary Teaching Blog
Last updated by Linda Kamp on December 10, 2022 • 3 Comments
Arctic Animal Adaptations: Blubber Science Experiment for Kids
In this post, I’ll show you a simple and fun blubber science experiment for kids as they learn about arctic animal adaptations. It’s easy to do in the classroom and demonstrates how arctic animals adapt to their environment.
Arctic Animal Adaptations
When teaching second graders about habitats and ecosystems, we spend a bit of time learning about adaptations; ways plants and animals adapt to their habitats to survive. This simple blubber experiment demonstrates how arctic animals stay warm in their icy water habitats.
Blubber is a thick layer of fat just under the skin of all marine mammals. It covers the entire bodies of animals like polar bears and penguins, whales, seals, and walruses. These mammals have adapted to live in cold waters. They survive because their blubber acts like insulation, trapping their body heat in.
The science behind it is pretty simple: The further the blood is from the skin’s surface, the less body heat is lost. Blubber creates a thick, protective layer, much like a blanket, that provides a barrier between the animals’ blood and the surface of its skin.
Blubber Science Experiment for Kids
This activity is really a demonstration. It recreates the layer of fat that keeps an animal warm. During the demonstration, students compare the cold they can feel with and without wearing a “blubber glove”.
To get started, you will need a few inexpensive items that are readily available at any grocery store.
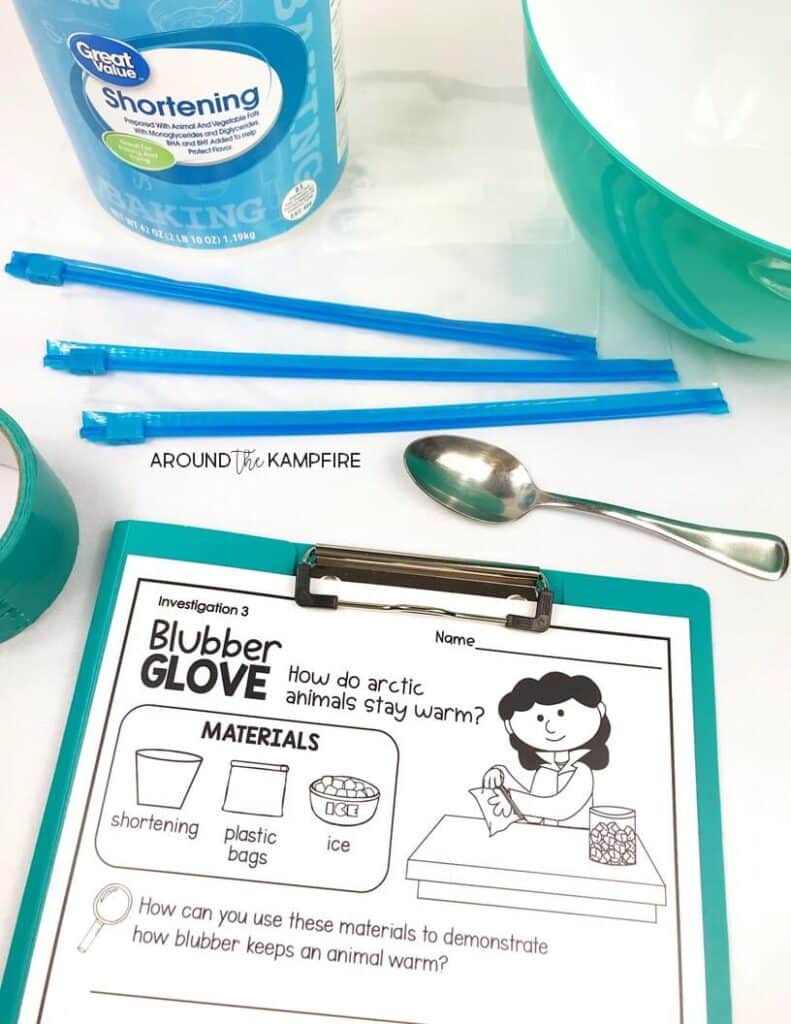
Blubber science experiment & lab sheet source: Habitat s Science Unit
Materials per small group of students:
- 3 gallon size Ziploc bags
- 1 can of shortening
- large cup of ice
- large bowl or bin
- metal spoon for scooping shortening
- student lab sheet
Prepping the glove:
I recommend preparing the blubber glove ahead of time using the following steps.
1. Fill a gallon zipper bag about 2/3 full of shortening.
2. Place your had inside a second, empty zipper bag and carefully push it into the bag with the shortening.
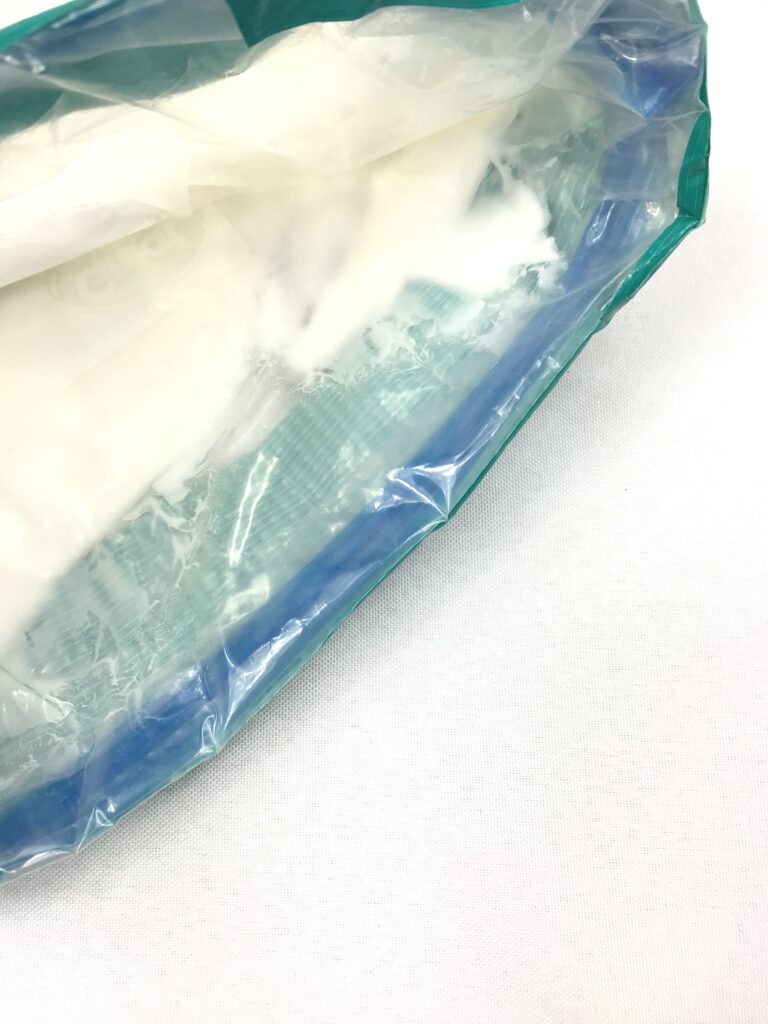
3. Holding the top edges of both bags, roll the top edges of both bags over about an inch.
4. Tape down the fold with duct tape to seal the shortening inside between the two bags forming a “glove”.
5. With your hand inside the glove, press and smooth the shortening to distribute it as evenly as possible around the center bag. The inner bag should be surrounded by shortening.
Demonstrating the Adaptation
Conduct the test by first having students describe on their lab sheet how the materials are used to replicate blubber. Once students finish, they start by placing their hand inside the bowl of ice water.
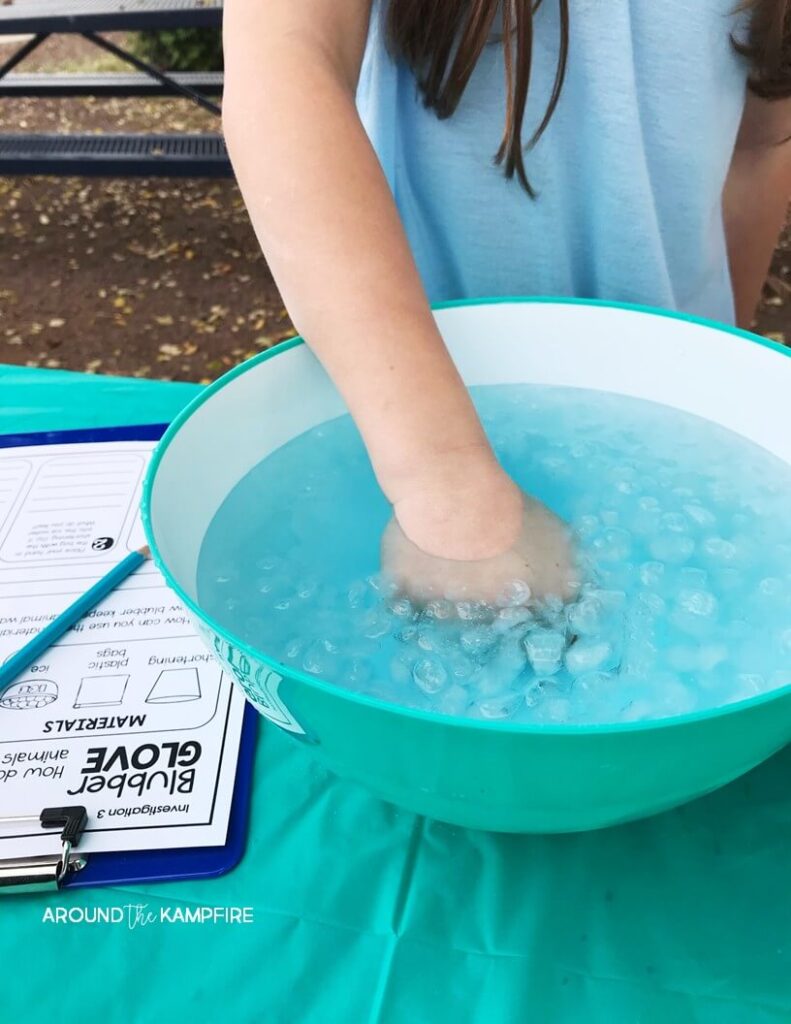
Next, students place their hand inside the blubber glove and into the ice water again.
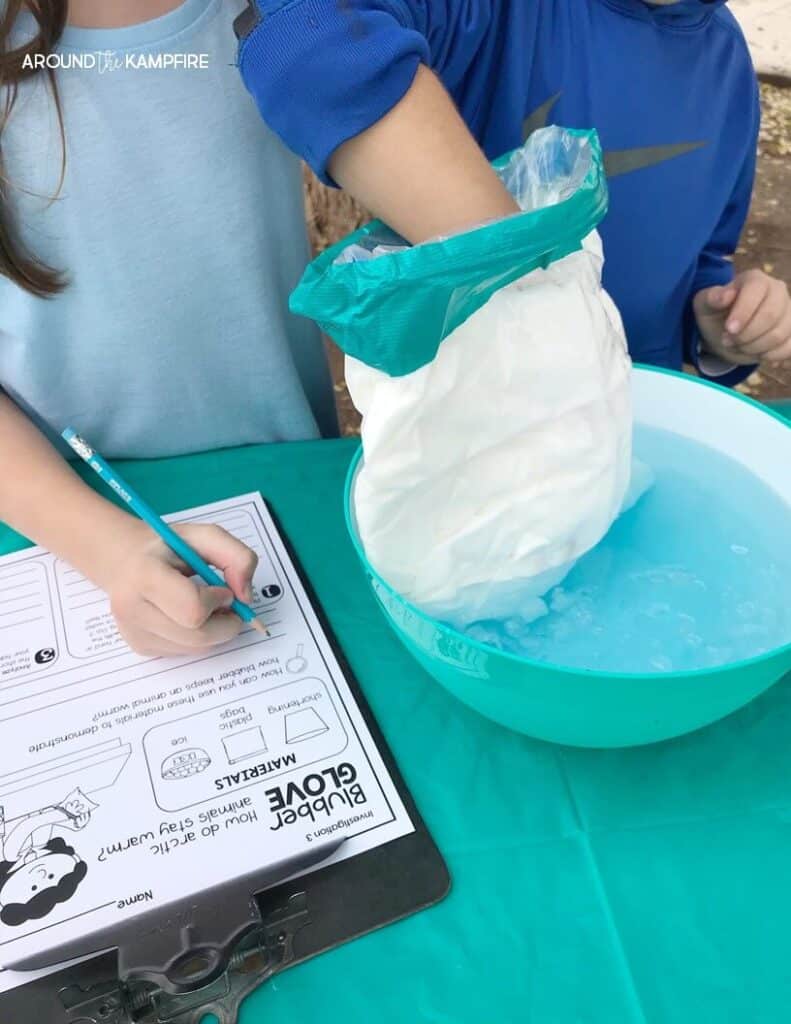
Students compare what they feel and document it on their lab sheet. Lastly, students explain in writing on their lab sheets how the shortening insulated their hand from the cold temperature of the water comparing it to the way blubber keeps an arctic animal warm.
This blubber science experiment video by Steve Spangler science gives a visual on how to prep your glove.
CLICK HERE for an in-depth, ready to use unit on Habitats and Ecosystems for second grade.
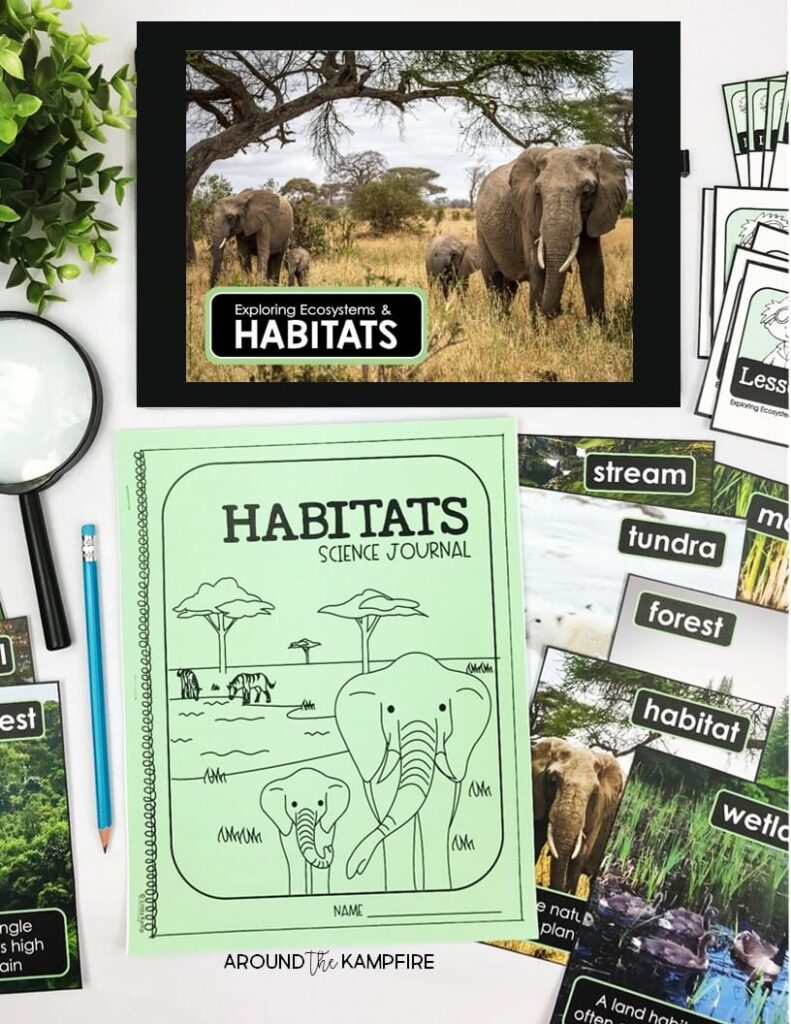
This comprehensive, 3-week unit includes a 7-lesson teaching PowerPoint, experiments, science journal, and much more.
Click here to see the entire 2nd grade series.
I hope you’ll try this simple blubber science experiment for kids as your students learn about habitats and arctic animal adaptations. Be sure to pin this post for later so you have it when you plan!
Find more high engagement science activities for kids in these posts:
Hands-On Properties of Matter Activities & Experiments

Habitats Activities for Second Grade Scientists

Milk & Cookies and the Scientific Method
Happy teaching!
Share this:

Mad libs style
Get FREE Winter Grammar Stories!
Make grammar practice more fun with these Mad Libs style stories! Help your students practice noun types, verb types, adjectives, adverbs, and more!

You May Also Enjoy These Posts

Reader Interactions
May 22 at 10:25 pm
Great ideas! Keep it coming please! Thank you!
Leave a Comment Cancel reply
Your email address will not be published. Required fields are marked *
Notify me of new posts by email.
Hello Friends
I’m Linda Kamp, a 20 year primary grade teacher with a passion for creating educational materials that excite students and make learning fun! I'm so glad you're here!

Preschool Blubber Experiment

Blubber is the fat layer beneath the skin of many sea animals, such as whales, sea lions and penguins, that helps keep them warm in frigid weather. A blubber experiment not only serves the educational needs of your preschooler, but also gives a practical hands-on experience that a preschooler loves.
Explain what blubber is, which animals have it and what its purpose is. The experiment will be much more meaningful when children learn what blubber is. Ask the children what will happen if they put their hands in icy cold water, then explain that you will make blubber for their hands and check whether it works.
Blubber Bag Experiment
This blubber bag experiment requires two self-sealing plastic bags, some Vaseline or shortening, ice cubes in a tub of water and duct tape. Turn one plastic bag inside out and insert it into the other bag and align the edges of the two bags. The reversal of the first bag will enable the edges of the bag to be zipped with the adjacent edge of the second bag. Fill the space between the two bags with Vaseline or shortening, then seal both sides. Duct-tape the ends to prevent entry of water into the pouch. Ask a preschooler to insert her hand in the pouch, then put the pouch into the tub of ice. You can insert her other hand in another plastic bag and tape the end. Insert this "control" hand in the ice tub and ask whether she feels the cold. Ask her whether the blubber protects her hand.
Blubber Glove Experiment
The blubber glove experiment uses real gloves; it is a messy but fun way to learn about blubber. You need a pair of rubber gloves, one latex surgical glove, a tub of ice water and Vaseline or shortening. Put Vaseline or shortening in all the fingers of one rubber glove. Put the latex surgical glove on one hand of a preschooler and insert the gloved hand into the shortening-filled rubber glove (make your blubber foolproof by adding more shortening to make up for any that oozes out when you insert your preschooler's hand). Put the rubber glove with no Vaseline on the child's other hand; this would serve as the control. Put her gloved hands into the tub of ice water and ask your preschooler whether she can feel the cold in either hand. Ask whether the blubber protects her hand.
Talk with your preschoolers about other uses for blubber and why some animals need to protect themselves from the cold. For example, penguins use blubber for food storage for the lean periods when food is unavailable. Whales migrate from warm waters to cold waters and the blubber helps them keep their body temperature constant.
- Scholastic; Wonderful World of Whales; Wendy K. Cruikshank
- Home Science Tools: Whale Blubber Experiment
- A To Z Teacher Stuff; Polar Bears; Mandy Wallace
Cite This Article
Stewart, David. "Preschool Blubber Experiment" sciencing.com , https://www.sciencing.com/preschool-blubber-experiment-10042393/. 22 November 2019.
Stewart, David. (2019, November 22). Preschool Blubber Experiment. sciencing.com . Retrieved from https://www.sciencing.com/preschool-blubber-experiment-10042393/
Stewart, David. Preschool Blubber Experiment last modified March 24, 2022. https://www.sciencing.com/preschool-blubber-experiment-10042393/
Recommended
🥳2025 VISION BOARD PROJECT FLASH SALE HERE

HOME | BLOG | FREEBIES | SHOP

Home » Arctic Animals Blubber Experiment
Arctic Animals Blubber Experiment
- arctic animals , STEM , printable
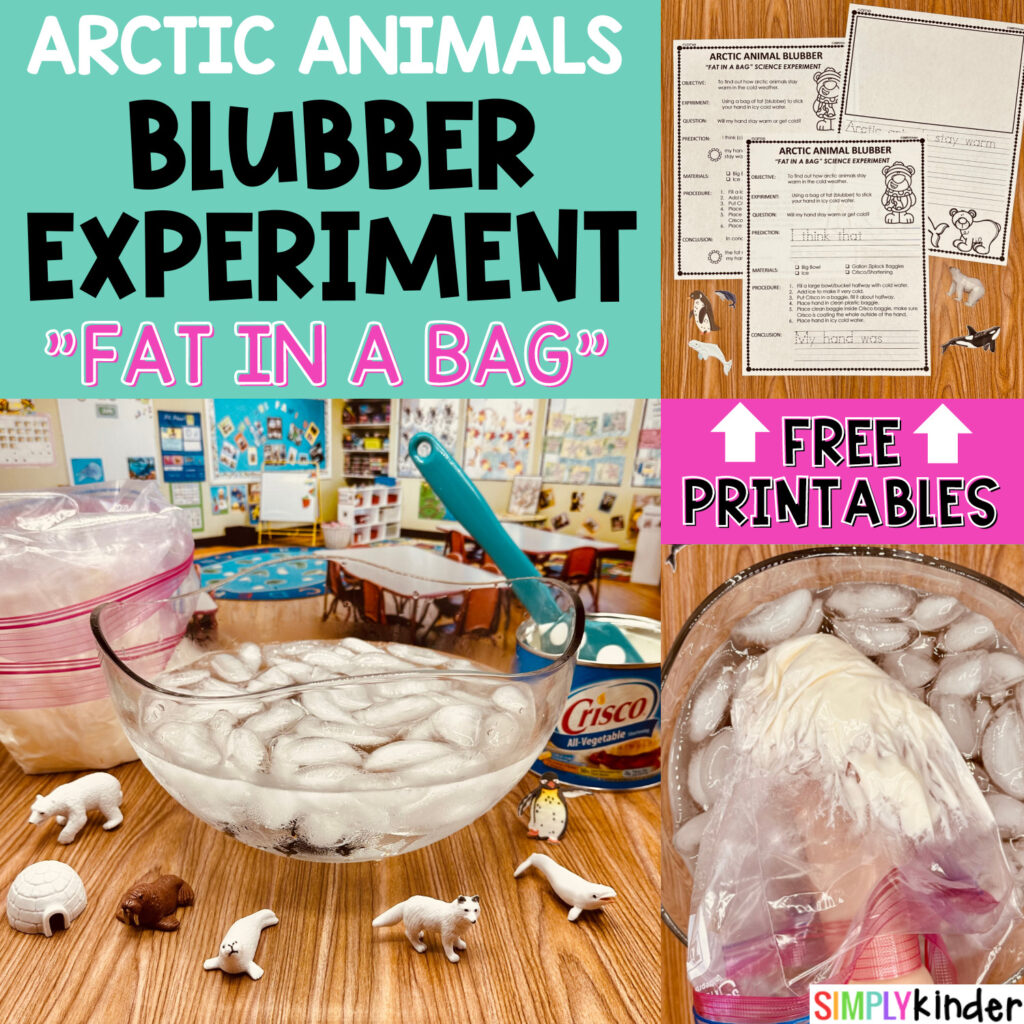
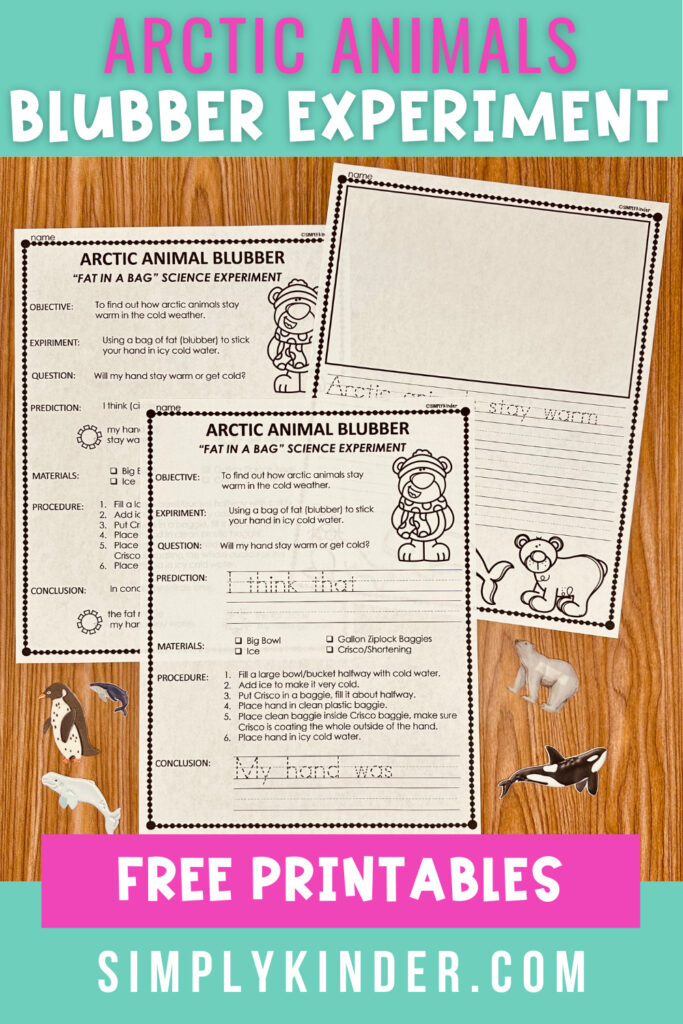
Looking for a fun way to teach your students how animals stay warm in such cold temperatures? Try this hands-on STEM arctic animals blubber experiment. Only a few ingredients are needed for this easy activity that your preschool, kindergarten, or first-grade class will love! Then, make sure to grab the FREE printable at the bottom for science and writing extensions.
Check Out These Related Articles:
- Arctic Animals Virtual Field Trip
- Videos about Arctic Animals
- All the STEM Experiments
This Activity Goes Well With This Simply Kinder Resource:

So how DO arctic animals stay warm?
A simple way to explain blubber to students is to say that it’s the fat inside the animals’ bodies, the layer right under the skin. Polar bears, whales, penguins, seals, walruses, and more all have this extra layer, which traps their body heat inside. It’s kind of like covering up with a blanket to stay warm. Here is a great video that’s kindergarten appropriate you can start with:
Want to introduce the topic with even more information on arctic animals? Be sure to grab these Research Reports now! Start here and then move on to science experiments to really seal in the learning!
Blubber Experiment:
Now that you’ve explained it, it’s time to let your students experience this concept for themselves with the arctic animal’s blubber experiment! Crisco shortening is an excellent fat that works as an insulator. When your student’s hand is covered with the insulator, they can’t feel the cold water! Keep reading for everything you need and then grab the freebie at the bottom.

- Crisco (or any store brand shortening)
- Three-gallon-sized baggies
- Large bowl of ice water
- Spatula or spoon to scoop the Crisco
Steps for the Arctic Animals Blubber Experiment:
You can choose to do this whole group and have one student at a time come up to your desk to try, split it into small groups with several sets, or have each student have their own individual baggie of Crisco. Teacher tip: to contain the mess, avoid spilled water, and keep the cost low; we would recommend passing out the free printable first so students can be working on it while you call them up individually.

- Fill a bowl with cold water, and add enough ice to keep it chilly.
- Scoop Crisco into a gallon-sized baggie to fill it about halfway.
- Have the student place an empty baggie on their hand and submerge that hand into the icy water. Teacher: “Is your hand cold?” Student: “YES!”
- Then place the baggie with Crisco over top of the empty baggie. Spread the shortening around so that it covers the whole outside of a student’s hand.
- Invite them to submerge their hand in the icy water again. Teacher: “How does your hand feel now? Now let’s go write down our observations!”

Spoiler alert: their hand won’t feel cold! WHAT?!? Prepare to watch their amazement! The shortening works just like the blubber of an arctic animal. So cool!
Free Printable

We’ve created the BEST printables for you to accompany this activity. Differentiated options in a science worksheet allow the students to think about a question, make a prediction, and then figure out the conclusion. You can choose to have them write their answers, or circle them.
If you need an extension or work for early finishers, the writing prompt with space for a picture is a great way to continue the thoughts on arctic animals. Best news? THEY’RE FREE!!!
Grab It Now:
Enter your information below and the Simply Kinder Freebie Fairy will send that right over to your inbox. Already a subscriber? No worries! You can still unlock it here, too. Or if you’re a member of Simply Kinder +, you can download it instantly here !
We would LOVE to see your experiment results. Make sure you tag #simplykinder if you share any photos on Instagram . Or tell us in a post on our Simply Kinder Teacher Group Facebook Page.
This post was written by Johanna, an experienced early elementary teacher who loves learning about new teaching ideas for preschool, kindergarten, and first grade!

With Unmatched Printables & Engaging Classroom Ideas, Simply Kinder is your TRUSTED TEAMMATE.

GET OUR EMAILS
Get our emails loaded with free resources, teaching ideas, and so much more!

WHAT'S NEW?

You might also like...

[email protected]
- Teacher Facebook Group
- FAQ & Contact
- Refund Policy
- Get Our Emails
- SK Resource Shop
- SK My Downloads
- + Printable Membership
+ PRINTABLE MEMBERSHIP
- Pricing & Join
- Cancel Policy
© Simply Kinder
Terms & conditions, resource terms of use, privacy policy, refunds & cancellations, use of cookies, privacy overview.
HEre's your freebie!
Here's a coupon code for your next purchase! CODE: 123456
You might also like:

- Earth Science
- Physics & Engineering
- Science Kits
- Microscopes
- Science Curriculum and Kits
- About Home Science Tools
Science Projects > Life Science Projects > Whale Blubber Experiment
Whale Blubber Experiment
Many animals live their lives in extreme weather conditions. Blue whales, for example, migrate between warm breeding waters and cold feeding waters near Antarctica and in the Arctic. How do whales and other animals stay warm in very cold water and climates? Find out with this easy science demonstration that uses only common household items.
What You Need:
- Container of ice water
- Shortening (like Crisco) or petroleum jelly (like Vaseline)
- 4 Ziploc storage bags
- Thermometer
What You Do:
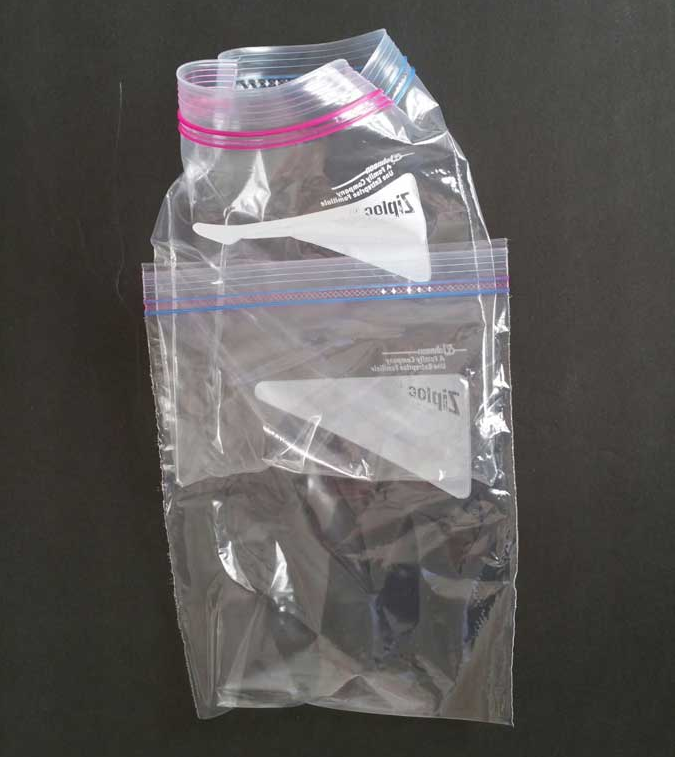
1. Turn one of the Ziploc bags inside out and place it inside another bag. Make sure you have the “zippers” lined up correctly so you can zip the two bags together.
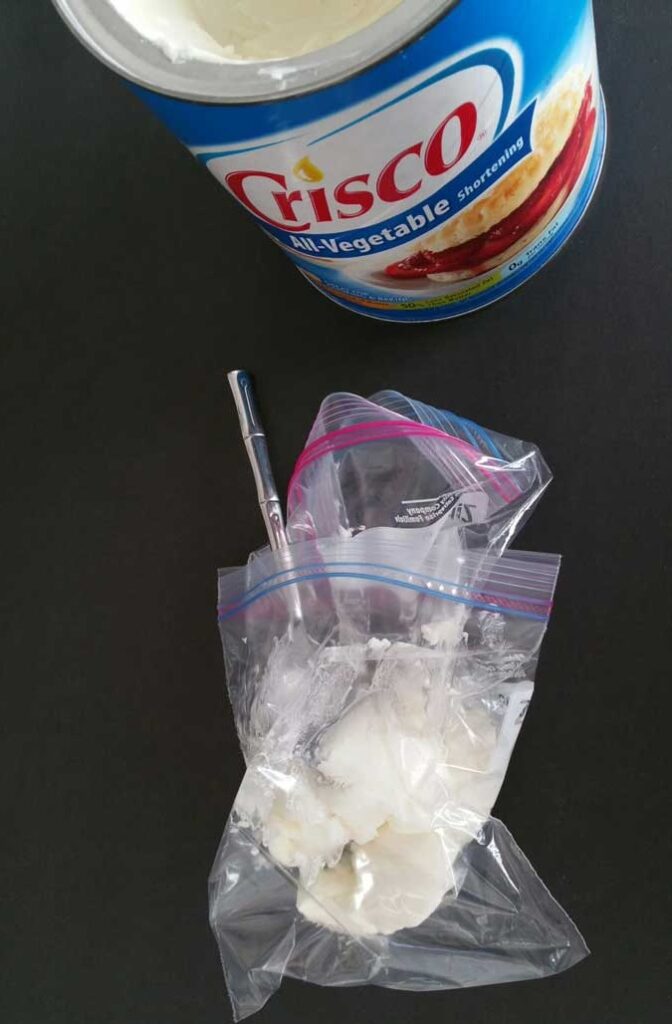
2. Fill the space in between the two bags with a thick layer of shortening or Vaseline, then zip the edges together. We used Crisco. Zipping the bags together makes a type of glove with an opening for your hand. This is the test glove.
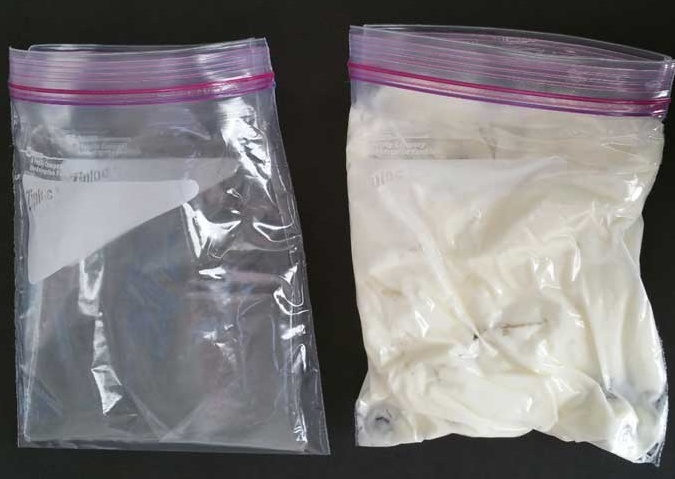
3. Make a “control” glove by putting the other two Ziploc bags inside each other. This will you give you the same amount of plastic, but with no extra substance shielding your hand from the cold water.
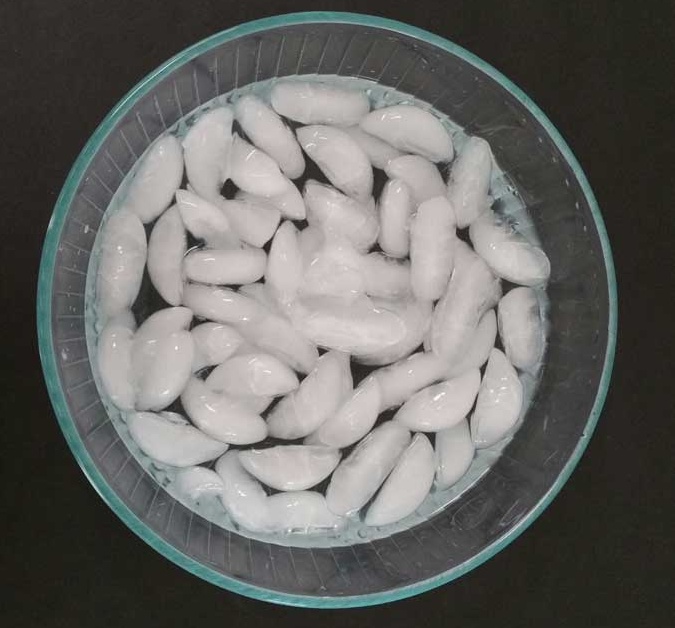
4. Fill a large container with ice water. Make sure it’s deep enough to submerge your hand. We used a glass mixing bowl.
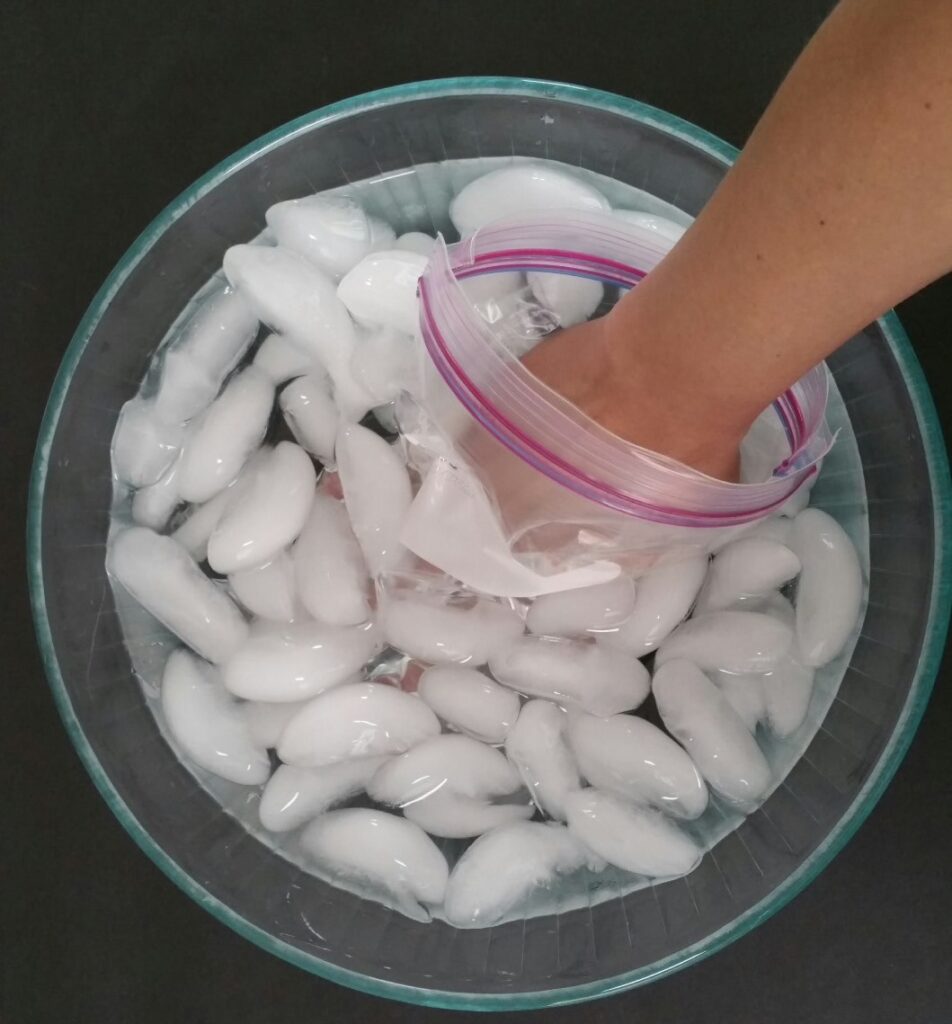
5. Put your hand in the control glove and stick it in the ice water. Using the stopwatch timer, see how long you can keep it in there before it gets too cold. Record your results in your science notebook . Use the hand towel to dry off the outside of the control glove, if necessary.
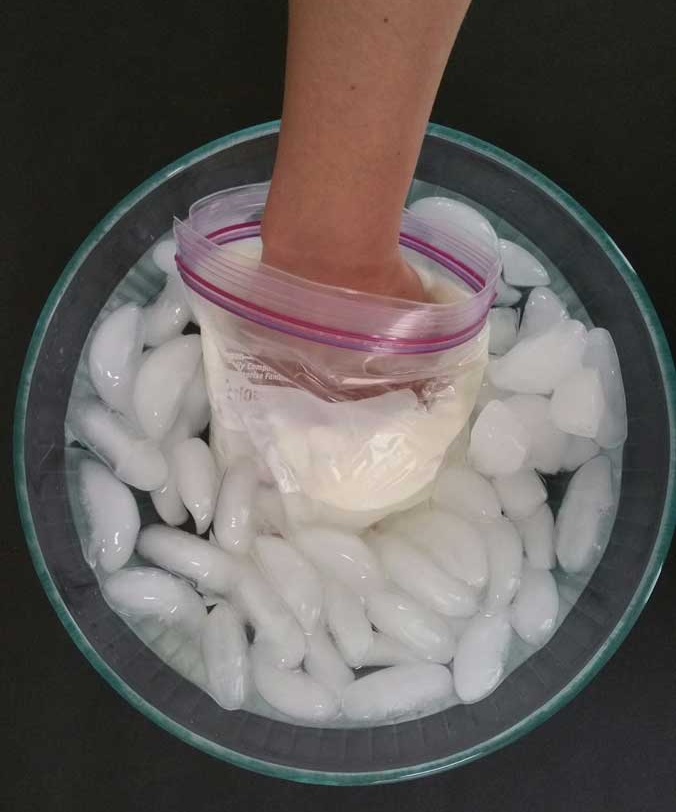
6. Now put the same hand in the test glove and submerge it in the water. Once again, use the stopwatch timer to time how long you can keep it in the ice water. Record your results. Were you able to keep your hand in the ice water longer using the control glove or the test glove? What was the time difference?
7. Now, put a thermometer in the control glove and put the end in the water. Record the temperature.
8. Repeat step 7 with the test glove. What is the difference between the two temperatures?
Although whales migrate between warmer and cooler waters, other animals, like seals, sea lions, penguins and polar bears, spend their entire lives in bitterly cold temperatures.
These animals have a thick layer of fat under their skin called blubber.
The blubber keeps them warm and also stores nutrients their body can use when they are in environments where there isn’t much food.
The fat molecules in Vaseline and shortening make them act a little like blubber.
Blubber helps keep animals warm because it acts as an insulator.
An insulator slows down the transfer of heat, keeping the animal’s body heat from escaping into the water and protecting it from the cold.
Can you think of any insulators you’ve used at home?
Hint : When you go outside to play on a snowy day, you probably wear some!
For further study, repeat the blubber glove project using different materials as insulators.
Try using packing peanuts, rubber bands, cotton balls, wool, sand, and feathers. Predict which substances you think will insulate well and why.
More Life Science:
- Hibernation
- Polar Animals
- Baby Animals
Biology / Life Science
Welcome! Read other Biology / Life Science articles or explore our the rest of the Resource Center which consists of hundreds of free science articles!
Shop for Biology Supplies!
Home Science Tools offers a wide variety of biology products and kits. Shop for all your biology teaching needs: kits, dissection supplies, petri dishes & more.
Science Fair Projects for 8th Graders
Science Fair Projects for 8th Graders As kids reach the 8th grade, their exposure to science goes up a notch. Equipped with basic knowledge, they can begin to explore more complicated concepts and satisfy their curiosity for deeper answers to the 'whys' and 'hows' of...
Science Fair Projects for 7th Graders
Science Fair Projects for 7th Graders Science fair projects for 7th graders are a step up in complexity. Because 7th graders have a better grasp of science concepts, they’re expected to practice the scientific method in the way they approach their experiments–which...
Home Science Experiments for Preschoolers
Home Science Experiments for Preschoolers Home science experiments for preschoolers are a great way to pique your child’s curiosity, teach them valuable knowledge, and allow them to have some fun in the comfort of their own home. There are plenty of activities your...
Easy Science Fair Projects for Kids
Easy Science Fair Projects for Kids Science fairs are a long-standing tradition that provide kids with the opportunity to better understand practical concepts in fun and innovative ways. The great thing about the experiments presented at these events is that they...

How to Make a Pollinator Hotel
Have you ever wondered how you can help provide habitat for pollinators like honey bees and butterflies in your back yard? Learn how to make a pollinator hotel with this step-by-step guide and lesson. Pollinators are animals that help move pollen. Most pollinators are...
JOIN OUR COMMUNITY
Get project ideas and special offers delivered to your inbox.
Get Your ALL ACCESS Shop Pass here →

Polar Bear Blubber Experiment
How do polar bears stay warm with those freezing temperatures, icy water, and relentless wind in the Arctic? What keeps a polar bear warm when its natural habitat is so harsh? This simple but classic polar bear blubber experiment will help kids feel and see what keeps those big guys (and gals) warm! Simple winter science experiments help to shape kids’ minds!
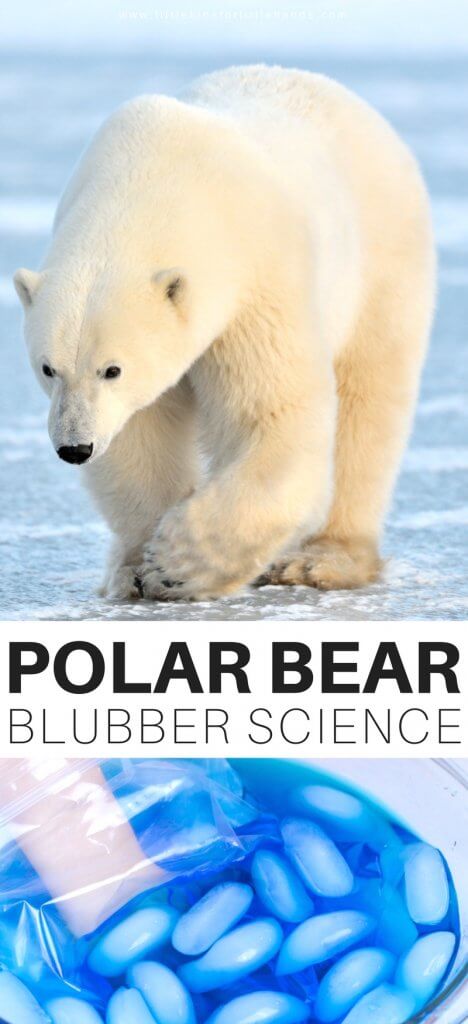
POLAR BEAR BLUBBER EXPERIMENT
To start this experiment, you need to ask your kids a few questions and get them thinking Ask your kids how they think polar bears stay warm when swimming around in the icy arctic water. What about them keeps them warm if they don’t wear clothes like us. Why don’t polar bears start to freeze in the water? Hint: there’s a thick layer of fat included! Brrr…
YOU WILL NEED THE FOLLOWING:
- Large container or bowl
- Lots of ice cubes
- Vegetable shortening
- Two plastic baggies (Ziplock Bags)
- Food Coloring (optional)

HOW TO SET UP YOUR BLUBBER EXPERIMENT
Before you begin, you may want to pair this lesson with the scientific method . You can use this with younger and older students with simple alterations that you can read about here .
Check below for another option to extend the learning or to lessen the mess!
STEP 1. First, you need to fill a large bowl with a good amount of ice and water. Add blue food coloring if desired.
STEP 2. Next, have your kid place his/her hand briefly in the water. It’s cold! There’s no need to linger in the water for safety.

STEP 3. Now, for the messy part, fill one plastic bag with shortening.
STEP 4. Have your kids place one hand in another bag and the other hand inside the blubber/fat-filled bag. Seal the tops with duct tape so water can’t get into the bags. Make sure to move the fat around, so it covers your hand completely.
NOTE: For a less messy version, see below!
Fun Fact: Polar Bears have 4″ thick layers of blubber to keep them toasty and store nutrients when there isn’t much food available.

STEP 5. Put the bag-covered hands in the freezing water. What do they notice? Does the water feel less cold or not?

ALTERNATE BLUBBER GLOVE
You can use two gloves with vegetable shortening for a less messy way. For a less messy version, go ahead and cover the outside of one bag with shortening, place that bag inside another bag, and seal everything tightly! This way, your hand stays clean inside the bag, and the shortening is sandwiched between two bags.
This also allows older students to test different kinds of insulators because of the sandwich method. What else can be used between the two layers of bags? This turns it into a true science experiment for kids in older grades. Make sure to write out a hypothesis before getting started. Read up on the scientific method here.
- Cotton Balls
- Packing Peanuts
HOW DO POLAR BEARS STAY WARM?
If your kids haven’t already guessed what keeps polar bears warm, they will have a better idea once they make their own polar bear blubber glove! Blubber or a thick layer of fat keeps them warm. Polar bears are warm-blooded mammals like us! What the heck are they doing in the Arctic?
The blubber also stores nutrients needed for survival in this harsh climate. Learn more about the Arctic with Biomes of the World !
Of course, polar bears aren’t covered in cooking lard like Crisco, but they have their own kind of lard called blubber that helps out. The fat molecules in shortening work in a similar way to that of blubber! However, several special adaptations work together for maximum heat retention.
POLAR BEAR ADAPTATIONS
Polar bears use a combination of fur and blubber to keep warm. Thick fur and thick fat keep these warm-blooded mammals warm in temperatures up to -50 degrees! That’s pretty cold.
They have two types of fur. These bears have long, oily, hollow hairs that help keep water away but also help trap heat. The second type of fur consists of short insulating hairs. These hairs keep heat close to the skin.
Oh, and did you know these magnificent creatures with whitish fur, actually have black skin? This also helps to keep polar bears warm by absorbing the sun’s rays.
Some adaptations include small ears, so the ears don’t get too cold, “sticky” pads for gripping ice, and 42 very sharp teeth for catching their dinner!
POLAR BEAR By Candace Fleming ad Eric Rohman is an excellent addition to your winter theme library. It’s a fantastic mix of non-fiction storytelling filled with engaging text and plenty of good information! (Amazon Affiliate Link) You can also pair this with the research sheet I added at the end of the article.
ARE POLAR BEARS BUOYANT?
What’s under the black skin? The blubber, of course! The blubber is a thick layer below the skin that can be up to 4.5 inches thick! WOW! It now only helps them stay warm, but it also helps to keep them afloat. You can check out this simple buoyancy science experiment to learn more about that!
Blubber is stored up fat. It creates a cozy blanket for the polar bear when combined with different types of fur. It also has another useful property in that it can help provide life-sustaining energy when food sources are scarce. Blubber is important to the life of a polar bear!
ALSO CHECK OUT: How Do Whales Stay Warm?

WINTER SCIENCE ACTIVITY
The winter season is a terrific time to explore different science concepts and keep the excitement of science alive! Learning about animals and animal habitats is always a favorite of young kids. Use this science experiment with small groups in the classroom or with several kids at home!
So next time you want to share something fun with the kids or if you are exploring an arctic unit, break out this polar bear blubber experiment . We will share a few more fun facts with you about how polar bears keep warm, and this winter science activity is a great hands-on way for kids to feel it as well.
You may also want to make a polar bear puppet or a paper plate polar bear craft !
Read below the activity for a bit of science behind the chilly fun, and see how polar bears brave the elements in style. Oh, and make sure your kids know that polar bears and penguins don’t hang out together!
Learn what role polar bears have in the food chain .
FREE Printable Winter STEM Guide
More fun and easy winter science activities can be found here.

MORE FUN ICY ACTIVITIES
Printable Winter STEM Pack
Even if you don’t live in a snowy winter climate, there are many ways to explore the season!
WHAT’S INSIDE? You’ll find 250+ Pages of Winter theme projects for science, STEM, and art!
- 25+ winter science activities and STEM projects for kids that are easy to set up and fit into the time you have available, even if it’s limited! NEW: Activity observation sheets .
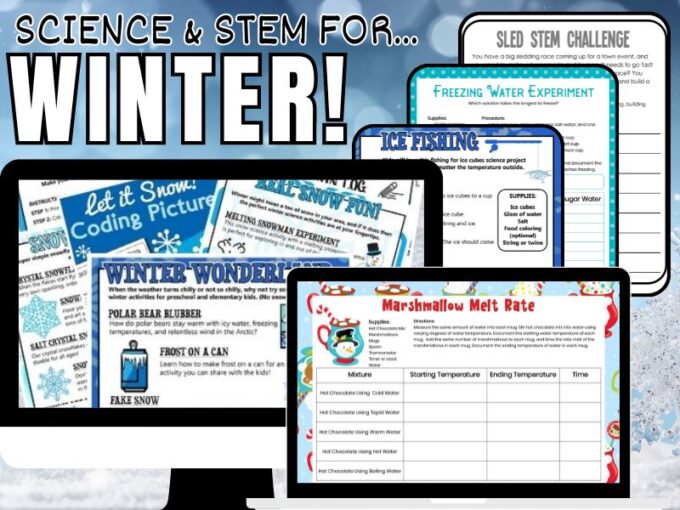
- Pingback: Winter Snow Storm In a Jar Science Activity for Kids
- Pingback: International Polar Bear Day – TeachersFirst Blog
Is there something we can use as a substitute for shortening? Because our schools is remote learning parents have to have any supplies we need available in their homes. I worry this may not be a pantry staple for all our families.
Hmm, butter is not going to be as good and may be more wasteful than picking up a tub of sshortening. Other than that maybe someone else has a good idea and can reply to you!
Comments are closed.

Subscribe to receive a free 5-Day STEM Challenge Guide
~ projects to try now ~.

Make blubber gloves
Learn about polar animals' adaptations with this experiment!
Extremely cold climates are full of life. What kind of adaptations do polar animals have to allow them to thrive in these environments? Learn about one survival tool with this experiment from the Nat Geo Kids book Try This! Extreme .
Assemble a blubber glove by filling a plastic bag three-quarters full with shortening.
Put on your nitrile gloves and insert your hands in two plastic bags: one filled with the shortening and the other empty. Zip the bags as closed as possible and then get someone to help you tape the bags closed around your wrists.
Place your covered hands in the icy water for as long as you can stand. Which hand stays warmer?
Repeat the experiment with different insulating materials, like the packing peanuts, cotton balls, and feathers. Which material keeps your hand the warmest?
WHAT TO EXPECT
Some of the materials placed in the bag around the subject’s hand will prevent cold from reaching her hand better than others.
WHAT'S GOING ON
Fat—even a vegetable-based fat like shortening—insulates animals from cold. So the shortening provides a decent substitute for blubber, the layer of fat that seals , whales , walrus , polar bears , and other marine animals in polar climates have under their skin.
Other materials, such as foam, keep drinks warm because they don’t conduct heat, so the heat doesn’t escape through the sides and bottom of the cup.
By the way, the bucket full of icy water is similar to the temperature and texture of the water around ice floes—where animals like seals and whales tend to live.
Try This! Extreme Text Copyright © 2017 Karen Romano Young
more to explore!
Science lab, (ad) try this extreme: 50 fun & safe experiments for the mad scientist in you, (ad) make this: building thinking, and tinkering projects for the amazing maker in you, (ad) try this: 50 fun experiments for the mad scientist in you.
- Terms of Use
- Privacy Policy
- Your California Privacy Rights
- Children's Online Privacy Policy
- Interest-Based Ads
- About Nielsen Measurement
- Do Not Sell My Info
- National Geographic
- National Geographic Education
- Shop Nat Geo
- Customer Service
- Manage Your Subscription
Copyright © 1996-2015 National Geographic Society Copyright © 2015-2025 National Geographic Partners, LLC. All rights reserved

IMAGES
COMMENTS
Nov 9, 2024 · How do whales, penguins and polar bears stay warm? Test out different insulators with this easy and fun blubber experiment.
Whales and Arctic mammals like penguins and polar bears, have a thick layer of fat under their skin called blubber. This fat can be anywhere from a couple of inches to a foot thick! The blubber keeps them warm and also stores nutrients their body can use when there isn’t much food.
Polar Bear Blubber. Materials: 2 gallon sized zipper lock bags; 4 tablespoons of shortening; duct tape; ice (crushed/cubed) 1 gallon bucket . Instructions: Fill bucket halfway with the cold water. Add enough ice to make water chilly. Add 4 tablespoons of shortening in one of the ziploc bags. Put empty ziploc bag inside of the ziploc bag with ...
This fun science experiment explores the nature of blubber and how it keeps animals warm in the cold weather areas of the world! It's the perfect winter science experiment for preschoolers to do at home!
Dec 10, 2022 · This simple blubber experiment demonstrates how arctic animals stay warm in their icy water habitats. Blubber is a thick layer of fat just under the skin of all marine mammals. It covers the entire bodies of animals like polar bears and penguins, whales, seals, and walruses.
Nov 22, 2019 · A blubber experiment not only serves the educational needs of your preschooler, but also gives a practical hands-on experience that a preschooler loves. Blubber is the fat layer beneath the skin of many sea animals, such as whales, sea lions and penguins, that helps keep them warm in frigid weather.
Teach your students how arctic animals stay warm with this super fun hands-on blubber experiment using fat in a bag with FREE printables!
Learn how whales and other animals stay warm in cold temperatures and water with HST's Whale Blubber Experiment! Try out this easy, fun activity at home.
Dec 18, 2024 · How do polar bears stay warm with those freezing temperatures, icy water, and relentless wind in the Arctic? What keeps a polar bear warm when its natural habitat is so harsh? This simple but classic polar bear blubber experiment will help kids feel and see what keeps those big guys (and gals) warm!
Learn about one survival tool with this experiment from the Nat Geo Kids book Try This! Extreme. Assemble a blubber glove by filling a plastic bag three-quarters full with shortening. Put on...