
- Science Notes Posts
- Contact Science Notes
- Todd Helmenstine Biography
- Anne Helmenstine Biography
- Free Printable Periodic Tables (PDF and PNG)
- Periodic Table Wallpapers
- Interactive Periodic Table
- Periodic Table Posters
- Science Experiments for Kids
- How to Grow Crystals
- Chemistry Projects
- Fire and Flames Projects
- Holiday Science
- Chemistry Problems With Answers
- Physics Problems
- Unit Conversion Example Problems
- Chemistry Worksheets
- Biology Worksheets
- Periodic Table Worksheets
- Physical Science Worksheets
- Science Lab Worksheets
- My Amazon Books

Egg in a Bottle Experiment – Two Easy Methods

The Egg in a Bottle experiment is a classic science project that demonstrates the principles of air pressure in a fun and visually appealing way. Here are two different methods for performing this project, each highlighting how changing temperature in turn changes air pressure and forces a hard-boiled egg into a bottle.
Egg in a Bottle Experiment Materials
- Glass bottle with a neck slightly narrower than the egg’s diameter
- Peeled hard-boiled egg
- Matches or lighter
- Small piece of paper
Finding the right size of bottle is a challenge. Remember there are different sizes of eggs available for sale. A sturdy plastic bottle is an option instead of glass, but sometimes the temperature and pressure change deforms the bottle.
Egg in a Bottle Using a Burning Piece of Paper – Method #1
- Preparation: Peel the hard-boiled egg.
- Ignite the Paper: Light a small piece of paper using matches or a lighter. Just using a wooden match works too, but a piece of paper typically burns longer and changes the temperature inside the bottle more.
- Place the Paper in the Bottle: Quickly drop the burning paper into the bottle.
- Position the Egg: Immediately place the peeled egg on the neck of the bottle. If you like, wet the egg with water so it is a bit slippery. Sometimes this helps a larger egg fit through a smaller hole.
- Observation: After the flame goes out, the temperature inside the bottle cools and the egg slides into the bottle. Note: the egg does not enter the bottle because fire consumes oxygen! Oxygen merely rearranges into other compounds.
Explanation
When you drop the burning paper into the bottle, it heats the air inside. Heat gives molecules kinetic energy so they move more rapidly and have an increased number of collisions with the wall of the bottle. In other words, heat increases the air pressure inside the bottle . When you place the egg on the bottle, it seals it. Fresh air does not enter the bottle, so the flame consumes the oxygen and then goes out. As the air cools down, it contracts, creating a lower pressure inside the bottle compared to the outside air. The higher external air pressure pushes the egg into the bottle.
Egg in a Bottle Using Hot and Cold Water – Method #2
- Heat the Bottle: Place the bottle in hot water, which heats the air inside. (Do not submerge the bottle and fill it with water.)
- Position the Egg: After a few minutes, remove the bottle from the hot water and quickly place the peeled egg on the neck of the bottle. (If you like, place the egg on the bottle and then heat it. It makes no difference.)
- Cool the Bottle: Immerse the bottom of the bottle in cold water.
- Observation: The air inside cools and contracts. The outside air has a higher pressure than the air inside the bottle, pushing the egg through the bottle opening.
Heating the bottle with hot water expands the air inside the bottle. Some of it escapes the bottle. The egg seals the bottle. When you place the bottle in cold water, the air inside cools down and contracts, creating a lower pressure inside the bottle. The higher external air pressure pushes the egg into the bottle.
How to Get the Egg Out of the Bottle
There are ways of getting the egg back out of the bottle without breaking it up. Here are three methods:
Method 1: Reversing the Pressure
- Tilt the Bottle: Turn the bottle upside down so the egg is at the neck.
- Blow Air into the Bottle: Carefully create a seal around the bottle’s mouth with your lips and blow air forcefully into the bottle.
- Increase Pressure: The increased air pressure inside the bottle pushes the egg back out through the neck.
Method 2: Lubrication Method
This method works if there is only a small size difference between the egg and the bottle opening.
- Add Lubricant: Apply a thin layer of cooking oil or dish soap around the neck of the bottle and the surface of the egg to reduce friction.
- Position the Bottle: Turn the bottle upside down so the egg is at the neck.
- Gently Shake: Gently shake the bottle. The force of shaking helps slide the egg out. The lubricant makes it easier for the egg to pass through the neck of the bottle.
Method 3: Temperature Change
- Position the Egg: Tilt the bottle upside down so the egg is at the neck.
- Heat the Bottle: Once the egg is in the bottle neck, carefully change the bottle’s position so you can heat it. Submerge the bottom of the bottle in hot water and heat the air inside. As the air expands, pressure increases and pushes the egg out.
Of course, there is a chance these methods won’t work if the egg is too big. If you really need the egg removed and pressure is not working, insert a stick or wire into the bottle, break the egg, and shake out the pieces.
Relation to the Ideal Gas Law and the Combined Gas Law
The gas law that predicts the behavior of the egg in a bottle experiment is the Combined Gas Law , which is a special case of the Ideal Gas Law .
The equation for the Ideal Gas Law is PV = nRT, where:
- P is the pressure
- V is the volume
- n is the number of moles of gas
- R is the ideal gas constant
- T is the temperature
In this experiment, the burning paper or hot water increases the temperature (T) of the air inside the bottle. According to the Ideal Gas Law, if the volume (V) of the bottle remains constant, an increase in temperature results in an increase in pressure (P). When you place the egg on the bottle and the air inside cools, the temperature decreases, leading to a decrease in pressure. The external air pressure (higher P) then pushes the egg into the bottle to equalize the pressure difference.
For the most part, the number of moles of air, volume of air (volume of the jar), and ideal gas constant remain the same throughout the project. This makes using the Combined Gas Law possible. The Combined Gas Law is a rearrangement of the Ideal Gas Law that combines Boyle’s Law, Charles’s Law, and Gay-Lussac’s Law. The Combined Gas Law is given by:
P 1 V 1 /T 1 = P 2 V 2 /T 2
- P is the pressure of the gas
- V is the volume of the gas
- T is the temperature of the gas (in Kelvin)
- Subscripts 1 and 2 refer to the initial and final states of the gas, respectively.
So, if volume remains the same, the equation only balances out when temperature and pressure both increase or both decrease.
Method 1: Using a Burning Piece of Paper
- The burning paper heats the air inside the bottle, increase the temperature (T 1 ).
- As the temperature increases, the pressure (P 1 ) inside the bottle also increases.
- Some of the air escapes the bottle because of the increased pressure. But, it’s not enough to affect the outcome.
- The flame consumes the oxygen and the fire goes out, decreasing the temperature (T 2 ) to decrease.
- As the temperature decreases, the pressure (P 2 ) inside the bottle decreases. A common misconception is that the pressure decreases because the flame consumes oxygen, forming a partial vacuum. This is incorrect because no oxygen is lost. Instead, combustion forms carbon dioxide and water using carbon and hydrogen from the match or paper. The number and type of atoms inside the bottle remains the same.
- The volume of the bottle (V) remains constant, so the decrease in pressure creates a partial vacuum inside the bottle.
- The lower pressure inside the bottle (P 2 ) compared to the atmospheric pressure outside causes the higher external pressure to push the egg into the bottle to equalize the pressure difference.
Method 2: Using Hot and Cold Water
- Heating the bottle in hot water increases the temperature (T 1 ) of the air inside the bottle.
- The increased temperature causes the air to expand, and some air escapes the bottle, slightly increasing the volume temporarily.
- Placing the bottle in cold water cools the air inside, decreasing the temperature (T 2 ).
- As the temperature decreases, the pressure (P 2 ) inside the bottle decreases.
- The volume of the bottle (V) is effectively constant after the initial escape of some air, so the decrease in pressure creates a partial vacuum inside the bottle.
- Castka, Joseph F.; Metcalfe, H. Clark; Davis, Raymond E.; Williams, John E. (2002). Modern Chemistry . Holt, Rinehart and Winston. ISBN 978-0-03-056537-3.
- Clausius, R. (1857). “Ueber die Art der Bewegung, welche wir Wärme nennen”. Annalen der Physik und Chemie (in German). 176 (3): 353–79. doi: 10.1002/andp.18571760302
- Raff, Lionel M. (2001) Principles of Physical Chemistry (1st ed.). Pearson College Div. ISBN: 978-0130278050.
Related Posts
Cool Science Experiments Headquarters
Making Science Fun, Easy to Teach and Exciting to Learn!
Science Experiments
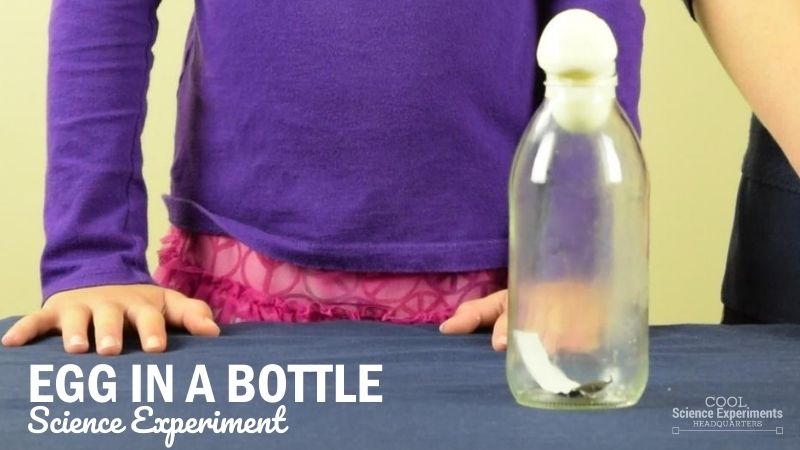
Egg in a Bottle Science Experiment
Can eggs move by themselves? Maybe not, but with the help of air pressure, they can be pushed into a glass bottle without being touched!
In this experiment, your young scientists will learn about density and air pressure. And when you watch our demonstration video, you’ll see that although things didn’t go exactly as we expected, this experiment is always fun and educational. Printable instructions and a materials list are included.
JUMP TO SECTION: Instructions | Video Tutorial | How it Works
Supplies Needed
- Hard-Boiled Egg (shell removed)
- Glass Bottle
- Thick Piece of Paper
- Match or Lighter
Safety Note: Because the experiment involves fire, adult supervision is required.
Egg in a Bottle Science Lab Kit – Only $5
Use our easy Egg in a Bottle Science Lab Kit to grab your students’ attention without the stress of planning!
It’s everything you need to make science easy for teachers and fun for students — using inexpensive materials you probably already have in your storage closet!
Egg in a Bottle Science Experiment Instructions
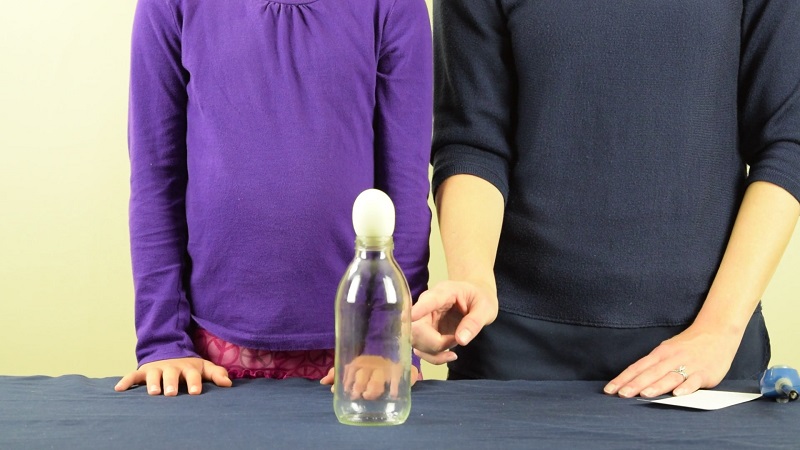
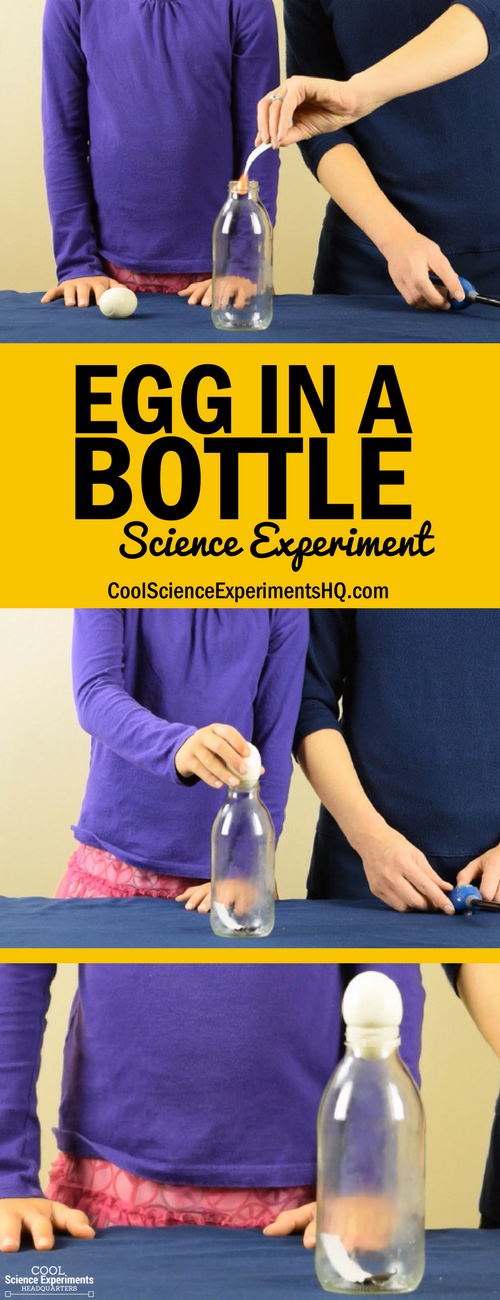
Step 1 – Remove the shell from the hard-boiled egg and place it on the mouth of the jar. Take a moment to make some observations. Why doesn’t the egg fit into the jar? Do you think it is possible to put the egg inside the jar? Do you think it is possible for the egg to move into the jar without touching it?
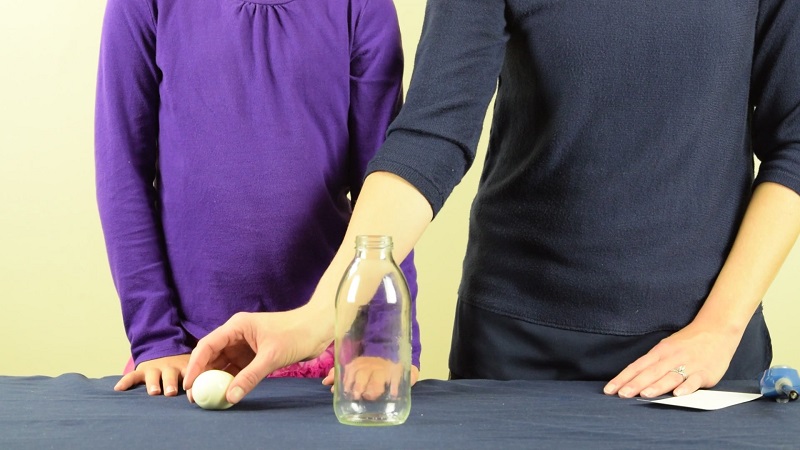
Step 2 – Remove the egg from the jar and set it on the table nearby. Make sure that you place it within reach because you’ll need to move quickly once it’s time to place the egg on the bottle again.
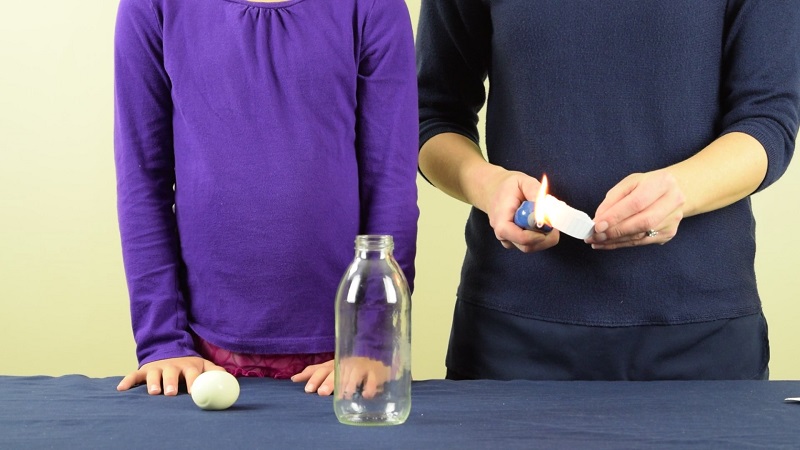
Step 2 – Get your strip of thick paper ready. Note that using thick paper is important because you need something that won’t burn too quickly when you light it on fire. We tore off a piece from an index card. Construction paper would also work nicely.
Carefully use a lighter to light the piece of paper on fire. Safety Note: Remember to always use safety measures when dealing with fire. Adult supervision is required.
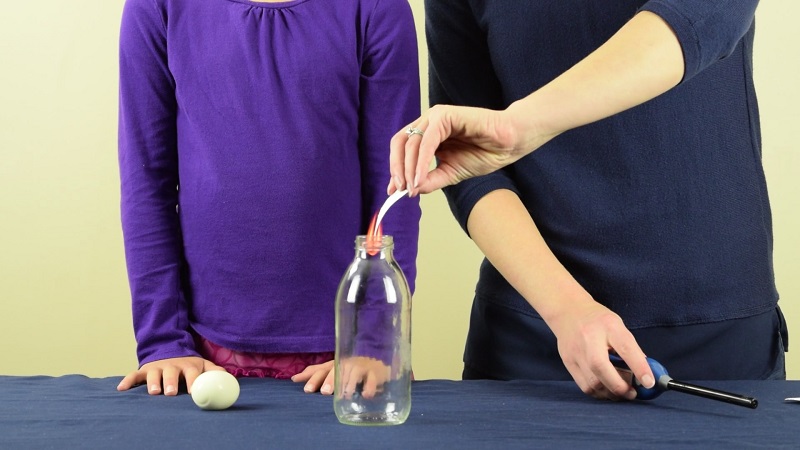
Step 4 – Once the paper is burning, carefully but quickly drop it into the glass bottle.

Step 5 – Immediately after you put the paper in the bottle, place the egg on the top of the bottle.
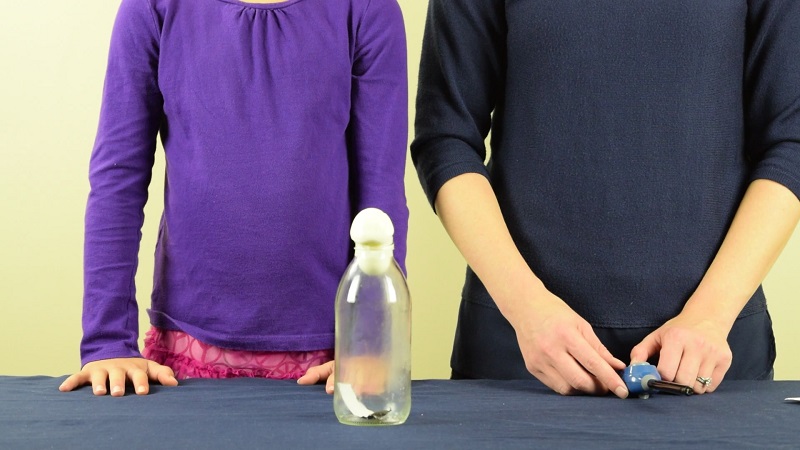
Step 6 – Watch as the egg begins to slowly move into the bottle. If you are lucky the egg will stay in one piece as it moves into the bottle. Or if you are like us, the egg will eventually split as it is squeezed into the mouth of the bottle. Watch the Egg in a Bottle Experiment Video Tutorial to see what happens to our egg.
Were you surprised when the egg began to move into the jar? Do you know why it did? Read the how does this experiment work section before to find the answer.
Egg in a Bottle Science Experiment Video Tutorial
How Does the Experiment Work?
Air has mass, so it has other properties like pressure and density. Air is able to push or crush objects when given the opportunity. We don’t often see air pushing or crushing objects because air molecules surrounding objects push on objects equally in all directions. In this experiment, you get to see the power of air!
Air pressure is the reason the egg moves into the bottle without us touching the egg. Let’s go over exactly what happened.
When we started the experiment, the air pressure inside the bottle was the same as the air pressure outside of the bottle because the air inside the bottle and outside the bottle was the same temperature.
After we placed the burning paper in the bottle, the air inside the bottle began to heat up and expand. A few seconds after we placed the egg on top of the bottle, the fire went out and the paper stopped burning. This caused the air inside the bottle to cool down and contract.
When the air contracts, the air pressure inside the bottle becomes less than the air pressure outside the bottle. This gives the higher air pressure outside of the bottle the opportunity to push the egg down into the bottle.
I hope you enjoyed the experiment. Here are some printable instructions:
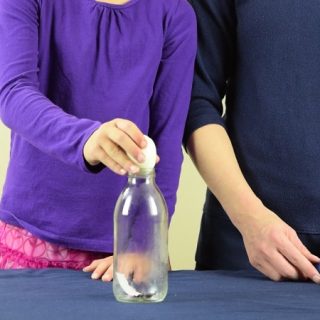
- Hard Boiled Egg (Shell Removed)
Instructions
- Position the egg near the empty bottle. This is needed because you have to move fast once it is time to place the egg on the bottle.
- Take a strip of thick paper. Think paper is important, because you need something that won’t burn too quickly when you light it on fire during the next step. Helpful Tip: I used a piece of index card. Construction paper would also work nicely.
- Light the piece of paper and drop it into the bottle. Remember to always use safety measures when dealing with fire.
- Once the paper is burning, carefully but quickly drop it into the glass bottle.
- Immediately after you put the paper in the bottle, place the egg on the top of the bottle.
- Watch as the egg begins to slowly move into the bottle. Helpful Tip: If you are lucky the egg will stay in one piece as it moves into the bottle. Or if you are like us, the egg will eventually split as it is squeezed into the mouth of the bottle. Watch the Egg in a Bottle Experiment Video to see what happens to our egg.
Reader Interactions
Leave a reply cancel reply.
Your email address will not be published. Required fields are marked *
Save my name, email, and website in this browser for the next time I comment.

- Privacy Policy
- Disclosure Policy
Copyright © 2024 · Cool Science Experiments HQ

Egg in a Bottle – Air Pressure Experiment
- April 21, 2021
- 10 Minute Science , 7-9 Year Olds , Physics
Science is amazing as it does wonders in our real life and around the world.
Today, Let’s explore “Egg in a Bottle”, which proves using simple science concepts anyone can put an egg into a bottle without touching it.
Yes, the egg can move into a bottle without any external help but with the help of science.
Objectives in this Science Activity
Using this experiment, children can learn,
1) Relation between Temperature and Pressure
2) Impact of air pressure on objects
3) Impact of air pressure in our daily activities
4) Properties of air
Amazed! Yes, though the experiment is quick and simple, it carries a lot of scientific information to inspire young scientists.
Egg in a Bottle – Experiment
Supplies required
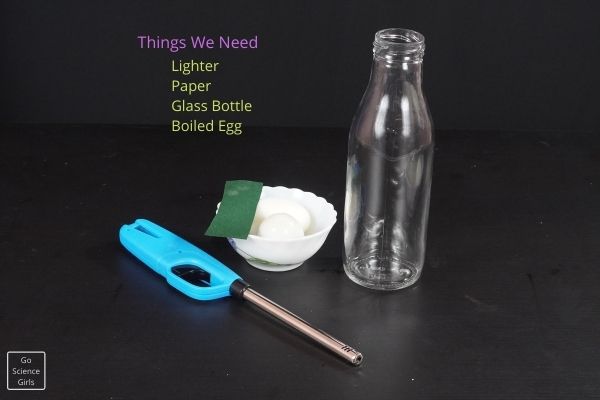
1) One glass container or jar. Make sure the opening of the glass jar is smaller than the size of a boiled egg because to fit the egg perfectly instead of slipping into the jar easily. Milk and Juice bottles work well for this purpose.
2) A small piece of Paper
3) Fire source i.e. a candle or lighter or a matchbox
4) One or two boiled eggs
Preparations
Just before the experiment, pick fresh and raw eggs and boil them until they turn hard. Probably, this step takes 7-10 minutes.
Once boiled, peel off the outer shell part of the boiled egg and wash it under tap water to remove any hard remnants attached to the egg. Then, keep it aside on the experiment table.
Simple Step by Step Instructions
Step-1: Place a clean and transparent glass jar on the experiment table.
And then pick a piece of paper and burn it using a lighter. Please make sure the paper is folded into a strip such that it is easy for you to drop it into the jar bottle.
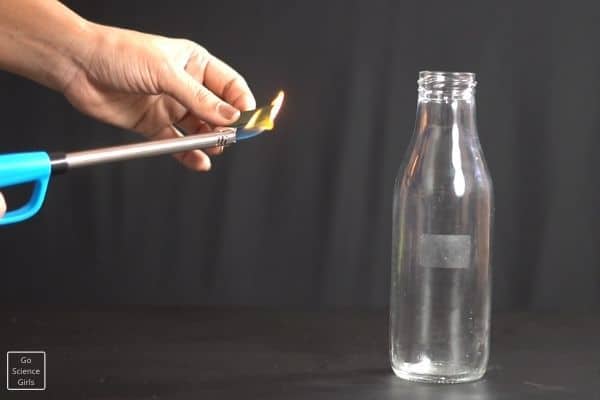
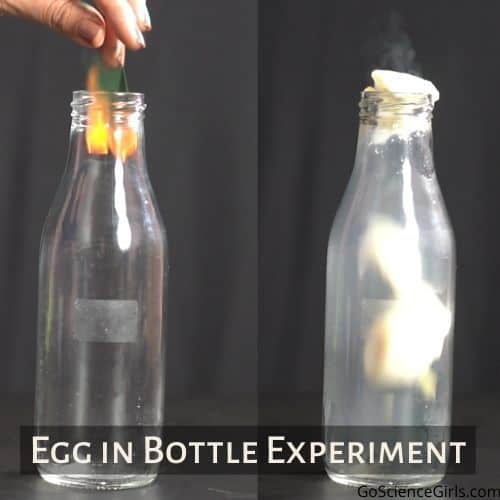
Step-2: When the paper catches fire, immediately drop it into the glass jar placed on the work table. You must drop the burning paper into the jar before the fire goes off.
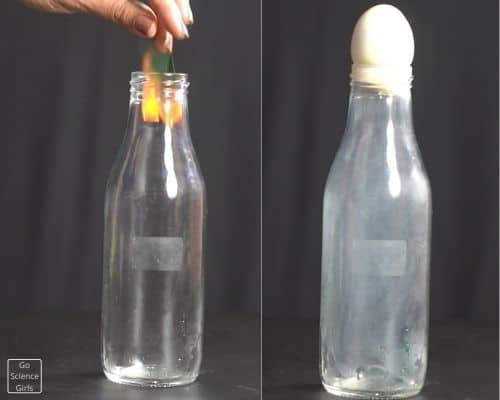
Step-3: Now, Place the hard-boiled egg on top of the glass jar opening perfectly. Then observe the results.
Results: You will observe the egg slowly moving into the bottle. At times, the egg will go into the glass bottle as it is without any breakages, but sometimes it may spill while squeezing into the bottle.
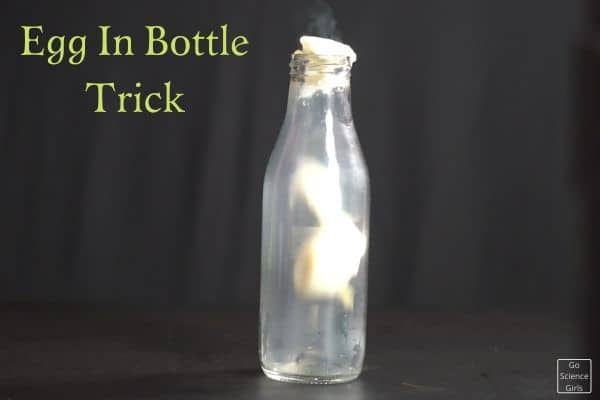
Note: If your egg fails or feeling difficult to slip down into the bottle, then you can apply vegetable oil around the neck of the bottle. Greasing oil helps the egg to move into the bottle easily.
Are you surprised watching an egg going into the bottle without any help from external forces? Do you want to learn that magical science trick? Then, let us discuss how this simple science activity worked out very well.
The Science Concepts behind The Egg in a Bottle Experiment
Air is a matter of substance, and hence it contains weight and other assets like density and pressure.
Generally, the air surrounding us or objects does not show any pressure because it surrounds with equal pressure.
But when there is additional pressure in the air, it starts showing its pressure through moving objects by push and pull trials.
In this science activity, we will observe that air shows its pressure when the opportunity is given.
Egg moving into the bottle without touching by external sources proves that air pressure is acting upon it. Let us discuss it in detail.
Before the experiment begins, the pressure of the air surrounding and inside the jar is the same as it is equally distributed.
That means the pressure inside and outside the glass bottle is the same at the beginning of the experiment.
But when we placed the burning paper into the glass bottle, the air inside the jar starts to expand. Because air molecules expand when it gets warmed up, and this is the specific characteristic of air.
And as soon as the egg is placed upon the opening of the glass bottle, the fire goes off, and the air molecules begin to cool down.
As the air molecules cool down, they start contracting themselves by lowering the air pressure inside the glass bottle.
That means there is a difference in the air pressure existing inside and outside the glass bottle.
Because there is less air pressure inside the bottle. The egg slowly squeezes into the bottle as the outside pressure pushes it from outside.
Yes, when the air molecules inside the bottle cool down, it offers more space to welcome additional air molecules.
In this process, the outside air molecules rush into the bottle to fill the spaces. So, it keeps pressure on the egg and helps it slip down into the bottle.
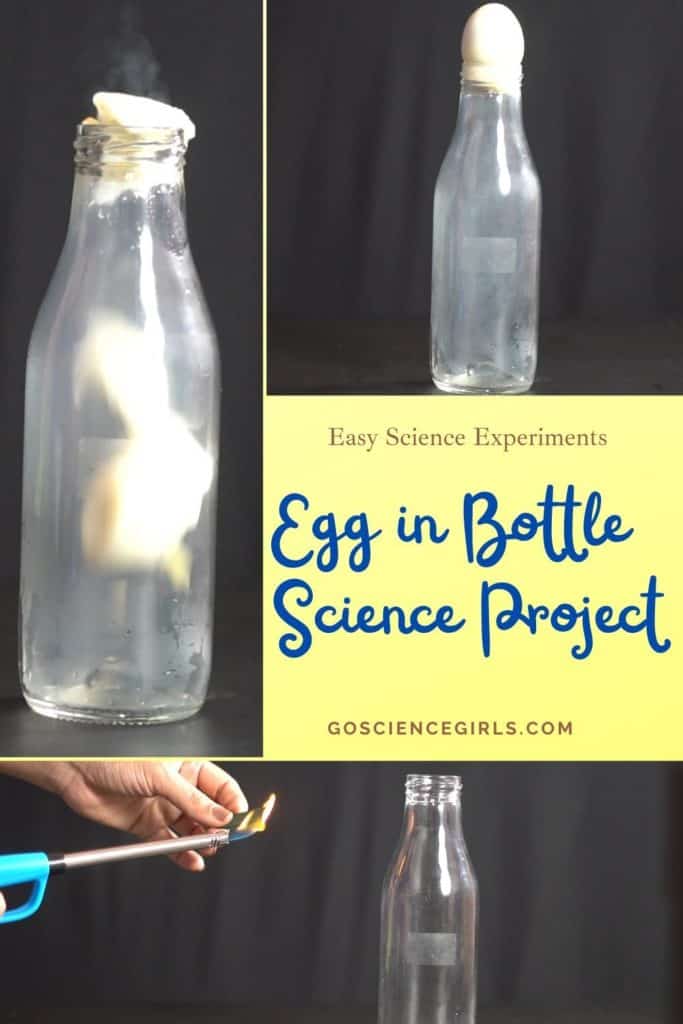
Extension Ideas
You can try out the experiment using other supplies such as boiling water and a balloon.
1) Use boiled water instead of paper inside the bottle and do the experiment
2) Try out using an inflated balloon filled with water in the place of a boiled egg.
Interesting Air Pressure Activities for Kids
Balloon in a Bottle
Crushing Can Experiment
Drip Drop Water Bottle – Science Behind Water Dispenser
Balloon in Hot and Cold Water
Tips to Teacher s
Here are the important questions a teacher can ask to make the students involved completely during the experiment. And to encourage them to participate in revealing and understanding the science behind the experiment.
1) What made an egg move into the bottle without touching it?
2) Why only eggs must be used in this science activity?
3) Are there any other possibilities to change the pressure of the air inside and outside the bottle?
4) Will the egg come out of the bottle again? If Yes, How?
5) What are the properties of air that made the egg move into the bottle?
Safety Measures
As we are dealing with fire, children need to be very careful while performing this activity. It is better to put on their safety guards even though an adult or teacher performs the activity. Adult supervision is a must when a child is performing this activity on his/her own.

Leave a Reply Cancel Reply
Your email address will not be published. Required fields are marked *
Name *
Email *
Add Comment *
Save my name, email, and website in this browser for the next time I comment.
Post Comment
Skip to Main Content

Popular Egg Science Experiments
What You Need for this Experiment:
- Use a paper towel to coat the inside edge of the bottle mouth with a little bit of vegetable oil for lubrication.
- Dip the peeled egg in water
- Set the egg with the small end down in the mouth of the glass bottle. It should be slightly larger than the mouth of the bottle/top of the bottle, so it doesn't fall inside.
- Have an adult light a match to light the end of a strip of paper on fire.
- Lift the egg off of the bottle, drop the paper inside with the flame down, and quickly replace the egg. Watch the egg wiggle a little in the bottle mouth, and then get sucked inside as the bottle cools!
First, the science behind a hard-boiled egg: Egg whites are made of water and proteins.
Proteins are made of long chains of amino acids, but in an egg, the chains are clumped tightly together in individual spheres. (These are called "globular proteins.")
When the egg is heated, the proteins and water molecules begin to move faster. As they move and collide with each other, the individual protein chains start to denature, eventually bonding loosely with other protein chains, forming a network of proteins with water trapped inside. The consistency has changed from runny egg white to a soft solid!
How does this squishy-but-solid egg get mysteriously pushed inside the bottle?
The answer is all about the pressure of the air. When you first set the egg on the bottle, the air pressure inside the bottle matched the air pressure outside, so nothing happened.
When you dropped the burning paper through the neck of the bottle, it caused the air inside to heat up and expand rapidly. That expanding air pushed the egg aside and escaped from the bottle; that's why you saw the egg vibrating.
When the fire consumed all the oxygen inside the bottle, the flame went out and the remaining air in the bottle cooled down. Cool air takes up less space, exerting less pressure inside the bottle. The egg acted as a seal to prevent outside air from getting in to fill the extra space.
The result was an unbalanced force—the force of the air pushing on the egg from outside the bottle was greater than the force of the air pushing up on it from inside the bottle. Voila - the egg was pushed into the bottle!
View this post on Instagram A post shared by Home Science Tools (@homesciencetools)
The pressure inside the bottle must be higher than outside the bottle. To increase the pressure, turn the bottle upside down and tilt it until the small end of the egg is sitting in the mouth.
Now put your mouth close to the bottle and blow, forcing more air into the bottle and raising the pressure inside. When you take your mouth away, the egg should pop out - just be careful it doesn't hit you in the face!
Fizzy Easter Egg Dye
- Hard-boiled eggs
- Food coloring
- Sodium bicarbonate (baking soda)
- Vinegar
- Bowls
- Paintbrushes
- Tongs
- Newspaper or paper towels
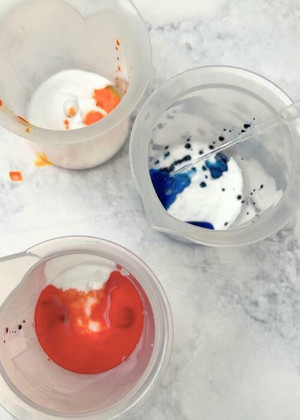
Make a paste of baking soda and water and add a few drops of food coloring. Repeat in separate bowls with as many colors as you’d like.
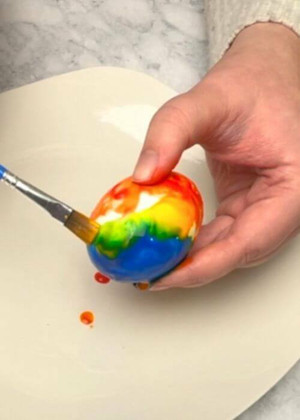
Using a paintbrush, apply the baking soda mixture to a hard-boiled egg (if the mixture is too thick and goopy, add more water, several drops at a time until it has thinned to the right consistency to spread easily). Once your egg is decorated the way you want it, set it in an empty bowl.
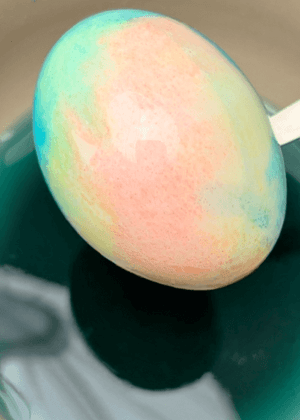
Pour about ½ cup of vinegar directly over each egg and enjoy the colorful, fizzy reaction!
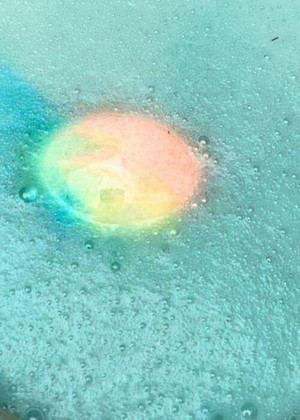
Once the fizz has died down, use tongs to carefully fish your egg out of the liquid and set it on newspapers or a stack of paper towels to dry.
A basic chemical reaction between the baking soda (which is a base) and the vinegar (an acid) is what caused all the fizzing and bubbling! The baking soda made a type of paint when you mixed it with water and food coloring. After the chemical reaction, the baking soda and vinegar were mostly used up, leaving the dye behind on the eggs.

Eggshell Geode Science Project
- Raw eggs
- Water
- 250 ml beakers
- Funnel (optional)
- Plastic cups
- Epsom salt (magnesium sulfate), alum (aluminum potassium sulfate) or other solids commonly used to grow crystals, like Borax (sodium tetraborate), copper sulfate , etc.)
- White school glue and paint brush (for alum crystal geodes only)
- Crack the eggs close to the top of the narrow end. Remove yolk and white.
- Carefully place eggshell under warm running water and peel the membrane from the shell. Be very gentle! This part is tricky and requires much delicacy to avoid breaking the fragile eggshells.
- Once the membrane is removed and the eggshells are rinsed, invert them on a paper towel to dry.
- For alum crystal geodes, paint the inside of the shell with white glue. Then sprinkle with alum powder and let dry.
- To make supersaturated solution, use your microwave to heat 100 ml of water in a 250 ml beaker just until boiling. Remove the beaker using hot pads or heat-resistant leather gloves.
- Stir in your solid (Epsom salt, alum, etc.), one spoonful at a time. Your solution should be clear. Heat it up more if all the solid won’t dissolve.
- Add food coloring and let cool for about 10 minutes.
- Carefully submerge the eggshell. Or set it in a clean empty cup and use the funnel to fill it with the supersaturated solution.
- Leave the eggshell and supersaturated solution undisturbed for several days or longer.
- After a few days, you should start to see crystals forming inside your eggshell. Use a spoon to remove it from the solution, or carefully pour the supersaturated solution out of the eggshell.
A crystal is a hard, solid substance made of molecules that bond together in specific patterns to form a shape with straight edges and flat surfaces. If you made more than one type of crystal eggshell geode, you saw that not all crystals have the same shape or size. The site where a crystal begins to grow, called its nucleation site, determines its size: fewer nucleation sites mean larger crystals, and many nucleation sites produce smaller crystals.
A few molecules of magnesium sulfate or aluminum potassium sulfate (or whatever solid you used) found each other in the solution and joined together in a crystal formation. More molecules joined until enough gathered to form a visible crystalline solid. Chemists refer to this as a crystal ‘falling out of’ the solution. If you left these crystals in the solution, they’d continue to grow.
Learn about Fizz, Foam, and Fire! Perform several chemical reactions to identify evidence for chemical change, use clues to describe reactants and products, and determine whether reactions are endothermic or exothermic.
View Details:
Accelerate (3rd-7th grade)
Out of Stock, Expected to Ship: 12/09/2024
Need It Fast? See Delivery Options In Cart.
Encourage nature exploration from a young age with this backpack kit for kids! This starter nature backpack kit comes with age-appropriate tools to help kids get the most out of the outdoors - starting in their own backyards.
In Stock & Ready to Ship

This LED microscope is designed to last a lifetime. It’s easy-to-use, sturdy, and makes the most intricate cell details visible.

Give students a solid chemistry foundation with the hands-on experiments in this complete lab kit! This set has 40+ real science tools and chemicals, 27 engaging experiments, a 46-page manual & safety equipment.
Item ships to the United States only.
This large geode is fun to break open and discover crystals or other interesting mineral deposits inside.

Uncover the science of electricity, including circuits, motors, and more!
Everything you need for test tube experiments! This set contains 6 glass test tubes, a rack, cleaning brush, stoppers, and clamp.
If you are what you eat, what makes up your food? Experiment and learn about the connections between chemistry & nutrition for a meaningful STEM activity.

The solar power kit offers a hands-on exploration on how to harness the amazing power of the sun including using a solar cell, making a solar oven, and creating a parabolic mirror.
We get it. Science can be messy. But Home Science Tools' products and service can handle it.
Our products are durable, reliable, and affordable to take you from the field to the lab to the kitchen. They won't let you down, no matter what they're up against. Whether it's (over)eager young scientists year after year, or rigorous requirements that come once-in-a lifetime.
And if your science inquiry doesn't go as expected, you can expect our customer service team to help. Count on friendly voices at the other end of the phone and expert advice in your inbox. They're not happy until you are.
Bottom line? We guarantee our products and service won't mess up your science study—no matter how messy it gets.
Questions? Get in touch with our Customer Service team.

How to Do the Egg in a Bottle Experiment
“Wow! How did you do that??” As a parent or a teacher, those are some of the best words you can hear. Well, after I love you, of course. And there’s nothing like science to get the kids intrigued and wondering how something works. That’s why we HAD to do the classic Egg in a Bottle Experiment . An egg, some fire, and you’ve got a really cool bottle trick on your hands! And some fascinated kids ready to learn.
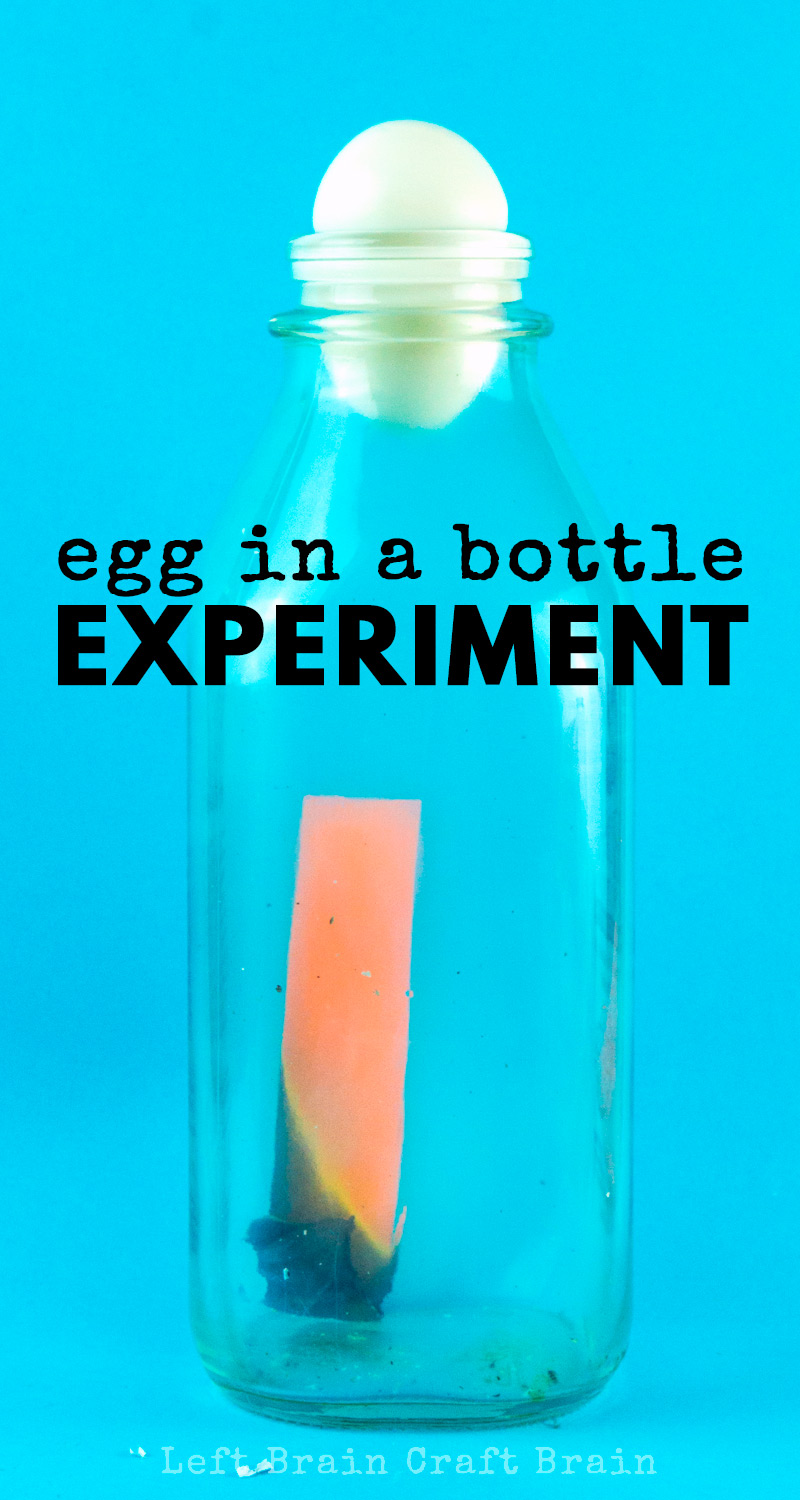
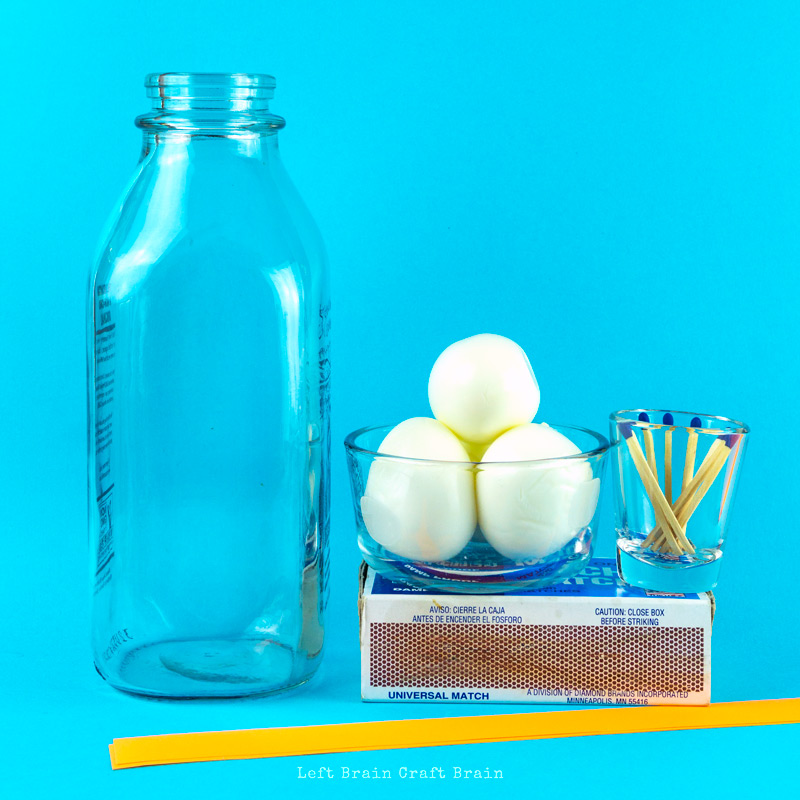
Egg in a Bottle Experiment Supplies Needed
- Hard-boiled egg, peeled (be sure to have a few because you’ll want to see this again!)
- 1-quart glass milk bottle or another glass bottle with a mouth smaller than the egg
- Matches or lighter
SAFETY FIRST!
This egg in a bottle trick is best done as a demonstration by adults. Children should never use matches or a lighter. Have the adult complete the part of this experiment that deals with lighting the matches and burning the paper. Always keep matches and lighters out of the reach of children. Also, keep a fire extinguisher nearby in case of emergency.
- Cut a strip of paper 6-8″ long and 3/4″ wide. The paper should be narrow enough to easily fit in the bottle and long enough that it ends below the top of the bottle when placed fully inside.
- Get your eggs ready, peeled, and nearby.
- Light the piece of paper and drop it into the bottle.
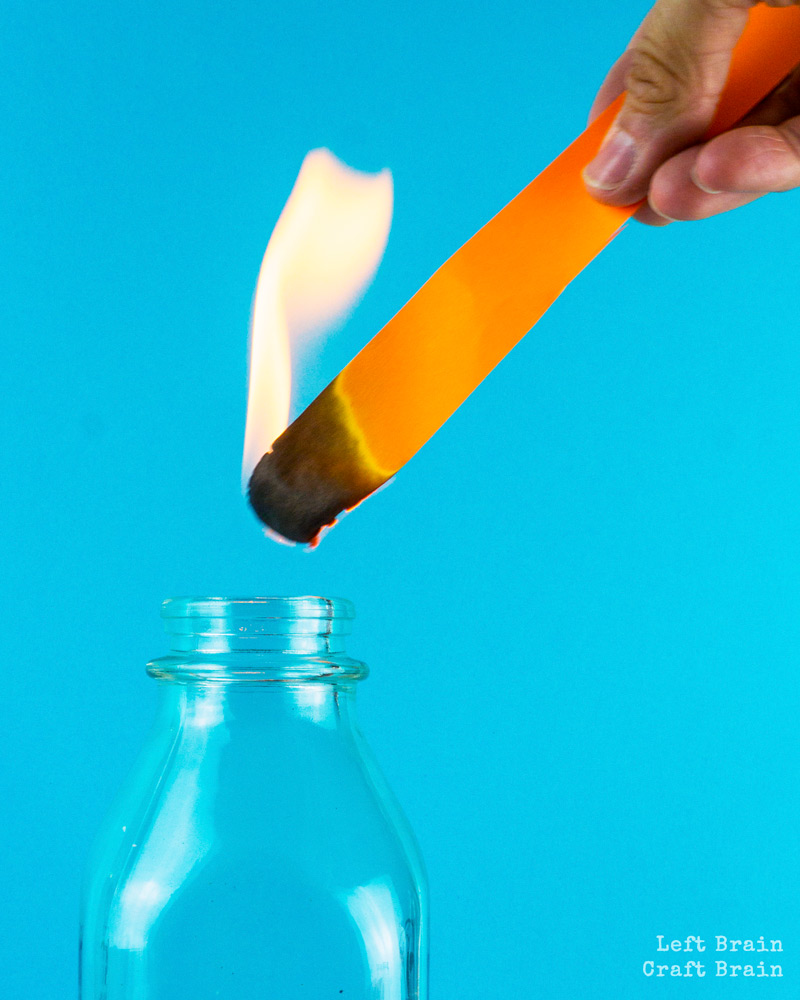
- Quickly place the hard-boiled egg on top of the mouth of the bottle.
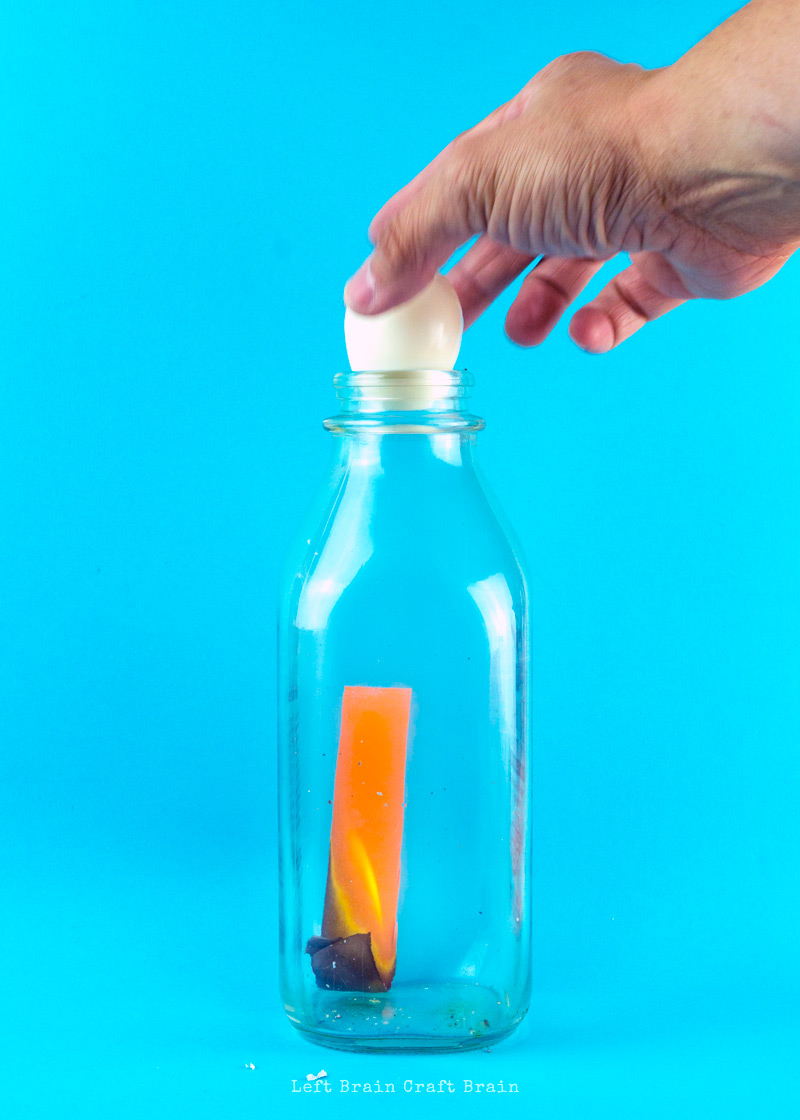
- Watch it pop inside the bottle!
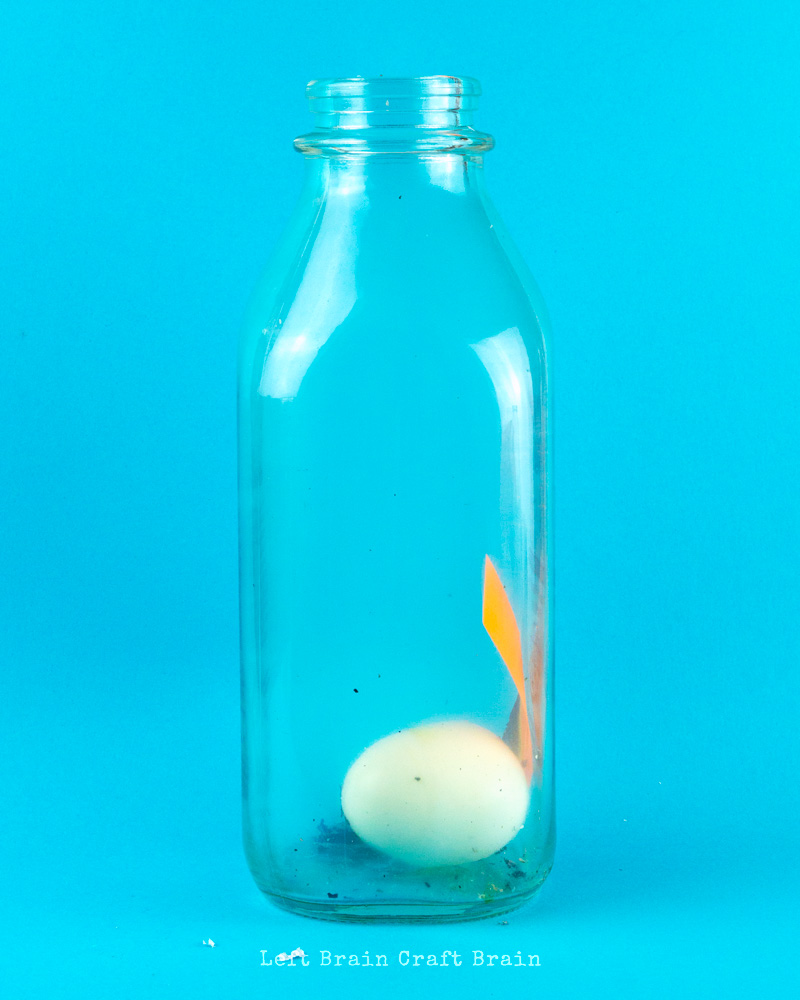
Let’s watch the experiment in action in this video…
How Did the Egg Get Sucked Into the Bottle?
This is a classic science experiment that demonstrates the power of pressure. It looks like the egg is getting sucked into the bottle. But, as my 9th-grade science teacher Mrs. Grimm drilled into our heads, there’s actually no such thing as suction. It’s just high pressure winning over low pressure. And air pressure follows something called the Ideal Gas Law.
Pressure * Volume = number of moles * R (gas constant) * Temperature
This is a cool way of remembering that when the temperature goes up, the pressure goes up, too in a fixed environment like a milk bottle. And vice versa.
So what’s happening in the experiment? When you start, the air pressure inside the bottle and the air pressure outside the bottle are equal, and the egg can’t move. But, as the paper burns inside the bottle, the temperature goes up, causing the pressure to go up. After you place the egg on the bottle top, it seals up the bottle a bit, but still allows the high pressure to force the air out of the bottle. This is why you may get to see the egg do a little jiggle on top. But, when all the air is forced out of the bottle, the burning paper runs out of oxygen and can’t burn anymore. So the flame goes out. And as you can guess, when the flame goes out, the bottle cooled and the air temperature goes down. And, so does the pressure. Suddenly, the pressure on the outside of the bottle is higher than the pressure on the inside of the bottle. And POP! In goes the egg. Because high pressure won over low pressure and air pushed the egg into the bottle.
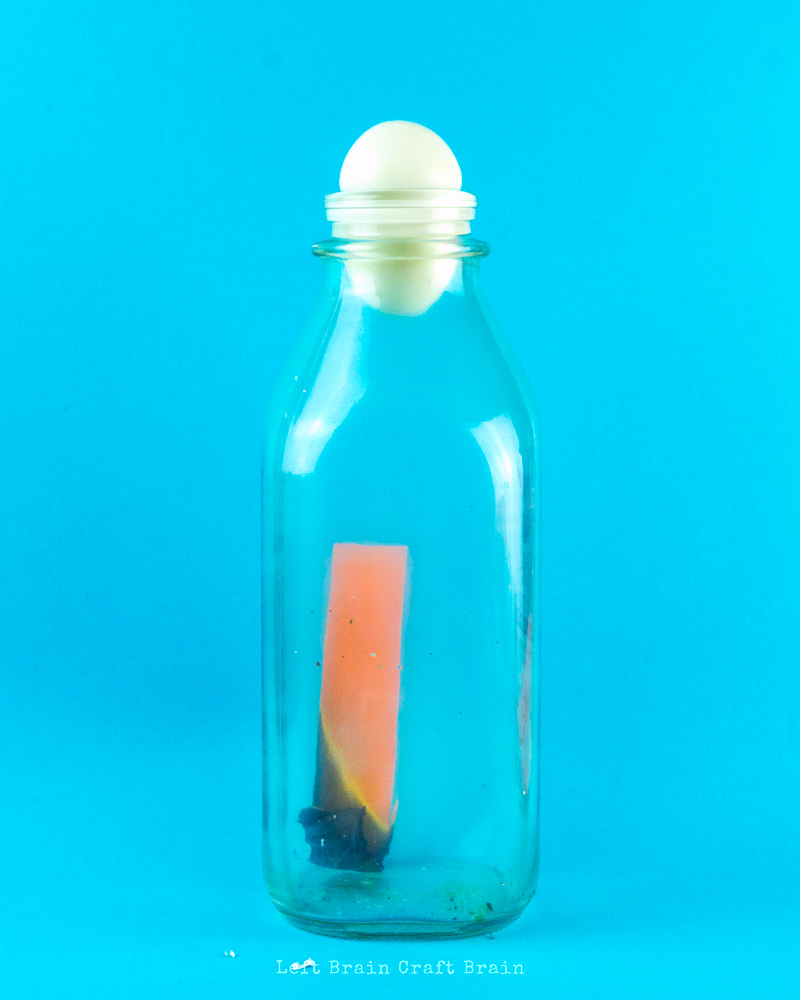
How to Remove the Egg from the Bottle
Here’s your challenge after the experiment. How do you get the egg out of the bottle? It’s a great time for experimenting! You just have to figure out how to make high pressure win over low pressure again. Basically, get the pressure in the bottle high enough that it can push the egg out. Good luck. I tried blowing in there with a straw-like I heard would work. No joy. But I’m guessing that’s why there are no pictures of getting eggs out of the bottle on the web… So first experiment, then grab a fork, break it up, and pop the bottle in the dishwasher instead…
More Science Fun for Kids
Explore the entire house with this fun At-Home Science Scavenger Hunt .
Or check out this mega list of 25+ Easy and Awesome Science Projects for Kids!
Love Kitchen Science? You'll love STEAM Kids in the Kitchen!
Looking for some more STEAM inspiration that use can use right now? Instant gratification style? Check out STEAM Kids in the Kitchen: Hands-on Science, Technology, Engineering, Art, & Math Hands-On Recipes and Activities for Kids ebook ! It’s packed full of 70+ Bring STEAM learning fun into the kitchen with these hands-on activities and recipes. Learn what makes bread rise, colors change, and how to make an epic pudding model of the Earth.
15 thoughts on “How to Do the Egg in a Bottle Experiment”
Pingback: How to Do the Egg in a Bottle Experiment • Little Genius International Kindergarten and Educational Center
Pingback: 25 6th Grade Science Projects That Will Wow Your Students – Education Discussion
Pingback: Genius Egg Experiments and STEM Projects For All Young Scientists
Pingback: 45 Best Sixth Grade Science Experiments, Projects, and Activities | atmhaber.com
Pingback: 45 6th Grade Science Projects That Will Wow Your Students - US Clock News
Pingback: 45 Best Sixth Grade Science Experiments, Projects, and Activities – E-Capitals
Pingback: 45 Best Sixth Grade Science Experiments, Projects, and Activities – I-Capitals
Pingback: 45 Best Sixth Grade Science Experiments, Projects, and Activities – Usae
Pingback: 45 Best Sixth Grade Science Experiments, Projects, and Activities - YoursBulletin
Pingback: 60 Easy Science Experiments Using Materials You Already Have On Hand | atmhaber.com
Pingback: 60 Easy Science Experiments Using Materials You Already Have On Hand - US Clock News
Pingback: 60 Easy Science Experiments Using Materials You Already Have On Hand – E-Capitals
Pingback: 60 Easy Science Experiments Using Materials You Already Have On Hand – I-Capitals
Pingback: 60 Easy Science Experiments Using Materials You Already Have On Hand - Edulogg
Pingback: 60 Easy Science Experiments Using Materials You Already Have On Hand - Country Highlights
Comments are closed.
Get a FREE! rainbow-inspired STEAM activity ebook filled with hands-on projects, printables, and recipes.
Simply fill out the form below to have this 48-page resource emailed to you! It’s a $25 value!
For this experiment you will need:
• a hard-boiled egg � a glass bottle with a mouth just slightly smaller than the egg (a fruit-drink bottle works well) • a 8-cm by 8-cm (3-inch by 3-inch) piece of newspaper � a match
Remove the shell from the egg. Set the egg on the mouth of the bottle to see that the egg does not fit through the mouth.
Fold the piece of newspaper into a strip that can be dropped into the bottle, about 1 cm by 8 cm.
Light the match and use it to ignite the folded strip of paper. Remove the egg from the mouth of the bottle and drop the burning strip of paper into the bottle. Before the fire goes out, set the egg back onto the mouth of the bottle. Within a few seconds the egg will squeeze through the mouth and into the bottle.
As it entered the bottle, the egg may have broken into pieces. This happens when the diameter of the egg is more than about 0.5 cm (about 3/16 inch) larger than the diameter of the bottle's opening. A medium or small egg may be small enough to enter the bottle without breaking. Also, rubbing some cooking oil onto the mouth of the bottle will make it easier for the egg to slide into the bottle without breaking.
A similar effect can be produced using a water-filled balloon in place of an egg. Just pour water into a round balloon to fill it without stretching it, then tie it shut. When the filled balloon is the size of an egg, it can be used in the same way as the hard-boiled egg.
Why does the egg slide into the bottle, even though no one is pushing it? Because the pressure of the air is pushing it. Before the burning paper was put into the bottle, the pressure of the air inside the bottle was the same as outside the bottle. The burning paper, however, heats the air inside the bottle. This causes the air inside to expand. When the egg is placed on top of the bottle, it seals the bottle, and the fire eventually goes out. When the fire goes out, the air inside the bottle cools. As it cools, the air contracts, and the pressure of the air inside the bottle becomes less than the pressure outside. Then, the higher outside pressure pushes the egg into the bottle!
Many years ago, milk came from the diary in glass bottle with a mouth just the perfect size for this experiment. Such bottles are now rare, but can still sometimes be found in antique shops. Reproduction milk bottles are also available from Educational Innovations .
Read a Doonesbury comic strip featuring this experiment!
Curious about the cornstarch experiment referenced in the comic? Check it out!
Playing With Rain
Explore the World Around You
in Instagram Feed · Kids Science Experiments · Weather Science
Egg In a Bottle Experiment
Share with your friends!
Have you ever tried to fit a peeled hard-boiled egg into a narrow neck bottle!? Chances are if you try, you will notice the egg is too big to fit into the bottle unless you use this super cool trick we learn about in this Egg In a Bottle Experiment!
Find more Egg Experiments For Kids here!
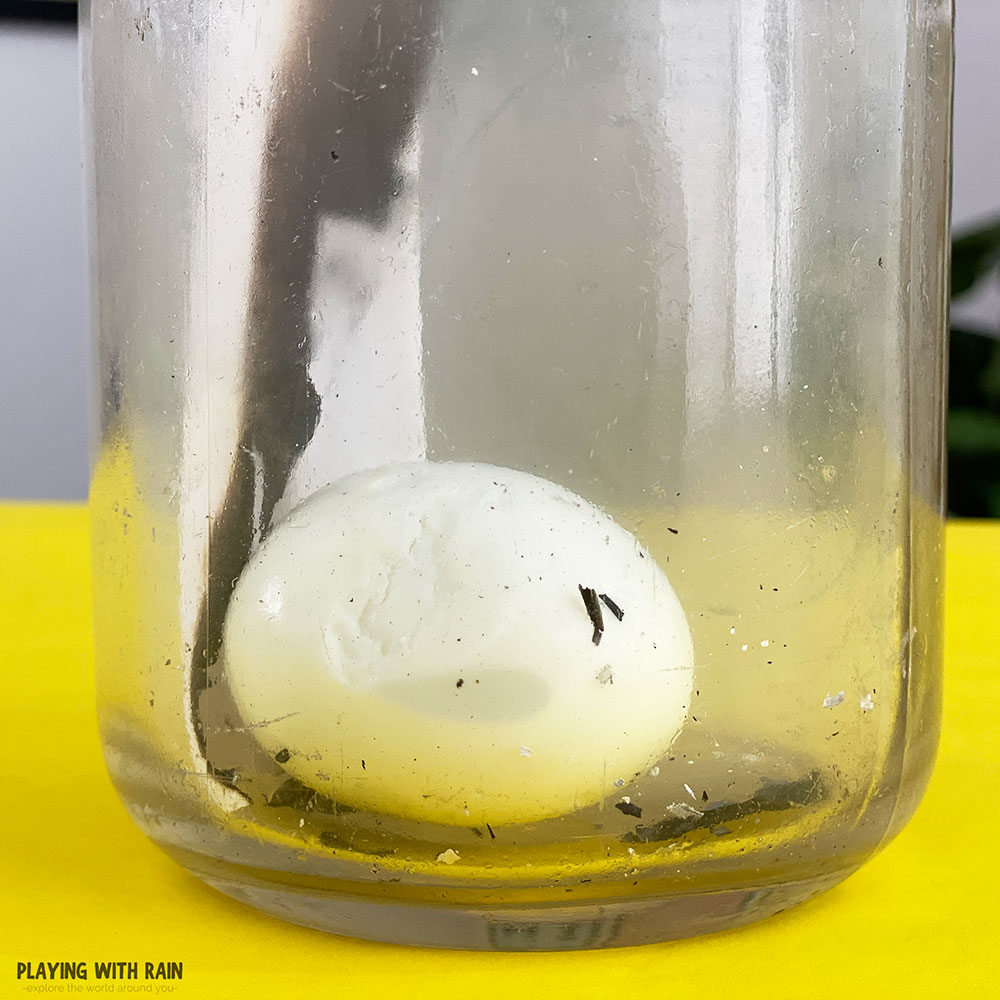
Watching an egg get squeezed and sucked into a bottle is a fun and fascinating way for kids to learn about the power of air pressure!
Table of Contents
This post may contain affiliate links. As an Amazon Associate, I earn from qualifying purchases.
Supplies Needed:
- Narrow Neck Bottle or Vase
- Piece of Paper
- Lighter or Matches
- Hard-Boiled Egg
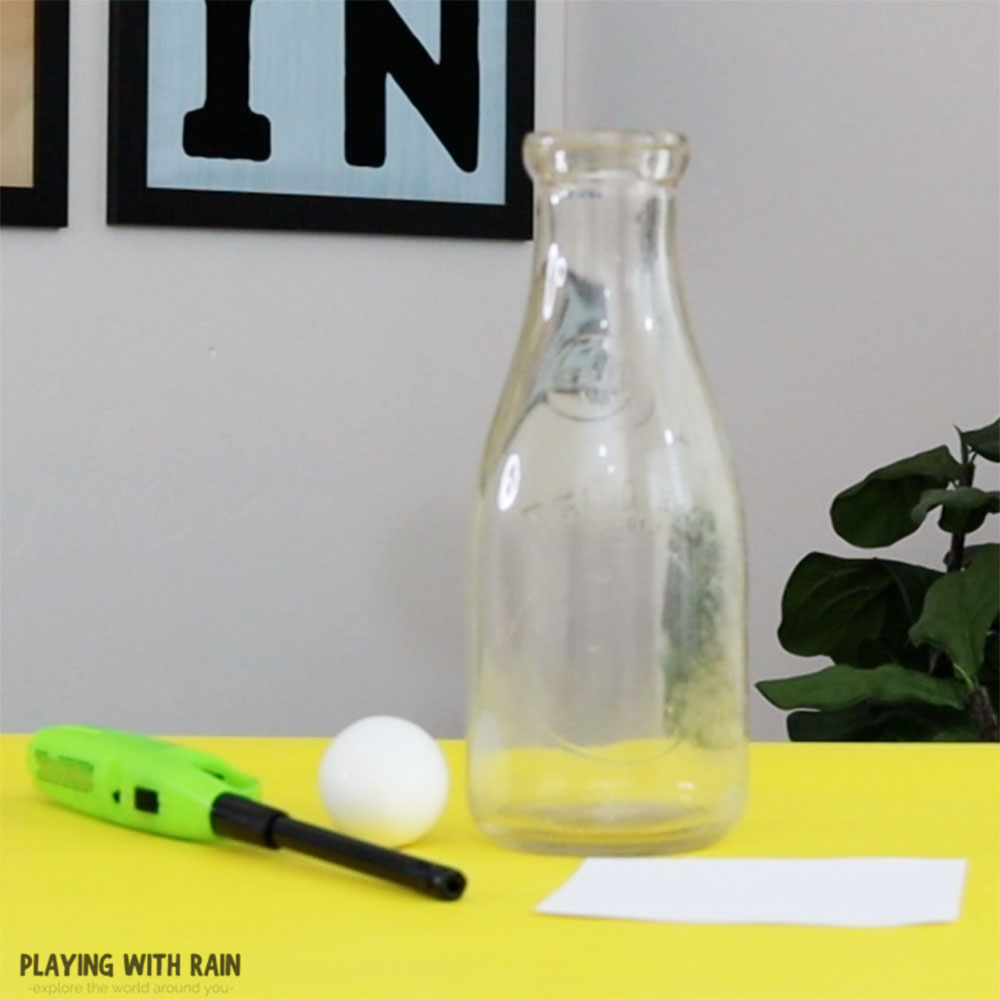
Hard-Boiled Egg in a Bottle Experiment
- Peel a hard-boiled egg.
- Try get the egg inside a narrow neck glass bottle.
- Fold or roll up a small piece of paper.
- Have a adult light the paper on fire.
- Drop the paper into a narrow-neck glass bottle.
- Place the egg on top of the bottle and wait for it to get pulled into the bottle!
Step 1: Remove The Shell From a Hard-Boiled Egg
To get started with this fun egg experiment, you will need to boil an egg first. You might as well boil a few eggs at the same time to enjoy a little snack along with this experiment too!
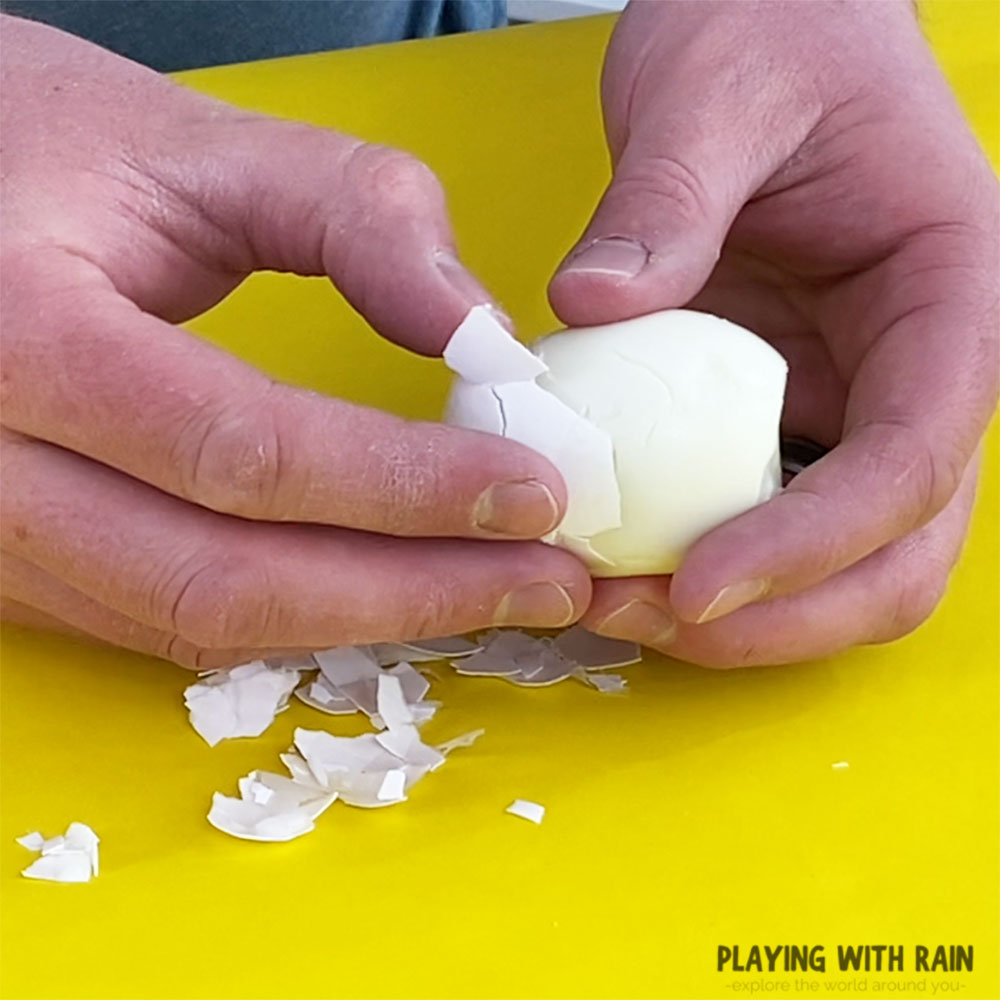
Once the egg has been boiled and cooled, go ahead and crack the shell and peel the shell off.
Step 2: Try To Get The Egg into a Narrow-Mouthed Bottle
Grab your freshly peeled and boiled egg and drop it inside a narrow necked glass bottle. Sounds easy right!? You will soon find out that it’s not easy at all if the opening of your bottle has a smaller diameter than the egg!
You can even try applying a little pressure to get the egg inside the bottle and still, the egg will likely be too large to fit into the bottle.
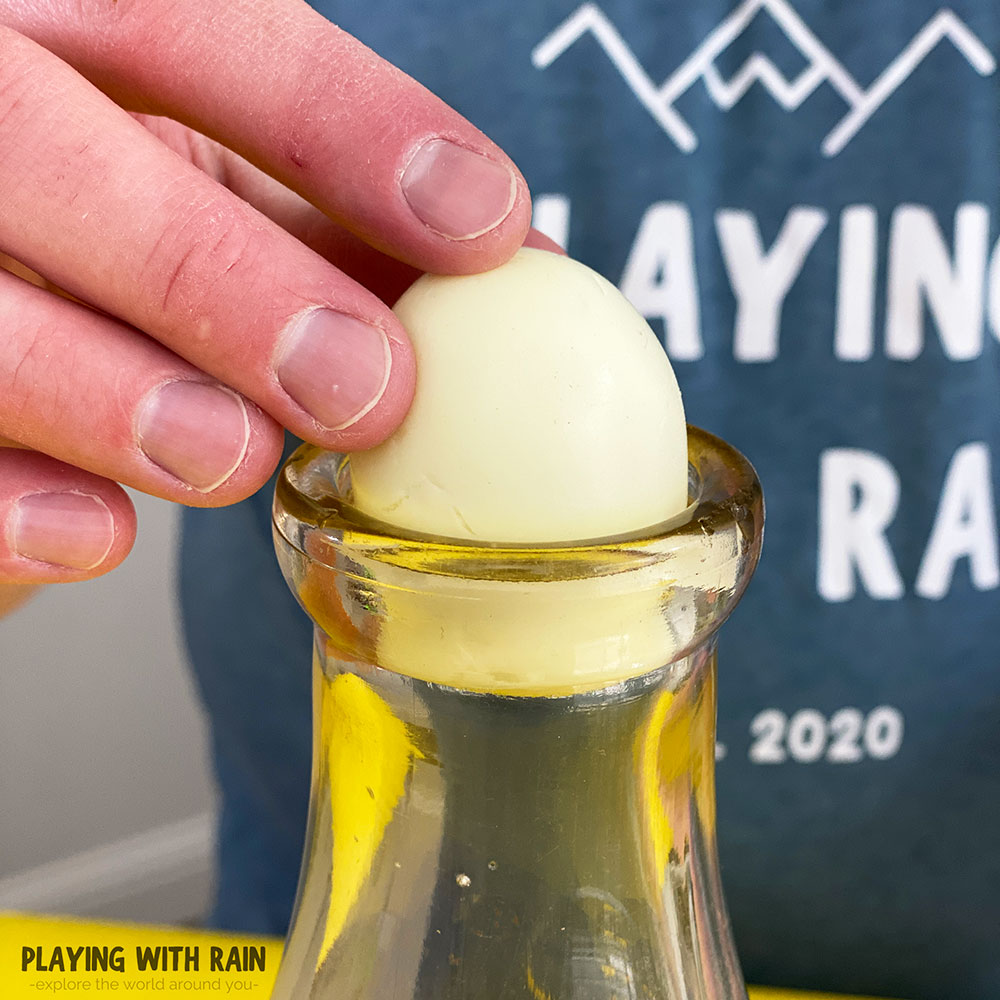
I also like to try pushing the egg in with the more pointy end of the egg into the bottle first and then flip it and try pushing the more rounded end in first…but still no luck getting it in the bottle!
Step 3: Roll Up a Small Paper
Once you realize the egg will not fit into the bottle without intervening with a little magic and science, set the egg down and go grab some paper.
You don’t need a full sheet of paper, you just want to fold up about a half sheet of paper into a size that will fit through the opening in the bottle.
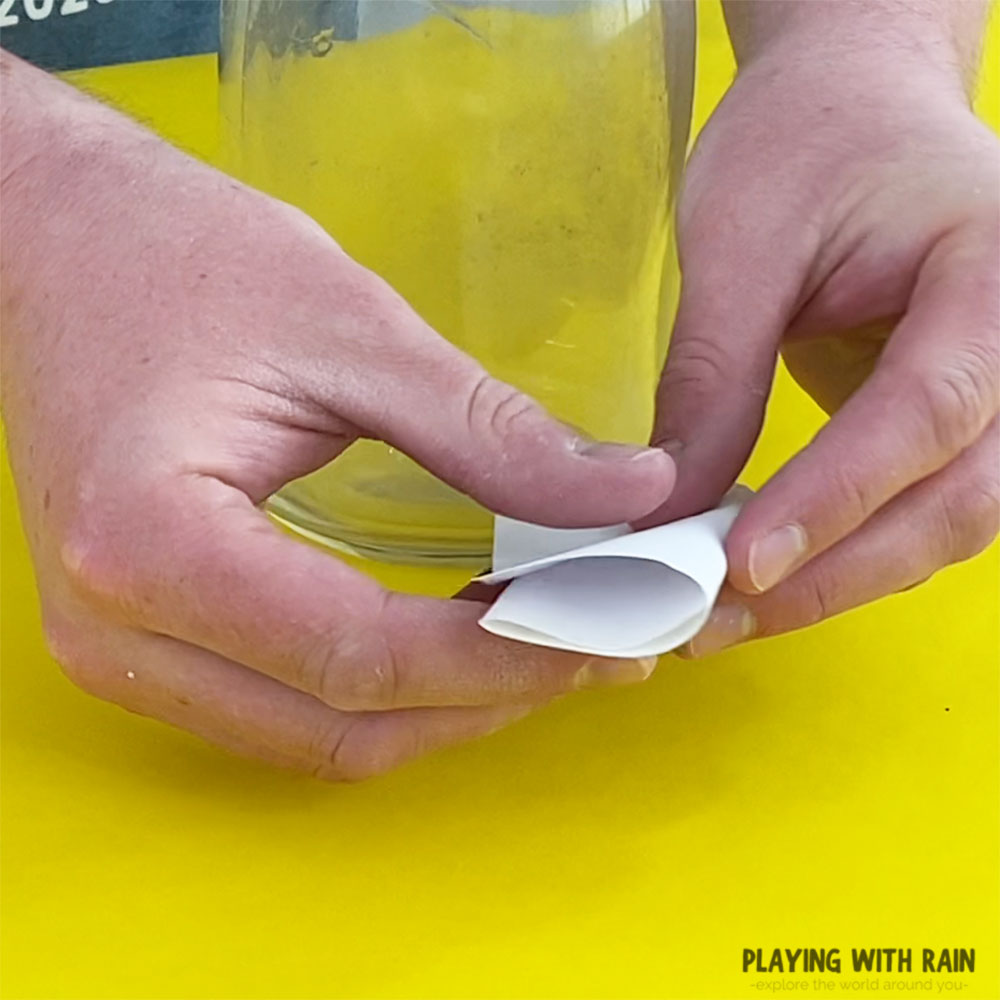
I prefer to roll my paper up so that it is narrow enough to slide into the bottle, but long enough to light one end on fire without burning my hand…yes, we are going to start a fire in the bottle next!
Step 4: Light the Paper on Fire
Using a lighter or matches, and with adult help and supervision, carefully hold one end of the paper while lighting the other end on fire.
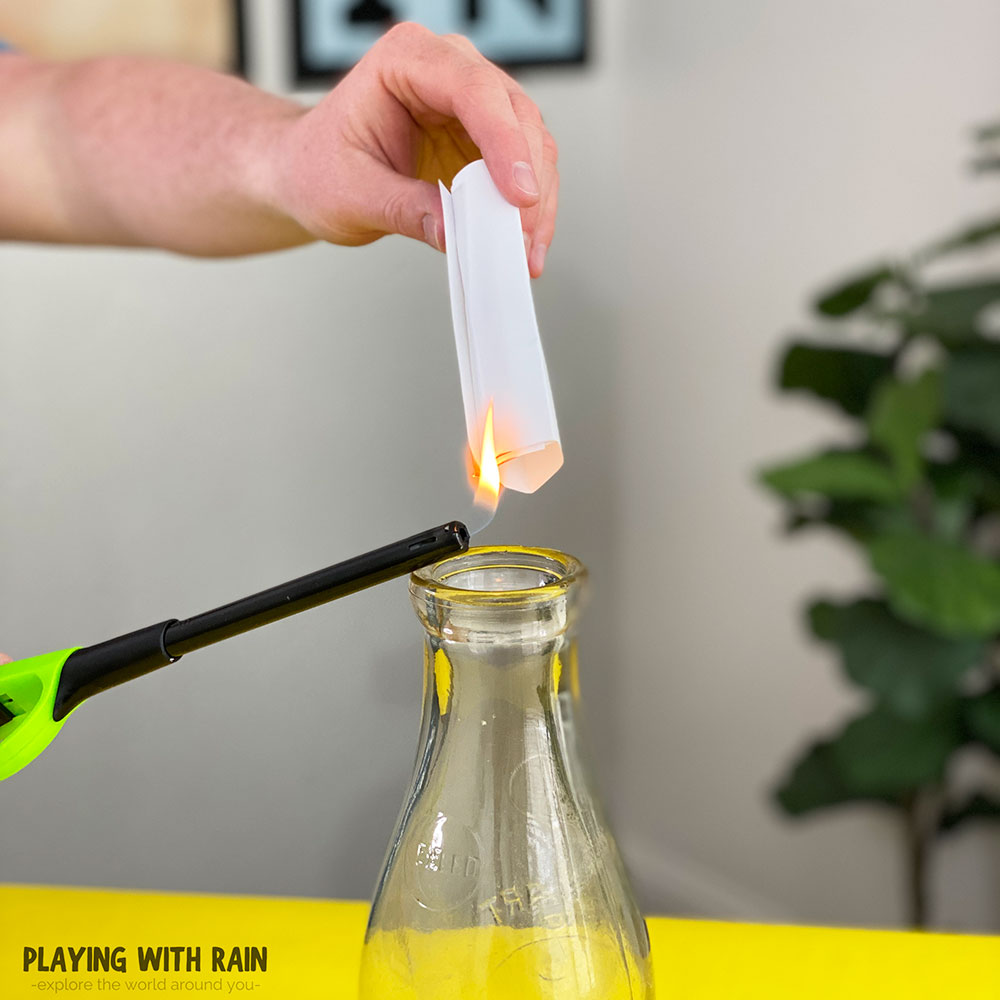
You might even want to wear flame-resistant gloves for extra protection during this step, but you certainly need an adult to do this step, or at least very closely supervise!
You can also try this Egg in an Upside-Down Bottle Trick if you would prefer to use a candle instead of lighting paper on fire!
Step 5: Place the Paper in The Bottle
When your paper has begun to burn, quickly, but carefully drop the burning paper inside the glass bottle.
The paper will continue to burn inside the bottle while heating up the air inside very quickly. This process of quickly heating up the air will play a key factor in the science behind getting the egg inside the bottle in the next step!
Step 6: Set the Egg on Top of the Bottle and Watch it Go Inside!
Now its time to watch some fiery and fascinating science happen right before our eyes! While the paper is still burning inside the bottle, quickly place the hard-boiled egg on the top opening of the bottle.
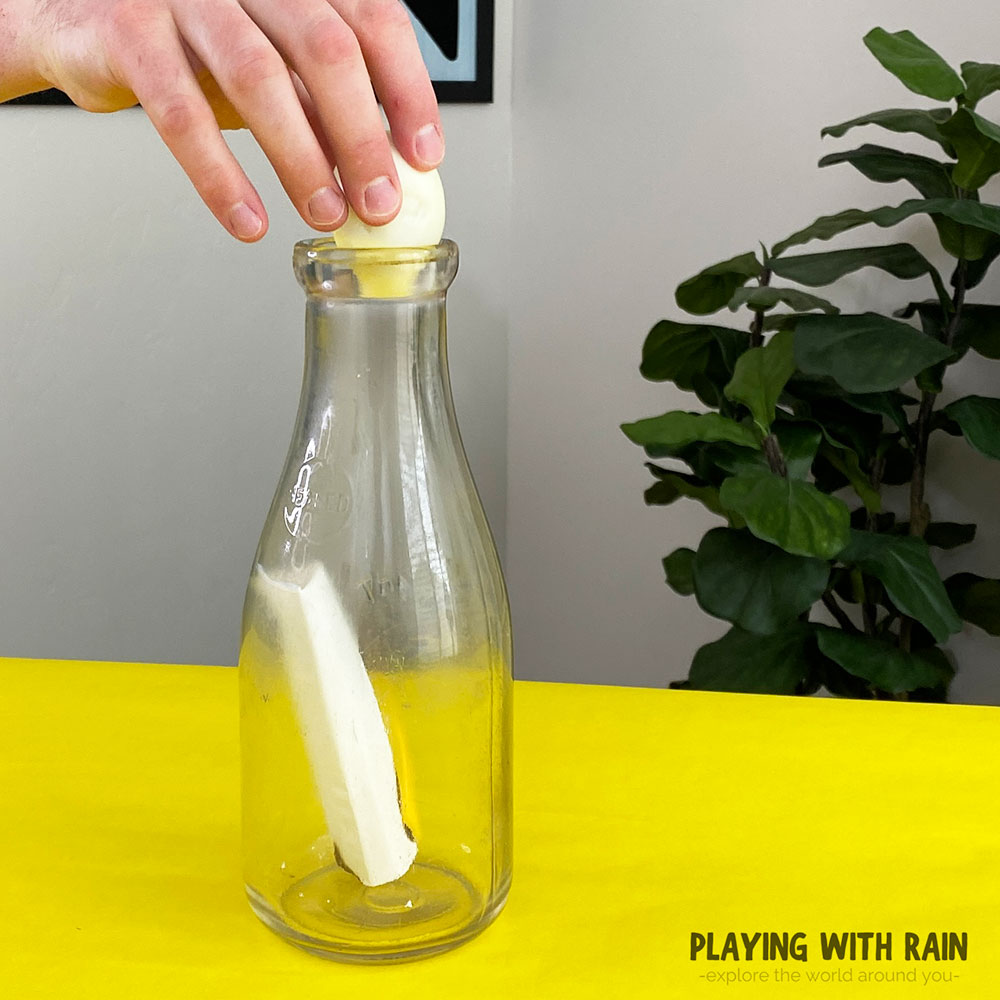
The flame will burn up all the available oxygen inside the bottle and the flame will die out fairly quickly after the egg is set on top of the bottle.
Shortly after the flame goes out you will see the egg slowly start getting pulled into the bottle and then it will suddenly plop right into the bottle!
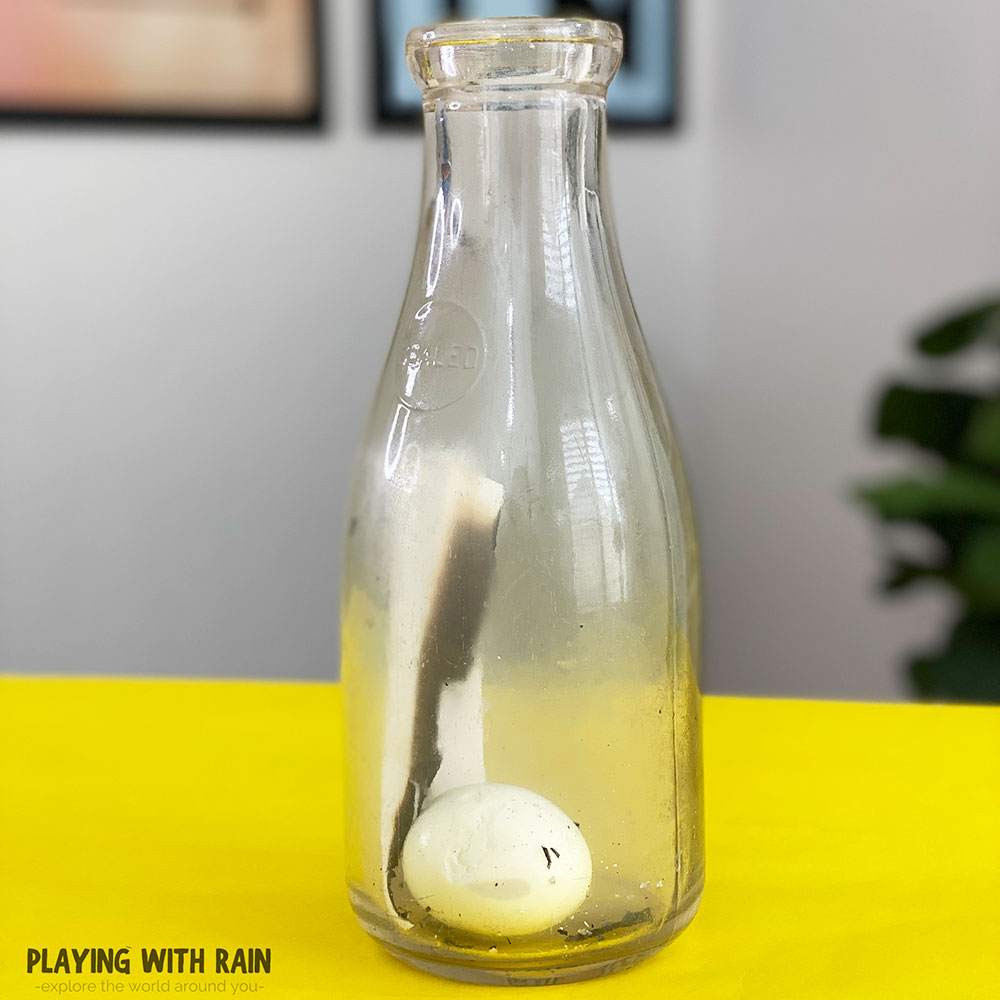
Congratulations! You have just succeeded in using the fascinating force of air pressure to push an egg into a bottle. Now let’s dive into the science behind how this egg in a bottle experiment works!
How Does The Egg in a Bottle Experiment Work?
This egg in a bottle experiment works thanks to the fact that hot air expands and cold air contracts.
As the flame burns inside the bottle and rapidly heats up the air, the air molecules bounce around quickly and the air pressure inside the bottle because greater than the air pressure outside of the bottle.
When the egg is placed on top of the bottle, it cuts off the oxygen supply to the flame. Fire needs oxygen to burn, so the fire quickly burns out.
As the fire goes out the air cools and contracts as the air molecules slow down. This cooling effect decreases the air pressure inside the bottle to a point that the outside air pressure is now greater.
As we have learned in other cool air pressure experiments like this Rising Water Experiment Step by Step , high pressure likes to move towards low pressure.
The higher pressure outside the bottle wants to get inside the lower pressure inside the bottle and actually pushes the egg into the bottle as the air makes its way inside!
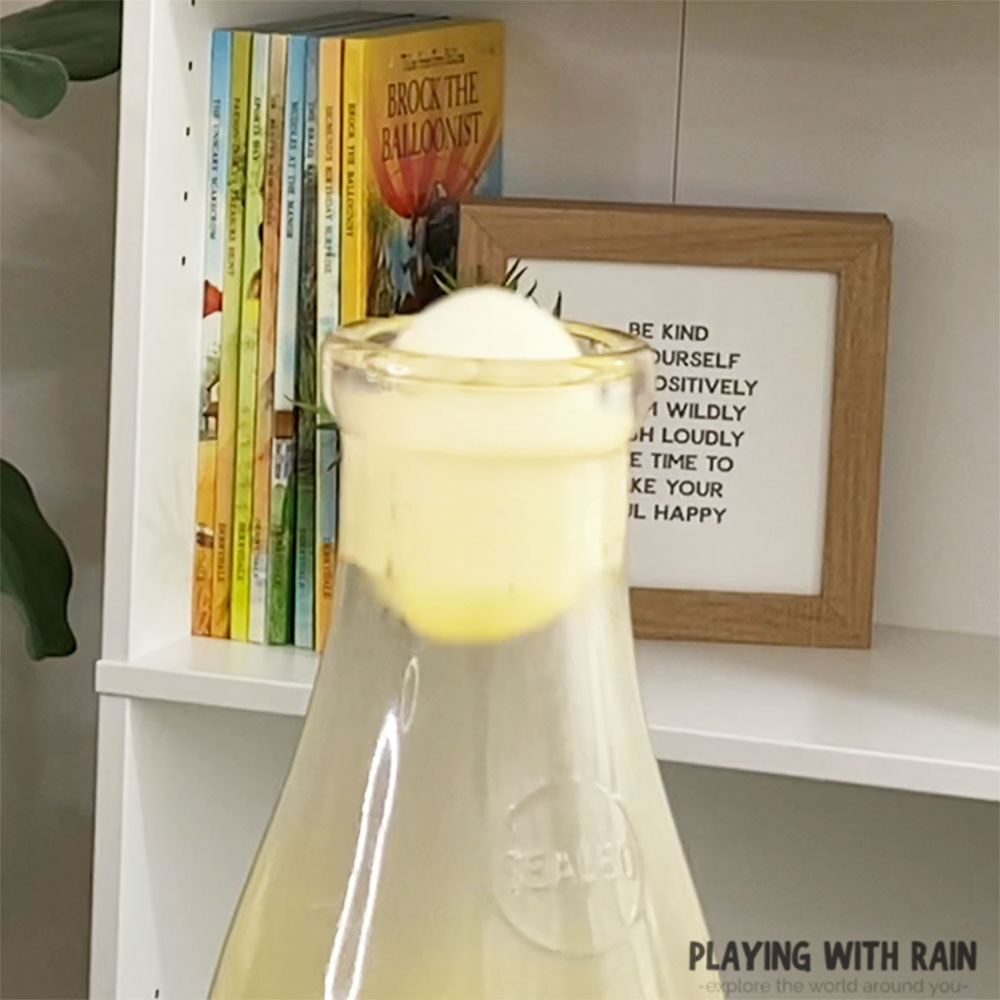
So even though it looks like the egg is “sucked” into the bottle, it is technically pushed into the bottle by the difference of air pressure between the outside of the bottle and the inside.
How to Get an Egg Out of a Bottle
Now that we got the egg into a bottle, how in the world are we going to get the egg back out of the bottle in one piece!?
We are actually going to use the same air pressure trick that we used to get the egg into the bottle to get it out!
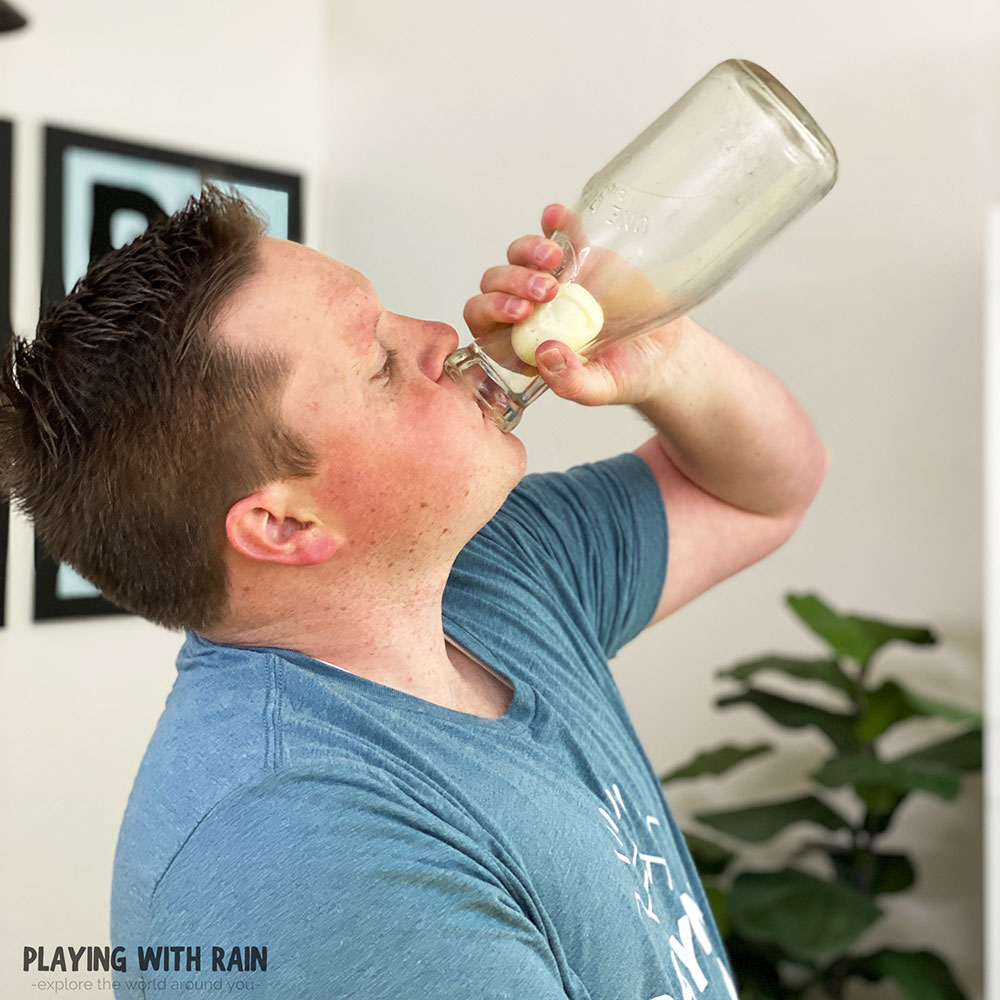
We need to increase the air pressure inside the bottle to a level that is higher than the air pressure outside the bottle. To do this you will need to put your mouth on the bottle opening, tilt the bottle up, and blow into it.
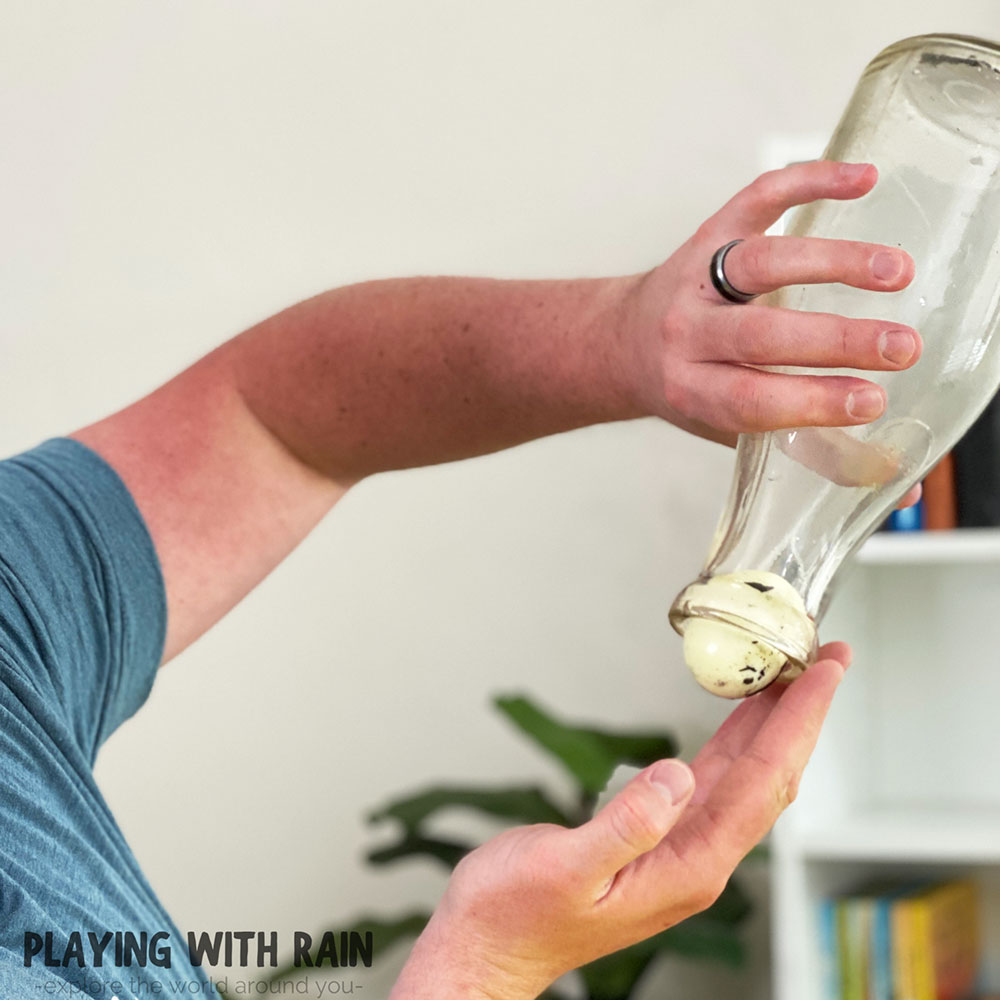
Blowing extra air into the bottle will increase the pressure inside the bottle. When you release your mouth, the higher pressure air on the inside will try to escape to the lower pressure outside and it will push the egg out of the bottle with it!
PIN THIS EXPERIMENT FOR LATER
More Fun Experiments For Kids:
- How To Make A Cloud In A Water Bottle
- Air Pressure Bottle Experiment
- How to Make Instant Snow at Home
Leave a Reply Cancel reply
Your email address will not be published. Required fields are marked *
Save my name, email, and website in this browser for the next time I comment.
MORE ABOUT PLAYING WITH RAIN
LET’S CONNECT
Search for more ideas, create at your own risk.
All content on this blog was created for inspiration and entertainment purposes. Creating anything with the suggested tools, products or methods, is under your own risk!

Reading & Math for K-5
- Kindergarten
- Learning numbers
- Comparing numbers
- Place Value
- Roman numerals
- Subtraction
- Multiplication
- Order of operations
- Drills & practice
- Measurement
- Factoring & prime factors
- Proportions
- Shape & geometry
- Data & graphing
- Word problems
- Children's stories
- Leveled stories
- Sight words
- Sentences & passages
- Context clues
- Cause & effect
- Compare & contrast
- Fact vs. fiction
- Fact vs. opinion
- Main idea & details
- Story elements
- Conclusions & inferences
- Sounds & phonics
- Words & vocabulary
- Reading comprehension
- Early writing
- Numbers & counting
- Simple math
- Social skills
- Other activities
- Dolch sight words
- Fry sight words
- Multiple meaning words
- Prefixes & suffixes
- Vocabulary cards
- Other parts of speech
- Punctuation
- Capitalization
- Narrative writing
- Opinion writing
- Informative writing
- Cursive alphabet
- Cursive letters
- Cursive letter joins
- Cursive words
- Cursive sentences
- Cursive passages
- Grammar & Writing
Breadcrumbs
Egg in a Bottle Science Experiment
The experiment involves placing a hard-boiled egg into a glass bottle without using any physical force or breaking the egg.
Materials you will need
A glass bottle with a narrow neck (such as a milk bottle)
A hard-boiled egg
Matches or a strip of paper
Vinegar (optional)
A lighter (optional)
Methodology
- Begin by hard-boiling an egg and allowing it to cool down completely. Make sure the egg is hard-boiled, as a raw egg could make a mess if it breaks inside the bottle.
- Take the glass bottle and remove any labels or obstructions from the opening. Make sure the bottle is clean and dry.
- If you want to remove the eggshell for a better visual effect, you can soak the egg in vinegar for a day or two. The vinegar will dissolve the shell, leaving the egg covered by a thin membrane. This step is optional but can enhance the experiment.
- Place the peeled hard-boiled egg near the opening of the bottle to ensure that it will fit inside.
- Light a match or a strip of paper and carefully drop it into the bottle. You want to create smoke inside the bottle. Be cautious and make sure not to burn yourself or any surrounding objects. We recommend this is performed by the parent.
- Immediately place the egg on the mouth of the bottle, making sure it covers the entire opening. Take care not to touch the sides of the bottle with the egg.
- Observe what happens. As the smoke inside the bottle cools down, it contracts, creating a partial vacuum. This reduced air pressure inside the bottle will cause the egg to be pushed inside to fill the void. This may take a bit of patience for this to happen, but be careful not to force the egg into the bottle manually.
- Once the egg is inside the bottle, you can tilt the bottle to allow the egg to roll out.
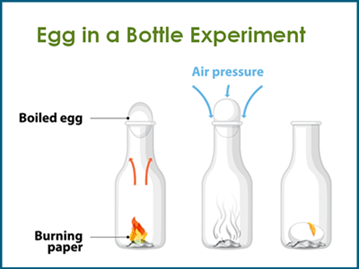
Note: If you don't want to use fire or matches, an alternative method involves heating the air inside the bottle by placing it in a bowl of hot water or using a hairdryer to blow hot air into the bottle. This heating process will create a similar pressure difference, drawing the egg into the bottle.
Remember to exercise caution during the experiment, especially when handling fire or hot objects.
This content is available to members only.
Join K5 to save time, skip ads and access more content. Learn More

IMAGES
VIDEO
COMMENTS
The Egg in a Bottle experiment is a classic science project that demonstrates the principles of air pressure in a fun and visually appealing way. Here are two different methods for performing this project, each highlighting how changing temperature in turn changes air pressure and forces a hard-boiled egg into a bottle.. Egg in a Bottle Experiment Materials
Step 6 - Watch as the egg begins to slowly move into the bottle. If you are lucky the egg will stay in one piece as it moves into the bottle. Or if you are like us, the egg will eventually split as it is squeezed into the mouth of the bottle. Watch the Egg in a Bottle Experiment Video Tutorial to see what happens to our egg.
Just before the experiment, pick fresh and raw eggs and boil them until they turn hard. Probably, this step takes 7-10 minutes. Once boiled, peel off the outer shell part of the boiled egg and wash it under tap water to remove any hard remnants attached to the egg. Then, keep it aside on the experiment table. Simple Step by Step Instructions
These fun egg experiments illustrate science principles in a meaningful way. Try the famous egg in a bottle experiment, make an egg geode, and more! ... First, the science behind a hard-boiled egg: Egg whites are made of water and proteins. Proteins are made of long chains of amino acids, but in an egg, the chains are clumped tightly together ...
Egg in a Bottle Experiment Supplies Needed. Hard-boiled egg, peeled (be sure to have a few because you'll want to see this again!) 1-quart glass milk bottle or another glass bottle with a mouth smaller than the egg; ... Quickly place the hard-boiled egg on top of the mouth of the bottle.
For this experiment you will need: • a hard-boiled egg • a glass bottle with a mouth just slightly smaller than the egg (a fruit-drink bottle works well) • a 8-cm by 8-cm (3-inch by 3-inch) piece of newspaper • a match. Remove the shell from the egg. Set the egg on the mouth of the bottle to see that the egg does not fit through the mouth.
For this experiment, you are demonstrating how air pressure works by sucking a hard-boiled egg into a bottle. Here's what you need for the egg in a bottle experiment: A clear, empty container with a narrow top; Very hot water; Hard-boiled egg (peeled) First, you will boil water. I put 4 cups of water in a Pyrex measuring cup and microwaved it ...
The Egg-cellent Experiment. I know many people use egg cookers or instant pots. And those people rave over their expensive, counter-hogging contraptions. However, I make my hard boiled eggs the old fashioned way—with a pot, water, and my stove. Sometimes, the eggs peel perfectly. Sometimes there is more egg attached to the broken shell pieces ...
Step 1: Remove The Shell From a Hard-Boiled Egg. To get started with this fun egg experiment, you will need to boil an egg first. You might as well boil a few eggs at the same time to enjoy a little snack along with this experiment too! Once the egg has been boiled and cooled, go ahead and crack the shell and peel the shell off.
A hard-boiled egg. Matches or a strip of paper. Vinegar (optional) A lighter (optional) Methodology. Begin by hard-boiling an egg and allowing it to cool down completely. Make sure the egg is hard-boiled, as a raw egg could make a mess if it breaks inside the bottle. Take the glass bottle and remove any labels or obstructions from the opening.