- Skip to primary navigation
- Skip to main content
- Skip to primary sidebar

- FREE Experiments
- Kitchen Science
- Climate Change
- Egg Experiments
- Fairy Tale Science
- Edible Science
- Human Health
- Inspirational Women
- Forces and Motion
- Science Fair Projects
- STEM Challenges
- Science Sparks Books
- Contact Science Sparks
- Science Resources for Home and School

How to Make a Rainbow with a Prism
June 21, 2019 By Emma Vanstone Leave a Comment
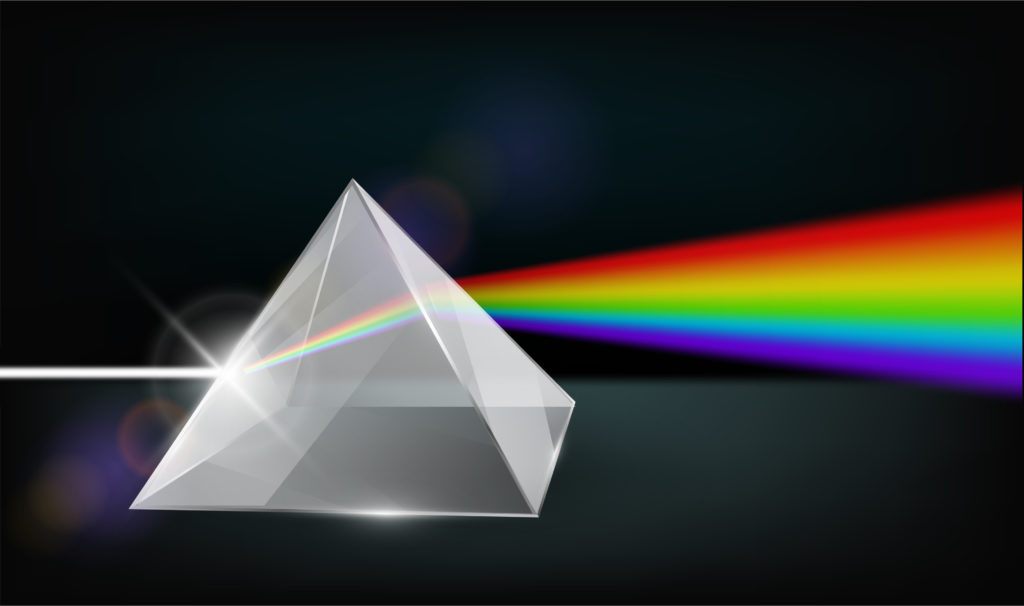
Visible or white light is made up of a range of colours each with a different wavelength . One way to see the different colours is to use a prism to split the light. When white light enters the prism it slows down and changes direction. The amount the light changes depends on the wavelength. Red light changes direction the least and violet the most.
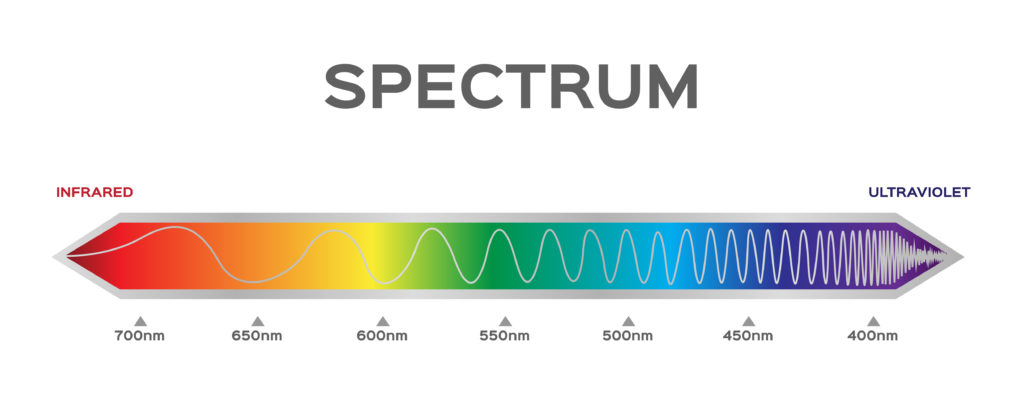
Visible light is the part of the electromagnetic spectrum we can see. Each colour has a range of wavelengths. Red has a long wavelength and low frequency and violet has a short wavelength and high frequency.
What is a prism?
A prism is a triangular block of glass or perspex which splits light into its constituent colours.
When light enters a prism it is refracted. Each colour of the spectrum is refracted by a different amount and the colours are dispersed ( spread out ) allowing you to see them.
A prism is a great way to demonstrate visually that white light is actually made up of 7 different colours.
How to split white light with a prism
What you need to split light
Triangular prism
White cardboard
Large sheet of white paper
Dark coloured cardboard
Tape or glue
Large tray or sheet of thick card
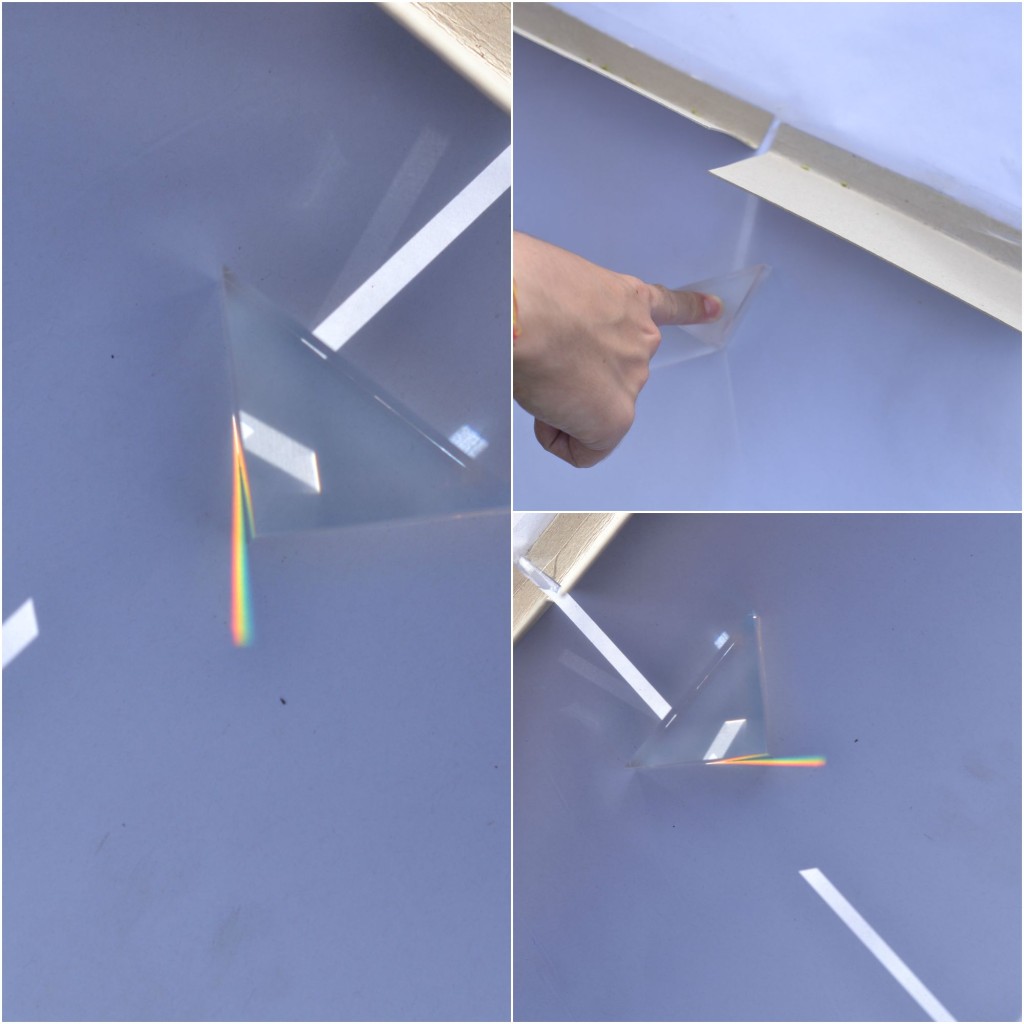
How to use a prism
If it’s not a sunny day, you can use a torch.
Use the dark card to create a slit over a sheet of white card. Place the card so sunlight shines through giving a thin beam of light.
Place the prism over the light and rotate it until you can see the light split into the spectrum of colours.
Why does a prism split light?
White light, which enters the prism, is a mixture of different wavelengths, which get bent ( refracted ) by different amounts though the prism, allowing them to be seen separately.
Facts about light waves
Light travels in straight lines.
It takes 8 minutes and 20 seconds for light to reach Earth from the Sun.
Light waves can travel through a vacuum.
Visible light is a form of electromagnetic radiation.
Light waves are much faster than sound waves.
Wavelengths of the visible spectrum of light range from 400nm ( violet end ) to 700nm (red end ).
More learning activities about light
Find out how to make a rainbow using a hosepipe !
Reverse the direction of arrows with this easy light refraction experiment .
Learn about how light travels in straight lines by making a light maze .

Last Updated on May 7, 2022 by Emma Vanstone
Safety Notice
Science Sparks ( Wild Sparks Enterprises Ltd ) are not liable for the actions of activity of any person who uses the information in this resource or in any of the suggested further resources. Science Sparks assume no liability with regard to injuries or damage to property that may occur as a result of using the information and carrying out the practical activities contained in this resource or in any of the suggested further resources.
These activities are designed to be carried out by children working with a parent, guardian or other appropriate adult. The adult involved is fully responsible for ensuring that the activities are carried out safely.
Reader Interactions
Leave a reply cancel reply.
Your email address will not be published. Required fields are marked *
Get Your ALL ACCESS Shop Pass here →

How To Make A Rainbow With A Prism
Have you ever wondered how rainbows magically appear in the sky after a storm? 🌈 With just a few simple materials, you can create your very own rainbow at home and learn the science behind it!
How to Make a Rainbow
Rainbows are created through a process called refraction . When light passes from one medium to another—like from air into water—it bends, or refracts. As it bends, the light separates into different colors because each color travels at a different wavelength .
Red light has the longest wavelength, which means it bends the least, while violet has the shortest wavelength and bends the most. This separation of light into its component colors is what we see as a rainbow. 🌈
Think about the rainbow in the sky after a storm. When sunlight hits raindrops, the light slows down and bends as it enters the water. As it exits the raindrop, the light is split into the seven colors of the visible spectrum: red, orange, yellow, green, blue, indigo, and violet. You can recreate this process with everyday items to see a rainbow up close!
💡Explore more light activities here.
Grade Level Recommendations:
- Kindergarten – 2nd Grade : Hands-on exploration of light and color, perfect for younger learners to explore and enjoy.
- 3rd – 5th Grade : Dive deeper into light refraction and the science behind rainbows with experiments that encourage critical thinking and observation.
Fun Ways to Make Rainbows at Home
Here are a few exciting ways to create rainbows with materials you probably already have!
YOU WILL NEED :
- White Paper
- Colored Pencils
- Prism or Crystal
- Water and Cup
💡How about garden hoses on a sunny day ? Create a stream of water droplets with your thumb over the opening of a hose on a sunny day, and watch the rainbow appear!
1. CD and Flashlight Rainbow
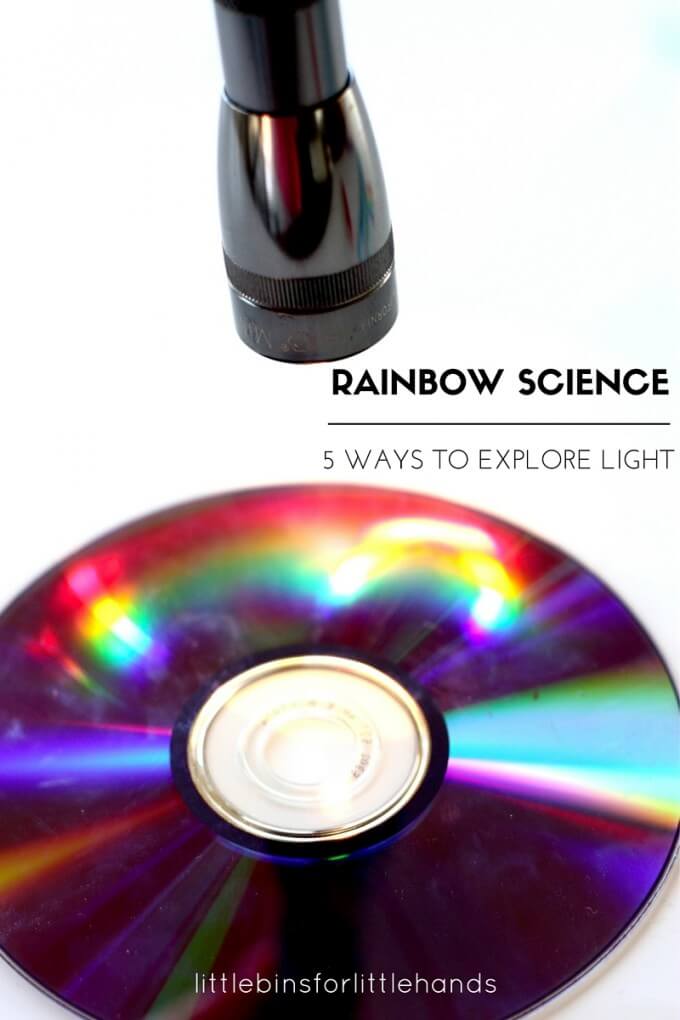
How It Works : Shine a small flashlight onto the surface of a CD. The grooves on the CD act like a prism, splitting the white light into its rainbow colors. Move the flashlight around and watch the colors change!
Science Tip : CDs reflect light, and when light hits the grooves, it refracts and creates the visible spectrum—just like in real rainbows.
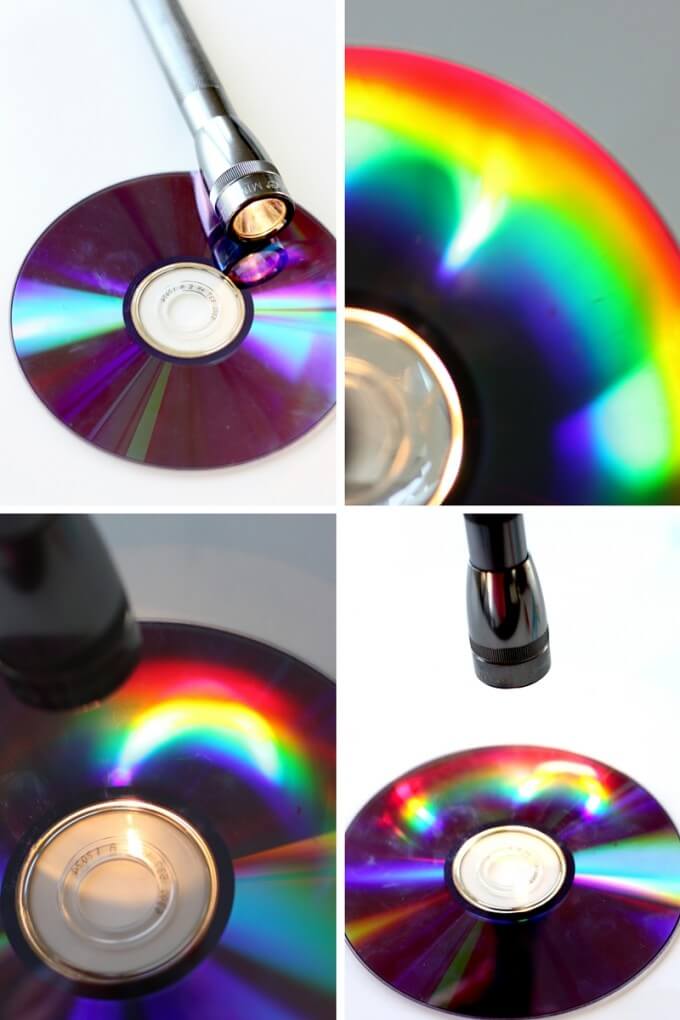
2. Prism Rainbow
How It Works : Use a crystal or prism with sunlight to make rainbows appear all around you. The light bends through the different angles of the prism, splitting into the colorful rainbow spectrum.
Science Tip : A prism works like raindrops in the sky. As light enters the prism, it bends and separates into different colors. The longer the prism, the more vibrant the rainbow!
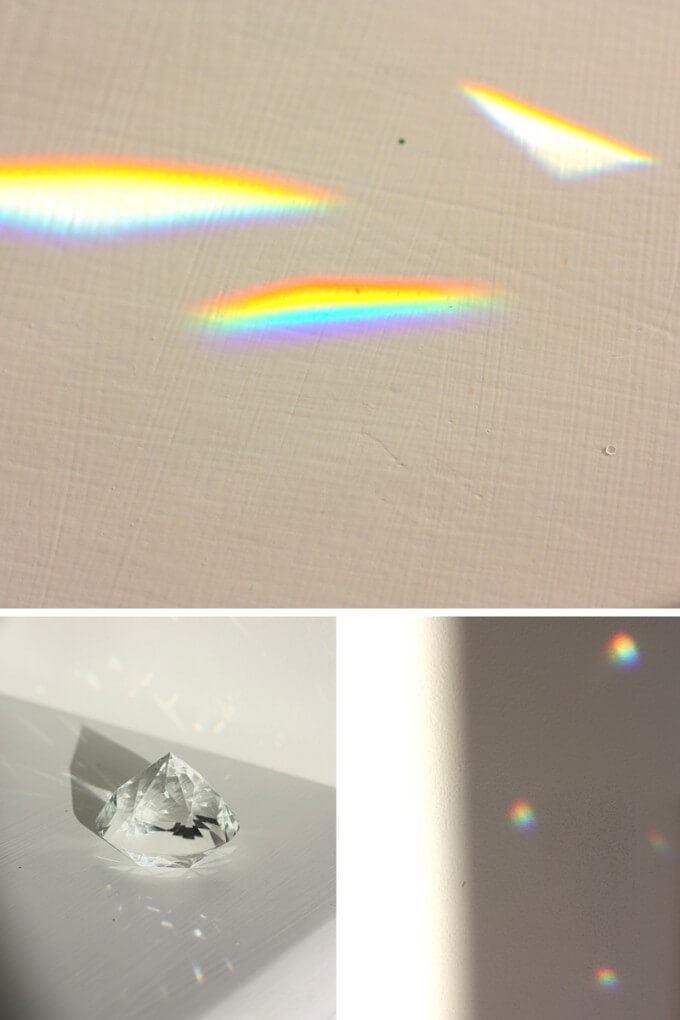
3. Rainbow STEAM Activity (Science + Art)
How It Works : Lay a CD on a blank white piece of paper and use colored pencils to match the colors you see reflected. It’s a fun combination of science and art! What colors of the rainbow can you spot?
Science Tip : Different angles of light create different hues! Try moving the CD and flashlight to see how the rainbow changes.
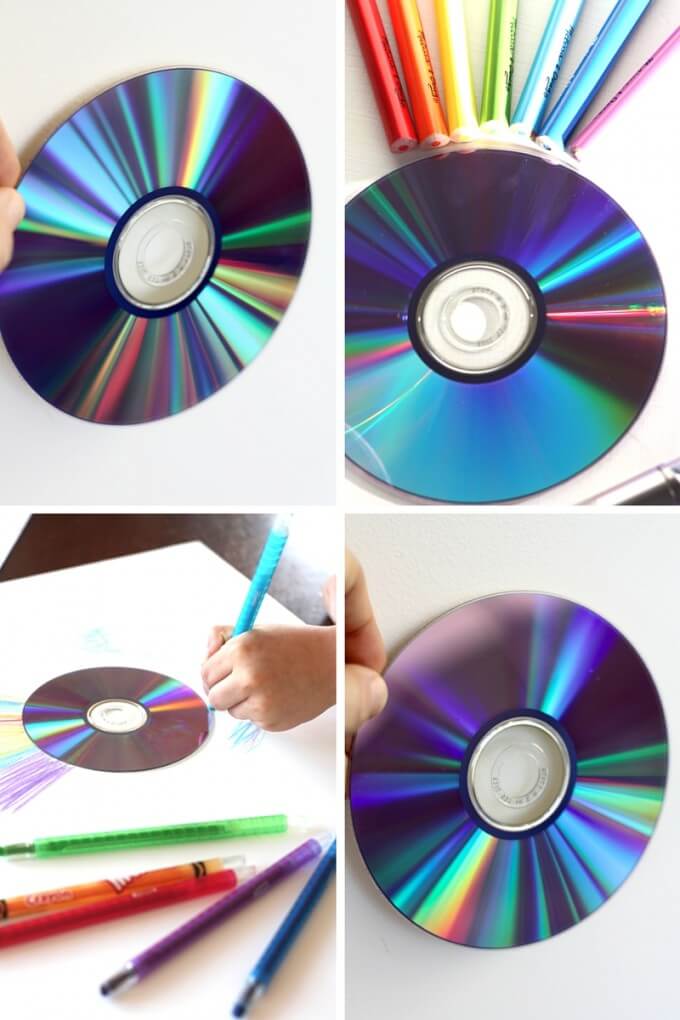
4. Crystal and CD Rainbow Combo
How It Works : Combine the CD and prism to make even more vibrant rainbows! Shine the flashlight through the crystal onto the CD and watch the rainbow dance across the room.
Science Tip : Light travels at different speeds through different materials, which causes it to bend. This bending is called refraction, and that’s how we see rainbows!
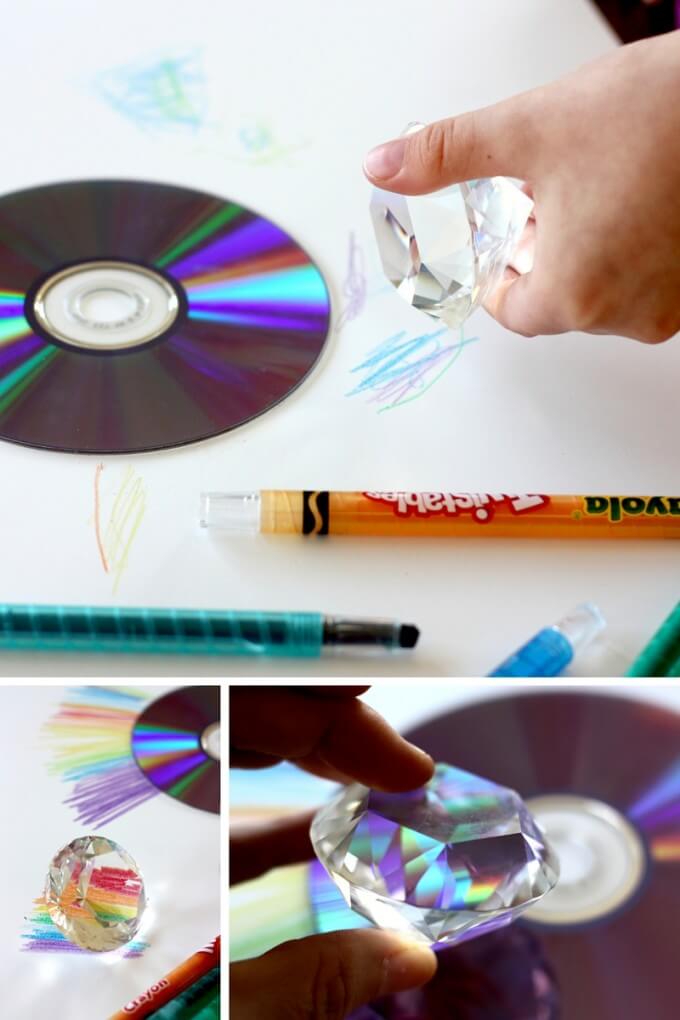
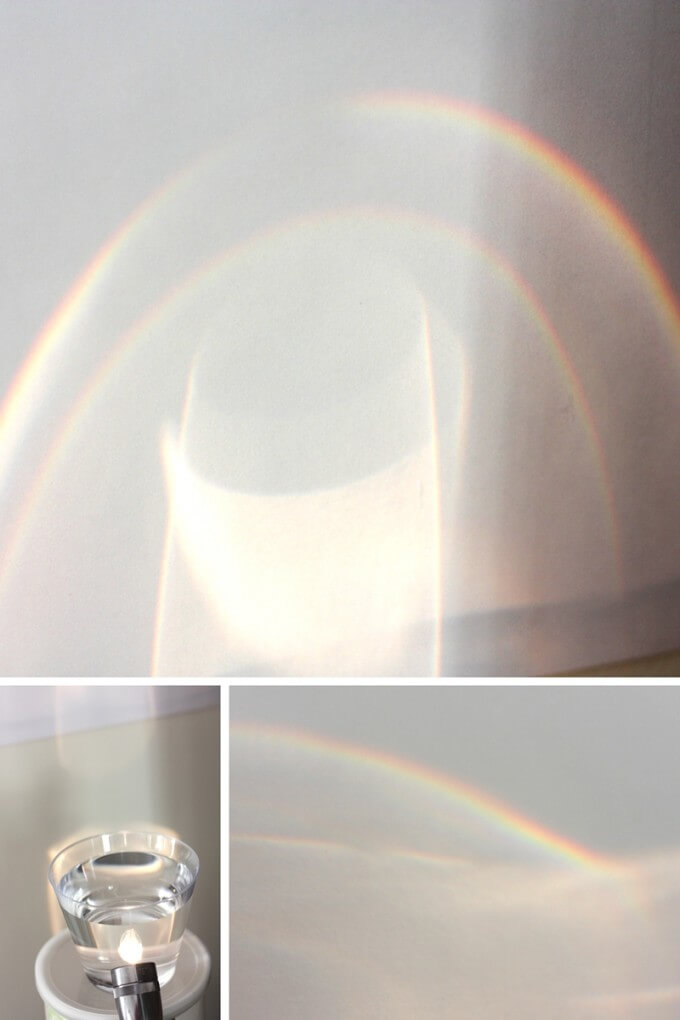
5. Flashlight, Water, and Paper Rainbow
How It Works : Fill a clear cup with water, place it on top of a box, and shine a flashlight into the water. Hold a piece of white paper nearby and watch as a rainbow appears on the paper. Try changing the angles of the light to create different effects.
Science Tip : As light moves from air to water, it slows down and bends, creating a rainbow. You’re recreating the same effect that happens in raindrops after a storm!
6. Explore Light Science with Flashlights
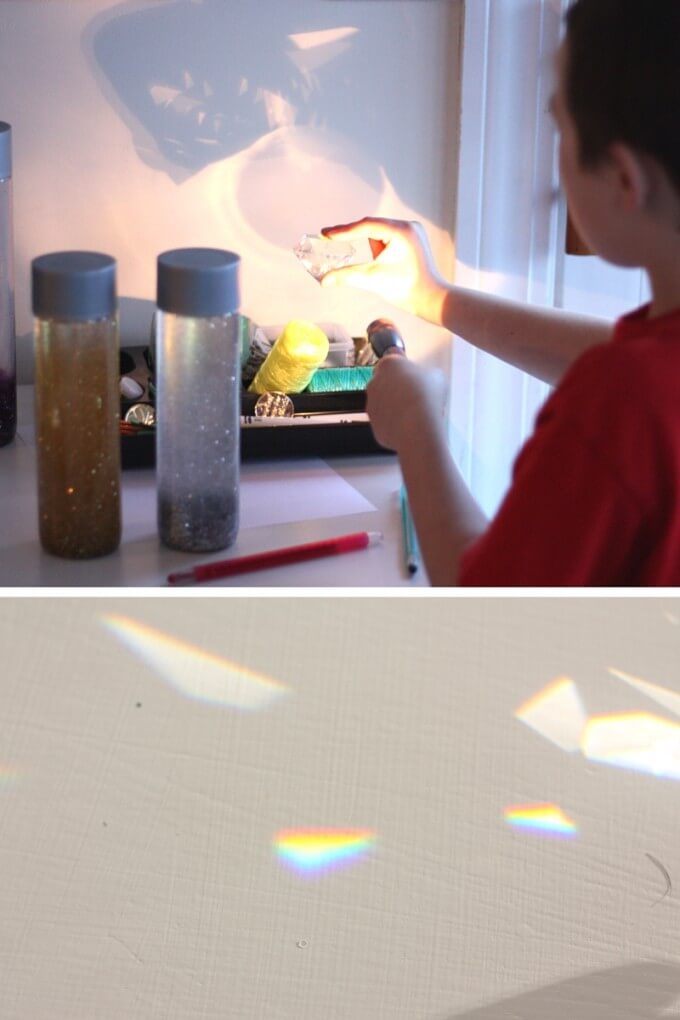
How It Works : Give your child a flashlight and encourage them to experiment with bending light. Try creating shadow puppets or using different objects to see how light moves and changes.
Science Tip : Light can be absorbed, reflected, or refracted. Kids can explore how light interacts with different objects and surfaces by experimenting with a flashlight!
💡 CHECK OUT: Shadow Puppets
Explore More Rainbow Science
There’s no wrong way to experiment with rainbows! Let your kids explore the magic of light and color, and encourage them to ask questions about what they see. 🌈 Curious minds can also check out our rainbow-themed STEAM activities for more fun! Download this free rainbow coloring page .
More Fun Light Activities
Make a color wheel spinner and demonstrate how to make white light from different colors.
Explore light with an easy DIY spectroscope .
Explore the reflection of light with a simple DIY kaleidoscope .
Learn about the refraction of light in water .
Set up a simple mirror activity for preschool science.
Learn more about the color wheel with our printable color wheel worksheets .
Explore the constellations in your own night sky with this fun constellation activity .
Make a DIY planetarium from simple supplies.

Helpful Science Resources
Here are a few resources that will help you introduce science more effectively to your kids or students and feel confident presenting materials. You’ll find helpful free printables throughout.
- Best Science Practices (as it relates to the scientific method)
- Science Vocabulary
- All About Scientists
- Free Science Worksheets
- DIY Science Kits
- Science Tools for Kids
- Scientific Method for Kids
- Citizen Science Guide
- Join us in the Club
- Printable Science Project Pack 👇
Thankyou for such easy ideas to explore rainbows
- Pingback: Tornado Bottle Weather Science Activity for Kids
- Pingback: Spring STEM Activities For Kids | Little Bins for Little Hands
Comments are closed.

Subscribe to receive a free 5-Day STEM Challenge Guide
~ projects to try now ~.


Making Rainbows: A simple prism experiment

Need an easy STEM experiment to get your day started? Look no further!
This experiment involves creating an at-home prism to see a rainbow from a ray of sunshine. It gives you the opportunity to talk to your child about refraction and reflection, how sunshine is made from each color of the rainbow, and practice observation skills!
Ready for an experiment that’s all sunshine and rainbows? Let’s do it!

How to make the Making Rainbows prism experiment
Supplies you will need.
For this experiment, you’ll need:
- Small glass bowl or cup
- Access to sunlight

Before you start
Please do not look directly at the sun.
Instructions
Here is how to do this experiment with your child:
Step 1: Add water to your glass bowl or cup
Choose a glass bowl or cup and add water to it (it doesn’t have to be full).
If you have a choice, opt for the bowl to have a more flat surface area for the sunshine to filter through.
Step 2: Find some sunshine
Head outside and hold your bowl out to catch some sun. The water needs to be fairly still to see a flat rainbow; otherwise, it is distorted and slightly blurry.
Step 3: Hold the container to reveal a rainbow
See if you can find each color of the rainbow! My kids could easily find the more obvious colors, like blue and red/orange, but if you look closely, you can see each color.

The STEM behind the Making Rainbows prism experiment
This experiment teaches:
How rainbows come from sunlight
Refraction and reflection, observation, how it works.
In this experiment, we are creating an at-home prism by filling a bowl or glass with water and shining light through it at a specific angle.
Sunlight is white light, but that light actually contains all of the colors of the rainbow!
Those colors are blended, creating a simple white light for us to see. But when we use water to create a change of direction, called refraction, this is when each color of the rainbow is bent at different angles and we can see them individually!
When we look at the sunlight, it appears to be white, like when you see a sunbeam shining through your window and onto the floor. The sun is actually emitting all of the colors of the rainbow, but our eyes perceive all of those colors blended as white.
Each color of light has a different wavelength. When sunlight enters our makeshift prism, the light slows down a bit due to water and glass being denser than air and is bent (more on that in the next section).
That helps us to see the true color of sunlight, which is a blend of the colors of the rainbow!
When light travels from air into water, it slows down because the water is more dense. This change in speed causes the light to bend, or refract, following a specific angle determined by the water’s r efractive index.
Different wavelengths of light (colors) have slightly different speeds in water, which means they also refract at slightly different angles. This causes the single beam of light to separate. It then reflects off the inside, is refracted again, and leaves as separate colors.
Violet light, having the shortest wavelength, bends the most, while red light, with the longest wavelength, bends the least.
Making a rainbow from a bowl of water requires careful observation from your child. The light must travel through the water at a specific angle to create the rainbow, and once it does, it requires you to look carefully to see each color of the rainbow!
More experiments about rainbows to try out with your child
Rainbow Rivers: Unveiling the Science of Capillary Action with Colored Water Bridges
Rainbow Rain Science Experiment
Related experiments
I have been so excited to try out this experiment! I wanted to wait until my youngest was ready to talk about primary and secondary colors so both kids could enjoy the experiment together. The...
Today's lesson is all about having fun with Earth Science! The Rainbow Rain experiment is a fun, colorful Earth Science experiment that shows the water cycle and how rain is formed. Many, if not...

How To Make A Rainbow – Simple Science Experiments
Making a rainbow is a fun and educational science experiment that can be easily done at home or in the classroom.
It involves using a light source, such as sunlight or a flashlight, and a medium to separate the light into its component colors.
The result is a beautiful display of the colors of the rainbow, which can be used to teach about the nature of light and color.
This experiment is an engaging way to introduce children to the basics of optics and the physics of light.
How Are Rainbows Formed?
Sunlight or white light is a mixture of all the rainbow colors. The different rainbow colors are essentially mixed together to result in a white color.
You may wonder why when you mix all the different colors of paint together result in black instead of light. That is because light mixing is additive while pigment mixing is subtractive.
When light passes from one medium to another medium of a different density (e.g. from air to water ), the light bends. This is known as refraction of light 1 (More light experiments ).
How much a light is refracted depends on the wavelength of the light. The shorter the wavelength, the more it bends. Because lights of different colors have different wavelengths , each color is refracted by different amounts.
Therefore, white light is split up after passing from air to water and the individual colors become visible. This dispersion of light allows us to see the spectrum of colors that form a rainbow 2 .

In nature, a rainbow is formed when sunlight is refracted on entering a droplet of water, reflected inside the back of the droplet and finally refracted again on leaving the droplet.

Seeing A Rainbow
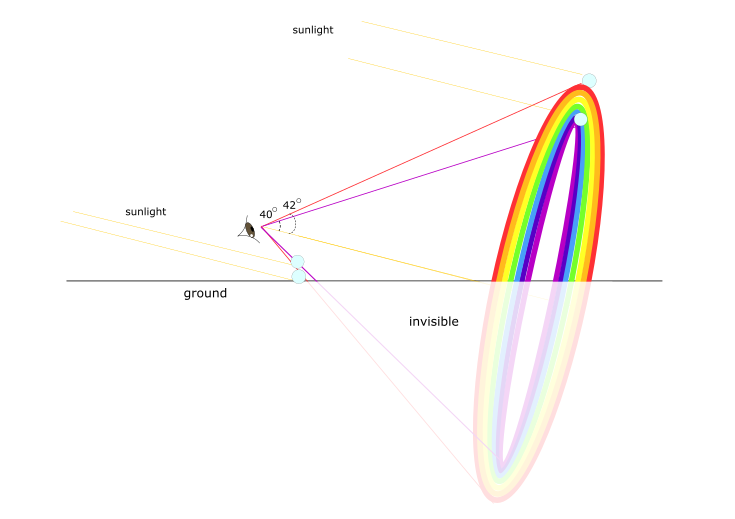
To see a rainbow caused by sunlight, the sunlight needs to come from behind us because rainbows only appear in the part of the sky directly opposite the sun.
Red has the longest wavelength among the visible colors. So it tends to bend the least and the angle between the incident light and our line of sight for red is approximate 42 degrees. As a result, red appears on the top of the rainbow
Violet has the shortest wavelength. It tends to bend the most. To see violet, the angle between the incident light and our line of sight is roughly 40. So violet appears at the bottom of the rainbow.

Why Are Rainbows Arched?
Rainbows are not two dimensional . A rainbow is seen at an angle that is between 40-42 degrees from the incident sunlight . So all the water drops that produce each color in the rainbow lie on a three dimensional cone . Our eyes are at the tip of the cone.
That is why rainbows are arched. The circular shape below the ground is invisible.
Rainbow Experiment
Now are you ready to make some rainbows? Here are 3 easy ways to make your own rainbows at home.
Warning: Adult supervision is vital in experiments involving sunlight. Do not look directly at the sun or at the reflection of sun in a mirror.

1. Rainbow Prism
One of the easiest and most visually stunning ways to see an artificial rainbow is by using a prism. Creating rainbows using a prism is really fun.
- strong sunlight
- glass prism
- white cardboard / paper (optional)
- adult supervision
Instructions
- Place a piece of white paper on the ground under the sunlight.
- Put the prism on or above the paper.

Recommended Products
As an Amazon Associate, I earn from qualifying purchases.

Did you try this project?
Follow us on Pinterest and share a photo!

2. Rainbow On The Wall
No prism? No problem. Using a small mirror and a glass, you can make a beautiful rainbow on the wall.
- a clear glass
- small mirror
- Fill the glass with water.

- Position the glass so that sunlight shines directly at the mirror. You may have to shift the mirror to find the right angle.
- Look for a reflection on the wall. It would be easier to see if the room is dark.

3. Make A Rainbow Using Flashlight
You can still make a rainbow without natural light. Try this experiment using a whitelight flashlight.
- clear glass
- flashlight that emits strong focused white light . Flashlights that emit only yellowish light won’t work. Flashlights that don’t emit focused light also won’t work. Look for one with parabolic reflecting mirrors inside to focus the light, or one with a strong LED light.
- 2 pieces of white cardboard
- Cut a narrow rectangle in the middle of one piece of paper.
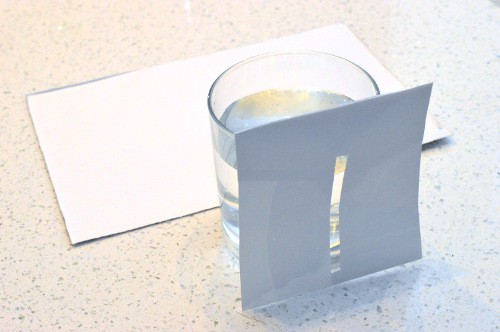
- Place the other piece of paper on the floor on the other side of the glass to catch the rainbow.

- Start from the glass and slowly move the flashlight farther and farther from the glass.


More Making a Rainbow Experiments
If you’re a rainbow enthusiast, want more rainbow experiments, or wonders what makes a rainbow, here are a few fun science projects for you.
- Rainbow Water
- Rainbow Walking Water
- Crystal Rainbow
Learn More About Rainbows

Have Fun With Rainbows

- 1. Jiang W, Chen RT, Lu X. Theory of light refraction at the surface of a photonic crystal. Phys Rev B . June 2005. doi: 10.1103/physrevb.71.245115
- 2. Whitaker RJ. Physics of the Rainbow. The Physics Teacher . May 1974:283-286. doi: 10.1119/1.2350374
Last update on 2024-12-23 / Affiliate links / Images from Amazon Product Advertising API
Similar Posts
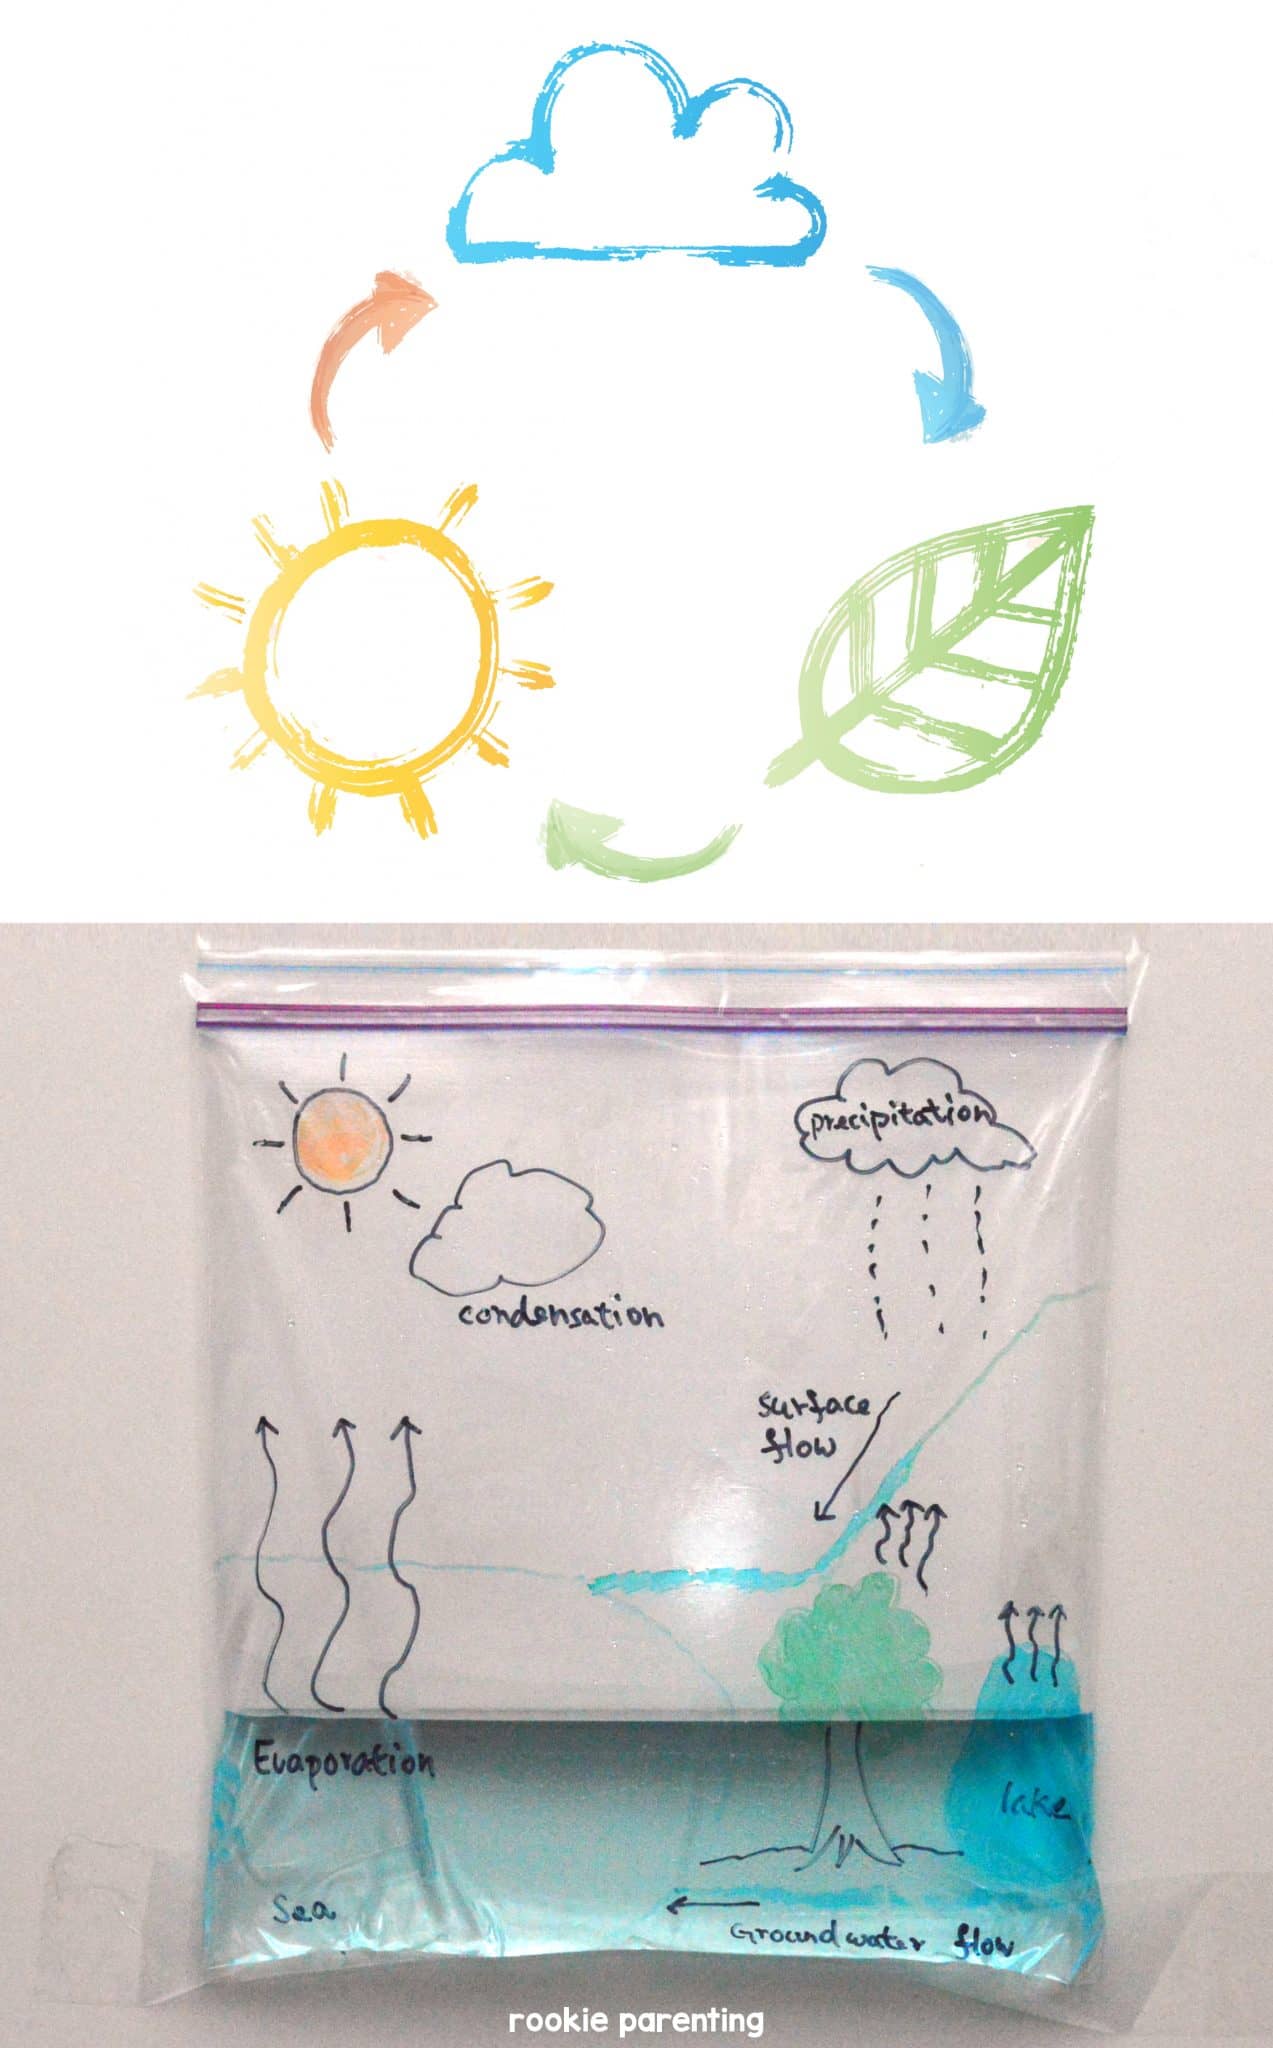
Water Cycle Project
Here are three hands on water cycle experiments. These are inspirations and fun experiments for teachers, homeschool parents, and science…
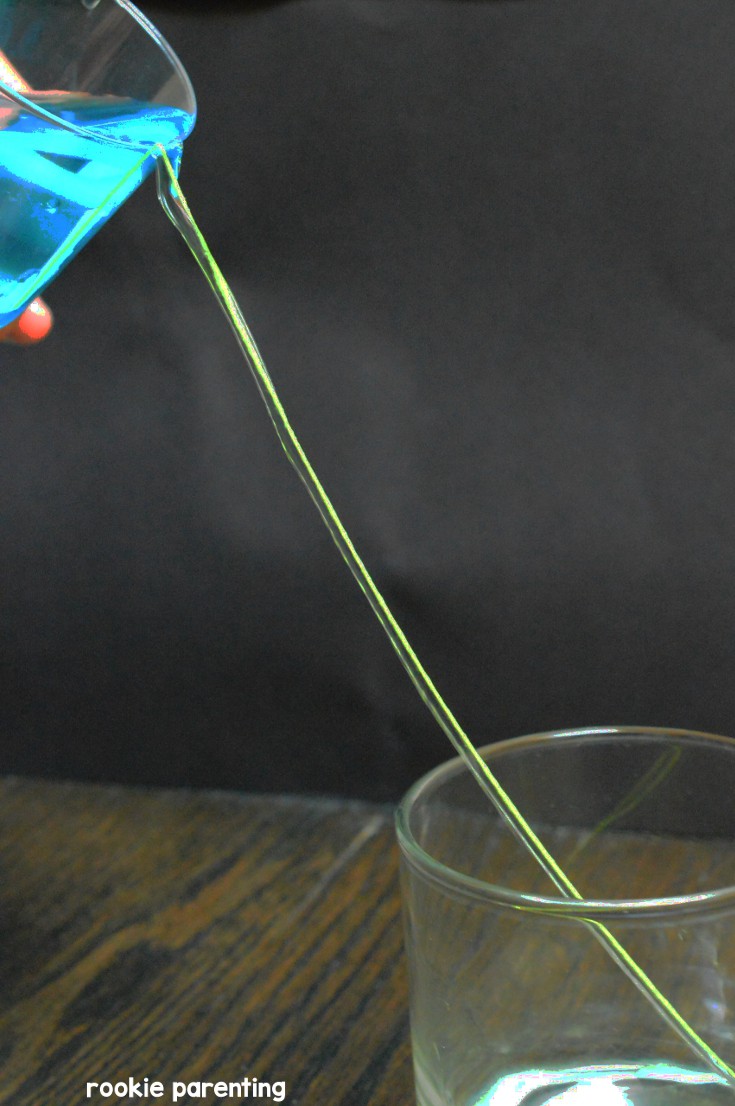
Traveling Water Experiment
Have you ever wondered why water sticks to your skin? When you jump into a ball pool and come out,…

Plant Respiration Experiment
Do Plants Respire All living organisms use a process called respiration to obtain energy from food to stay alive. Plants…

Iron In Cereal Experiment
Iron is an essential mineral to our body. It is found in every cell and is used to make hemoglobin, the…

Coffee Filter Flowers Chromatography
Is black really black? What happens when all the rainbow colors blend together? We will be able to answer these questions…

How Are Ocean Currents Formed | Water Convection Experiment
How Are Ocean Currents Formed Ocean currents are formed in several ways. They can be created by wind, by gravity,…
How To Make Rainbows With Prisms
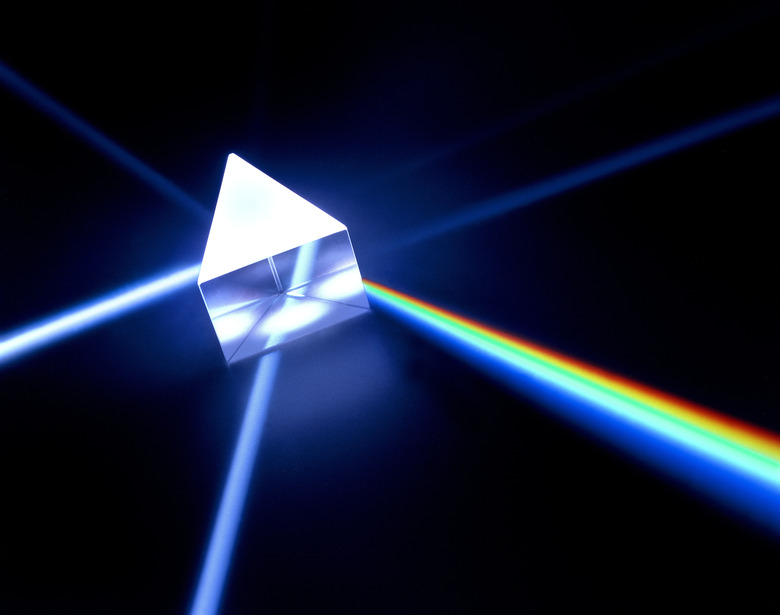
Students often benefit from scientific demonstrations because the visual evidence gives them another mode for remembering key concepts. This works especially well for intangible concepts like light and light travel. You can explain to students that light is actually made up of a spectrum of colors and talk about how rainbows form and then cement the information with a demonstration. The simplest light demonstrations involve prisms. Prisms are long, clear, triangular crystals usually made of quartz that split the light spectrum into different colors when used properly.
Tack your white paper or canvas to a wall with thumb tacks. Make sure the paper or canvas is flat and smooth so it can capture the rainbow perfectly. You can set it up across the room from a sunny window or use a flashlight if windows are unavailable.
Hold your prism up in front of the paper or canvas, making sure to catch the light from the window. If using a flashlight, hold the prism in your non-dominant hand and the flashlight in your dominant hand. Turn it on and hold the prism in the light beam.
Twist and turn the prism in the light source. Light should fall on the canvas or paper. Turn the prism until a corner of the triangle falls into the light beam. Light should refract through the prism and create a rainbow on your white background.
Things Needed
- White paper or canvas
- Thumb tacks
- Light source
- Berkeley: Rainbows, Prisms and Spectra
- Crayola: Every Color in the Rainbow
- Utah Education Network: I'll Build You a Rainbow
Cite This Article
Shoop, Megan. "How To Make Rainbows With Prisms" sciencing.com , https://www.sciencing.com/make-rainbows-prisms-6281318/. 13 March 2018.
Shoop, Megan. (2018, March 13). How To Make Rainbows With Prisms. sciencing.com . Retrieved from https://www.sciencing.com/make-rainbows-prisms-6281318/
Shoop, Megan. How To Make Rainbows With Prisms last modified March 24, 2022. https://www.sciencing.com/make-rainbows-prisms-6281318/
Recommended
Most Popular Activity: STRAW ROCKETS

Most Popular Activity: Straw Rockets
Rainbow Science for Kids: Exploring Prisms
As an Amazon Associate I earn from qualifying purchases. You can read more on our disclosure page .
This week we’re focusing on rainbow science for kids by exploring prisms . Prisms can provide such a fun, hands-on way for kids to observe and hypothesize about light. Here’s some fun ways to use prisms with preschoolers, kindergarteners, and elementary students.
*This science activity correlates with Next Generation Science Standard (NGSS) 1-PS4-3.
Follow our Science for Kids Pinterest board!
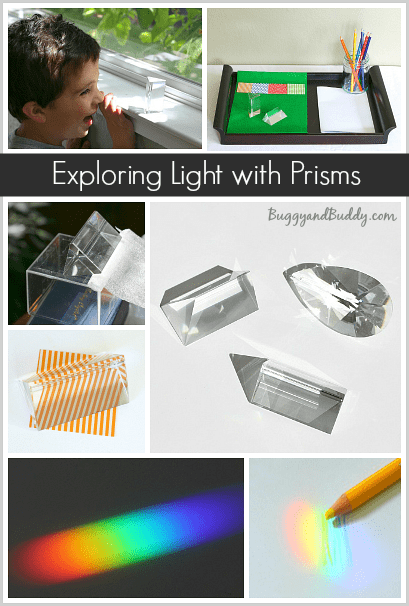
I have been so so excited to set up this prism exploration center for the kids! I remember using prisms as a kid and absolutely loving them. Prisms provide such a wonderful hands-on way for kids to explore light- especially rainbows! Not only is exploring prisms a fun physics activity, but it would fit into a geometry unit as well. (This post contains affiliate links.)
Whenever I invite my kids to participate in science activities, my main goal is NOT for them to master a set concept, but simply to allow them to explore the activity in their own way. Giving this freedom to children inspires them to make predictions and critically think about the world around them in a pressure-free setting.
Setting Up a Prism Exploration Center
Setting up a prism exploration center was super easy! I set out a few materials and made sure the items were located at a level where both kids could reach them on their own. I also hung a few prisms from a sunny window to get the kids excited about rainbows! Here’s which materials I placed in our prism exploration center:
- Various prisms (see which prisms I recommend at the end of the post)
- Some scraps of paper with different designs on them
- Blank white paper
- Colored pencils or crayons in the colors of the rainbow

Using the Prism Exploration Center
The kids started out by discovering all the rainbows around our house created by our window prisms.

We found them on our walls, the floor, and even on our couch! (It was fun for the kids to see how the rainbows moved to different locations as the day went on, and how they disappeared completely when the clouds came.)

Later they decided to explore the triangular prisms I placed in the tray. Theo put his in the window to see what would happen.
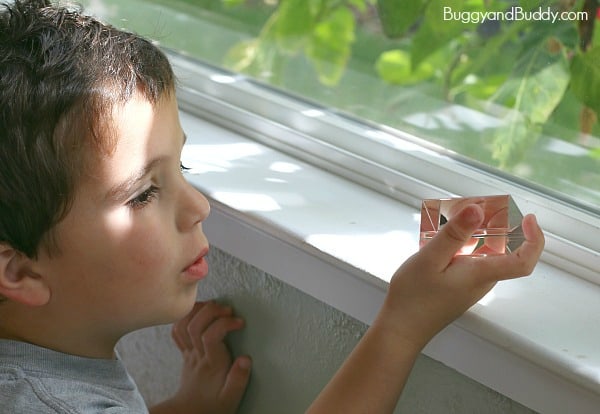
He saw little rainbows inside!
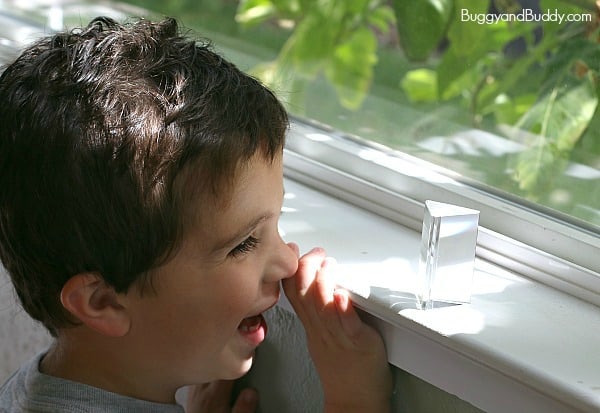
We played around with ways to tilt the prism so we could make the rainbows go in different locations in the room.

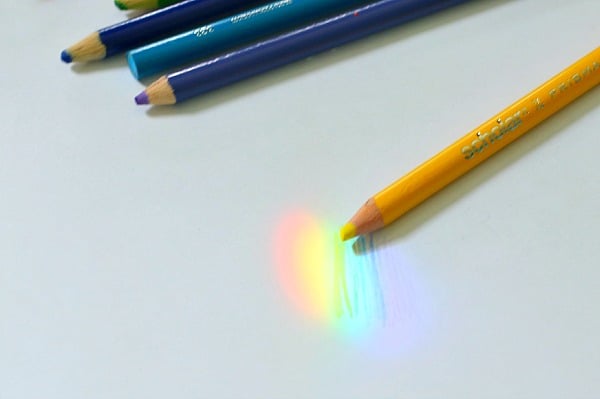
The kids used colored pencils to color over their rainbows created by the prisms on white paper. What a fun way for them to see all the colors of the rainbow right up close!
The kids also discovered how different things looked when observed through a prism. Lucy loved looking through hers and noticed how she could see many things at once. “I think I can see three things because there are three sides around the outside of this prism!”
When we put the prisms onto patterned paper, the patterns changed!
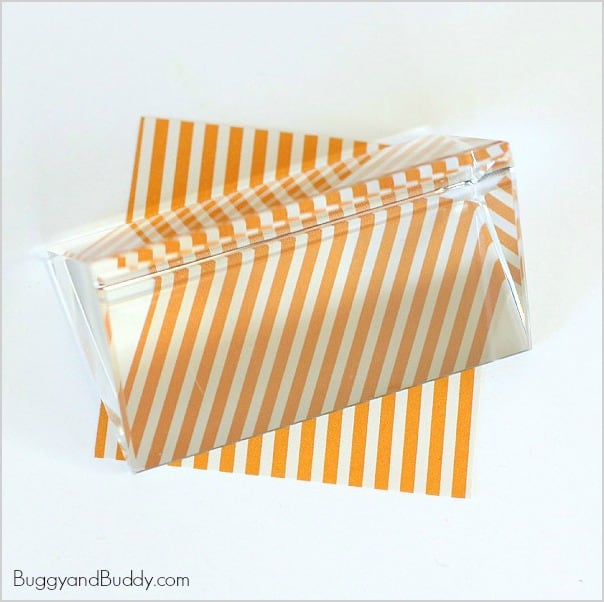
The kids were so inspired to hypothesize and observe using the prisms! I’ll definitely be leaving the prism exploration center out all week to see what other exciting discoveries the kids make!
What’s Happening?
White light is a combination of all the colors of the rainbow (which Lucy really found fascinating). As the light from the sun passes through the prism, the light refracts (bends) and separates, making the colors of the visible spectrum.
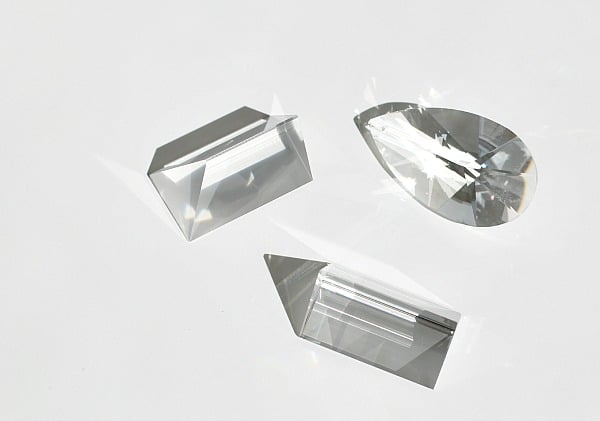
Different Prisms
You can find different kinds of prisms made from both optic glass and acrylic.
It’s fun to have a few glass prisms on hand because they are so much clearer, but I wouldn’t leave the kids unattended with them as they can break. (BUT, I’d definitely want at least one to use with the kids!)
- I purchased this 2.5″ crystal optical glass triangular prism which you see in the post.
- We also hung this crystal teardrop prism and this crystal ball prism from our windows. These lead to all kinds of rainbows showing up around our house on sunny days which the kids are just fascinated by!
Definitely purchase some acrylic prisms for younger kids. That way you’ll feel comfortable letting them explore all around the house or classroom with the prisms, and they’ll feel free to try all kinds of neat things with them without the fear of them breaking.
- I bought this plastic crystal prism which we used in our exploration center. It wasn’t as clear as the glass one, but I felt comfortable letting my kids carry it around all over the house to create rainbows!
- These also look like nice sets, and I might consider getting them in the future: Equilateral Acrylic Prisms , acrylic prisms in wooden storage box .
Want to go even further?
Even more activities about light to inspire creativity and critical thinking for various ages.
- Create your own rainbow using water and a mirror .
- Make a rainbow mobile with prisms .
- Bend light in this fun science activity.
- Here’s some children’s books about rainbows !
- This video shows an outdoor science activity using a prism and offers some scientific explanations perfect for kids.
- This activity for young children uses a rainbow to help teach color words .
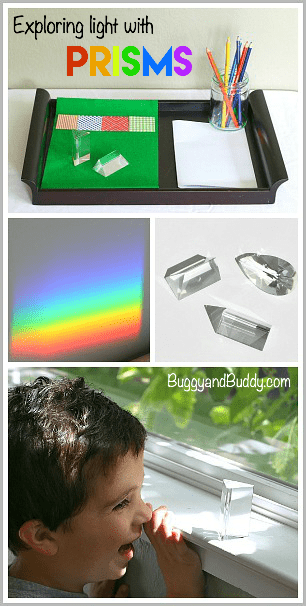
Be sure to check out STEAM Kids book and ebook for even more creative STEM and STEAM ideas!
Chelsey was previously an elementary teacher for 12 years and is now creating, playing, and learning at home with her two children. You can follow Buggy and Buddy on Twitter or Facebook by clicking on the icons below.
Similar Posts
Heart Garland Craft for Kids Made from Orange Peels
Make Spooky Trees for Halloween Using Blow Art

St. Patrick’s Day Activity for Kids: Making Words (Free Printable)
Floating Ping Pong Ball Science Activity
Jungle Slime Recipe
STEM Activity for Kids: Creating Hexbug Mazes and Structures
- Earth Science
- Physics & Engineering
- Science Kits
- Microscopes
- Science Curriculum and Kits
- About Home Science Tools
Teaching Resources & Guides > Worksheets & Printables > Rainbow Science Projects
Rainbow Science Projects

Watch Light Bend
What you need:.
- a glass of water
What You Do:
1. Set the glass of water on the table and put the pencil in so that part of it is sticking out above the water.
2. Look at the pencil through the side of the glass.
3. Now look at the pencil from the top of the glass.
4. Now take the pencil out of the water and look at it.
What Happened:
The pencil looked bent when you looked at it through the side of the glass, but when you looked from above and when you took it out of the water, of course it wasn’t really bent! When light passes through the glass and water, it refracts , or bends. Since the light is being bent in different directions by the glass and the water, it hits your eye from different angles than normal and makes the pencil look bent! (The same thing happens when you dangle your legs into a swimming pool.) It also makes the pencil look bigger than it really is. As the light passes through the water, it bends in odd directions and magnifies the part of the pencil that is in the water. The more water between you and the pencil, the bigger the pencil will look. Try holding it right up to the side of the glass nearest you, and then move it to the other side and watch it grow!
Make A Prism
Most of the time light looks white, but it is actually made up of colors: red, orange, yellow, green, blue, indigo, and violet. Those seven colors are the same ones you see in a rainbow! A prism is usually made of glass and is used to separate light into its colors. In this project, you can make your own prism to show the colors of light.
- a clear glass
- 2 sheets of white paper or cardstock
- flashlight (one with a small beam works best)
1. Fill the glass a little more than half-way full.
2. Set the glass on the edge of the chair so that nearly half of the bottom of the glass hangs over the edge. The glass might be a little wobbly, so be careful not to let it fall.
3. Lay both sheets of paper side by side on the floor next to the chair where the glass is.
4. Turn on the flashlight and hold it near the outside of the glass at the level of the water, pointing towards the paper on the floor.
5. Look for a rainbow pattern to appear on the white paper. You might need to adjust where you are shining the flashlight or where your paper is at in order to see the rainbow clearly. Depending on the shape of your glass and how much water is in it, you might see more than one rainbow. You could also try this by putting the glass of water in a window where sunlight will shine through it instead of using a flashlight.
When the beam of light from your flashlight hits the outside of the glass, it bends slightly and breaks into its seven different colors. This bending is called refraction. The beam of light is separated into its different colors because each color bends at a slightly different angle. When the light comes out the other side of the glass, it is no longer a beam of white light. Instead, you see all the colors that make up white light in a rainbow shape on the white paper! This setup is a type of prism. A normal prism is a triangular piece of glass, but it works in the same way as the prism you just made.
A prism refracts light in almost the same way that raindrops refract sunlight to make a rainbow. The seven colors of the rainbow are called the visible colors of light. White light is made up of all of those colors, our eyes just can’t see them until they are separated by water, glass, or something else. There are more colors of light, but our eyes can’t detect them. Another way to see the rainbow colors of white light is to hold the back of a cd up to a light bulb. To see the colors even more clearly, poke a small hole in a piece of foil and cover a flashlight with the foil so the hole is in the middle, then shine it at the cd.
Make a Rainbow
- a garden hose (connected to a faucet outside)
- a sunny day
- permission to go outside and use the hose
1. Get the hose and turn the faucet on.
2. Stand in a spot where the sun is behind you, shining on your back. (You will be able to see your shadow in front of you when the sun is behind you.)
3. Put your thumb over part of the nozzle of the hose so that the water creates a spray when it comes out.
4. Hold the hose out in front of you and turn slowly. Keep you finger over the hose to make a spray. Watch for a rainbow to appear above the water.
A rainbow should appear just above the spray of water from your hose when sunlight hits the water at the right angle. The water from the hose does the same things that rain does to make a real rainbow in the sky – it refracts the beams of sunlight so that they separate into their different colors. You can see the colors in the rainbow that appears above the water. The rainbow you made is much smaller than one you would see in the sky. Do you know why? It’s because the water from your hose is only spraying in a small area. If there were more drops of water for the sunlight to hit, you would see a larger rainbow.
Rainbow Science Lesson
What Is A Rainbow?
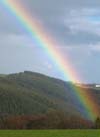
You can see a rainbow when the sun is low in the sky behind you and there is rain off in the distance in front of you. Beams of light from the sun shine towards the rain in the air and when the light goes into the raindrops, it is bent (refracted). When the light bends, it breaks into all of its colors (the colors of the rainbow). When the light hits the back of the rain drop, it is reflected and bounces back in the opposite direction (back towards you). Each color leaves the raindrop at its own angle, different from all the others. The colors of light bounce back to your eyes and form a half-circle shape, because of their different angles, and you see a rainbow of all the colors!
The colors of the rainbow always appear in the same order because each color always bends at the same angle. The red angle is reflected into your eye at the top, violet at the bottom, and the others at their specific place in between.
If we could see a rainbow from above the horizon, we would see that it actually forms a perfect circle! The reason it appears to be a half-circle is because the horizon blocks the other half of it from our view when we are on the ground. If you were able to get up above the horizon, the place where the ground and the sky appear to meet in the distance (even though they don’t really meet), you might be able to see a full circular rainbow.
When light is reflected two times in the same water drop, a second rainbow will show up right above the first one. The colors of the second rainbow (called secondary) will look a little different. They will be in the opposite order since they are a reflection of the rainbow, so red will be on the inside and violet will be at the top! The colors will look much lighter than the colors of the main rainbow. Have you ever looked into a lake or other pool of water and seen a reflection of yourself? If you remember, you probably looked a lot lighter and backwards in your reflection. To learn more about how a reflection works, try this: write your name in big letters on a piece of paper. Stand in front of a mirror and hold up the paper. What happens? The letters look backwards in the mirror, because you are not seeing a picture taken from the front of you, you are seeing a reflection of yourself and the letters on the paper. The reason a reflection of a rainbow looks lighter is because there is less light to reach your eyes since it has already gone through the raindrop twice by the time you see it.
Other Lights in the Sky
A rainbow is just one type of optical wonder in the sky that is created by light. Here are a few others.
Moonbow – a moonbow or lunar rainbow is created by light from the moon instead of the sun. Moonbows are usually harder to see since the moon doesn’t give off as much light. They are common around waterfalls where there are lots of drops of water in the air, even when it hasn’t been raining. Here is a picture of a moonbow over Yosemite Falls in California.
Halo – a halo can appear around either the sun or the moon and usually happens when there are ice crystals in clouds very high up in the sky. Light is refracted and also reflected by the crystals of ice and a glowing ring, called a halo, is formed around the source of the light. Here is a picture of a sun halo .
Mirage – a mirage works sort of like a mirror. It is a reflection of a part of the sky and it happens when light moves from air of one temperature to a very different temperature (such as cool air to very warm air). The rays of light bend (or refract) in a way that causes an image of a different part of the sky than what is normal. A mirage can appear on the ground or above the ground. Have you ever ridden in a car on a hot summer day and thought that the road ahead of you was wet? As you got closer the “puddle” you thought you saw probably disappeared. That is a common road mirage, like in this picture .
More About Colors
Have you ever noticed all the pretty colors in soap bubbles? Bubbles have two thin layers of soap that reflect light, so when a ray of light hits a bubble, it separates into different colors, then the colors re-combine with each other on their way to your eye. However, since different colors of light bend at different angles, the colors don’t match up perfectly when they combine. This is called interference and is what causes rainbow colors to appear on the surface of the bubble. You can learn more about bubbles here . A very similar thing happens when light hits the surface of certain types of oil (like the kind that gasoline comes from) in water that has spread out into a thin layer.
Red, yellow, and blue are called the primary colors. When those colors are mixed, lots of new colors can be made. Try this quick activity to let kids discover how colors mix: pour some whole milk into a bowl and put a few drops of red food coloring near the edge of the bowl. Add some yellow and blue spaced evenly away from the red (the three colors should form a triangle). Let kids dip a cotton swab in dish soap and then into the middle of the milk and watch the colors mix! Red and yellow combine to make orange, yellow and blue make green, and blue and red make purple (violet). These are all the colors of the rainbow except for indigo – indigo is made when there is more blue and violet is made when there is more red.
Science Words
Refraction – when light bends because it passes through a different material like when it goes from air into glass or water.
Reflection – when light hits an object and bounces back in the opposite direction. A reflection could also mean an image, such as a reflection of yourself in a mirror or a puddle of water.
Printable Worksheet
Use this worksheet with the “Make a Prism” activity to help kids review what happens to light when it moves from air to glass. Use the bottom half to help them learn the mnemonic phrase ‘Roy G Biv’ to remember the order of the colors of white light and the rainbow.

Teaching Homeschool
Welcome! After you finish this article, we invite you to read other articles to assist you in teaching science at home on the Resource Center, which consists of hundreds of free science articles!
Shop for Science Supplies!
Home Science Tools offers a wide variety of science products and kits. Find affordable beakers, dissection supplies, chemicals, microscopes, and everything else you need to teach science for all ages!
Related Articles
Kids First Early Engineering Kits
A Perfect Blend of Fun and Learning In today’s digital world, finding the right balance between screen time and hands-on learning for kids can be a challenge. That’s why educational toys like Kids First Early Engineering Kits have become a popular choice among...
Gift for Biologists
Looking for ideas for gifts that will thrill even the most hard-to-shop-for biologists on your list, whether young or old? (Kids or having a PhD?) We have just the list for you! Read on for favorites (or find top gifts for science lovers of any kind). Biology is...

Cool Gifts for Science Lovers
Looking for the perfect gift for a kid (or adult!) on your list who loves to fiddle with, build, or learn about things? Read on for some cool gifts for any science lovers...whether they actually realize it’s science or not! Browse our best gifts for...

Meet Our HST Alumni
Celebrating Exceptional Learning For 30 years, we've shared our mission to inspire learning through hands-on science with over 1.7 million homeschoolers. Thank you for letting us be your partner in education that goes beyond textbooks or classrooms. Meet three members...
Easy STEM Activities with Paper
Easy STEM Activities with Paper Beneficial STEM activities don't always require expensive materials or fancy equipment–a tool as simple as paper can teach children a range of STEM concepts. In this article, we'll explore STEM activities using paper, from paper...
JOIN OUR COMMUNITY
Get project ideas and special offers delivered to your inbox.

IMAGES
COMMENTS
Jun 21, 2019 · A prism is a great way to demonstrate visually that white light is actually made up of 7 different colours. How to split white light with a prism Prism splitting light into the colours of the rainbow What you need to split light. Triangular prism. White cardboard. Large sheet of white paper. Dark coloured cardboard. Tape or glue
2. Prism Rainbow. How It Works: Use a crystal or prism with sunlight to make rainbows appear all around you. The light bends through the different angles of the prism, splitting into the colorful rainbow spectrum. Science Tip: A prism works like raindrops in the sky. As light enters the prism, it bends and separates into different colors.
Learn all about light refraction at home! Create your own rainbows with just a clear prism and sunshine in this beautiful and easy experiment from The Good a...
Mar 18, 2024 · Step 3: Hold the container to reveal a rainbow. See if you can find each color of the rainbow! My kids could easily find the more obvious colors, like blue and red/orange, but if you look closely, you can see each color. The STEM behind the Making Rainbows prism experiment. This experiment teaches: How rainbows come from sunlight; Refraction ...
Dec 11, 2023 · The result is a beautiful display of the colors of the rainbow, which can be used to teach about the nature of light and color. This experiment is an engaging way to introduce children to the basics of optics and the physics of light. How Are Rainbows Formed? Sunlight or white light is a mixture of all the rainbow colors.
Mar 13, 2018 · Hold your prism up in front of the paper or canvas, making sure to catch the light from the window. If using a flashlight, hold the prism in your non-dominant hand and the flashlight in your dominant hand. Turn it on and hold the prism in the light beam. Step 3. Twist and turn the prism in the light source. Light should fall on the canvas or paper.
This week we’re focusing on rainbow science for kids by exploring prisms. Prisms can provide such a fun, hands-on way for kids to observe and hypothesize about light. Here’s some fun ways to use prisms with preschoolers, kindergarteners, and elementary students. *This science activity correlates with Next Generation Science Standard (NGSS) 1-PS4-3. Follow our Science for Kids Pinterest ...
A rainbow will appear on the card. This is because the water in the pan split the white light into its different colors, just like a prism does. These colors were then reflected in the mirror and onto the card. Terms/Concepts: Prism; How does a rainbow form? References: Experiments With Light, by Salvatore Tocci. Pp 32-33.
This setup is a type of prism. A normal prism is a triangular piece of glass, but it works in the same way as the prism you just made. A prism refracts light in almost the same way that raindrops refract sunlight to make a rainbow. The seven colors of the rainbow are called the visible colors of light.
Dec 26, 2023 · A popular rainbow science experiment involves the use of a glass of water and a sheet of white paper to create a simple prism effect. By shining a flashlight through the water, the light refracts upon exiting the water, projecting a rainbow onto the paper, thus illustrating how prisms work to separate light into different colors.